获取机器人的基本数据
本小节将介绍如何通过编写python代码,来获取机器人的基本数据。我们将通过以下四点来进行演示:
- 获取机器人基本参数,并打印出来
- 获取IMU数据,并转化成欧拉角打印出来
- 获取雷达数据,并打印出来
- 获取摄像头数据,并通过python的cv库将图像显示出来
1 获取机器人底层硬件基本信息,并打印出来
机器人的底层硬件基本信息,是指嵌入式片上时钟,嵌入式cpu温度,电池电压和电池电量剩余等。
只需要开启机器人的handsfree_hw节点,机器人的基本参数就发布到 "/handsfree/robot_state"的topic里,我们只需要在程序或者终端里订阅话题,就可以将这些数据拿到机器人的状态数据。
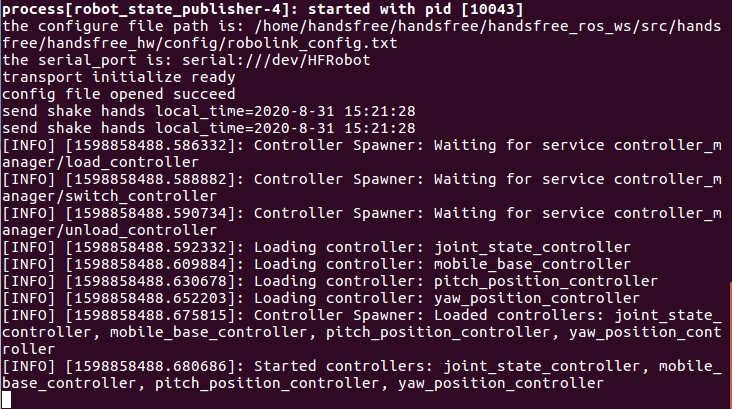
打开终端,开启机器人驱动节点
roslaunch handsfree_hw handsfree_hw.launch正常情况下,会显示:
打开第二个终端,查看当前的topic
rostopic list正常情况下会在终端打印这些信息,其中
/handsfree/robot_state是我们要接收的topic
你也可以去
handsfree_msgs/msg文件夹下,查看robot_state.msg看看还有哪些消息打开第三个终端,运行python文件
rosrun handsfree_tutorials get_hardware_info.py正常情况下,会将数据打印出来:
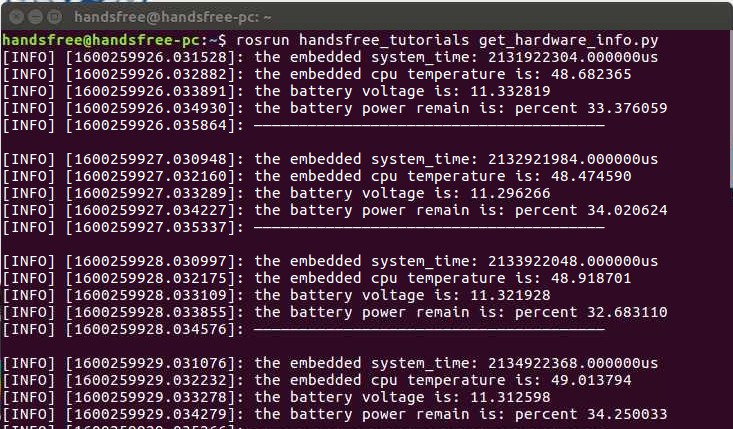
由于数据会一直在打印,所以需要通过Ctrl+C来停止打印
代码解析
我们可以简单的看一下代码,代码在
/home/handsfree/handsfree/handsfree_ros_ws/src/handsfree/handsfree_tutorials/script/1_get_sensors目录下,名为get_hardware_info.py也可以看下方
#!/usr/bin/env #coding=UTF-8 import rospy from handsfree_msgs.msg import robot_state def callback(data): #回调函数 rospy.loginfo("the embedded system_time: %fus",data.system_time) #下位机系统时间 rospy.loginfo("the embedded cpu temperature is: %f",data.cpu_temperature) #cpu温度 rospy.loginfo("the battery voltage is: %f",data.battery_voltage) #电池电压 rospy.loginfo("the battery power remain is: percent %f",data.power_remain*100) #电池电量剩余 rospy.loginfo("——————————————————————————————————————— \n\r") def sub_state(): rospy.init_node('sub_state', anonymous=True) rospy.Subscriber("/handsfree/robot_state", robot_state, callback) #想要订阅的主题名字 rospy.spin() if __name__ == '__main__': sub_state() 可以发现,这个代码是仿照着ros教程中:写一个简单的接收器/)
接收消息其实就是在
rospy.Subscriber中完成:- 第一个参数写入你想接收的topic名称。
- 第二个参数就是说明你要接收的topic类型,我是在
from handsfree_msgs.msg import robot_state定义。 - 最后的参数是一个回调函数。所谓回调函数,其实就是一旦接收到了这个消息,就跳到此消息的回调函数进行相应的处理。回调函数中运行的rospy.loginfo函数将获取的消息打印在相应的终端上。
2 获取IMU数据,并转化成欧拉角打印出来
imu数据是指惯性测量单元,这个ros已经帮我们完成了msg为Imu.msg其中包括现在方位,角速度和线加速度,以及他们的协方差。 并且我们已经将其封装好,启动handsfree_hw节点,可通过topic发送出来(我在下面教程中只是输出了方位的欧拉角)。
打开终端,开启机器人抽象节点(如果之前打开,就不用重复打开了)
roslaunch handsfree_hw handsfree_hw.launch正常情况下,会显示:
打开第二个终端,查看当前的topic
rostopic list正常情况下会在终端打印这些信息,其中
/handsfree/imu是我们要接收的topic打开第三个终端,运行python文件
rosrun handsfree_tutorials get_imu.py正常情况下,会将数据打印出来:

由于数据会一直在打印,所以需要同过Ctrl+C来停止打印
代码解析
我们可以简单的看一下代码,代码在
/home/handsfree/handsfree/handsfree_ros_ws/src/handsfree/handsfree_tutorials/script/1_get_sensors目录下,名为get_imu.py也可以看下方
#!/usr/bin/env #coding=UTF-8 import rospy import tf from tf.transformations import * from sensor_msgs.msg import Imu def callback(data): #这个函数是tf中的,可以将四元数转成欧拉角 (r,p,y) = tf.transformations.euler_from_quaternion((data.orientation.x,data.orientation.y,data.orientation.z,data.orientation.w)) #由于是弧度制,下面将其改成角度制看起来更方便 rospy.loginfo("Pitch = %f,Roll = %f, Yaw = %f",r*180/3.1415926,p*180/3.1415926,y*180/3.1415926) def get_imu(): rospy.init_node('get_imu', anonymous=True) rospy.Subscriber("/handsfree/imu", Imu, callback) #接受topic名称 rospy.spin() if __name__ == '__main__': get_imu()可以发现,这个代码是仿照着ros教程中:写一个简单的接收器/)
这里主要讲一下
tf.transformations.euler_from_quaternion函数,他的目的就是将四元数转化为欧拉角,让输出更加直观些。参数很简单,输入四元数的四个值,输出欧拉角的三个值。
3 获取激光雷达数据,并打印出来
激光雷达数据是指雷达通过发射激光束探测目标的位置后,将接收到的信号从目标点反射回来(目标回波),然后与发射信号进行比较。作适当处理后,就可获得目标的有关信息。一般激光雷达的驱动程序会将其封装好通过topic发送出来。
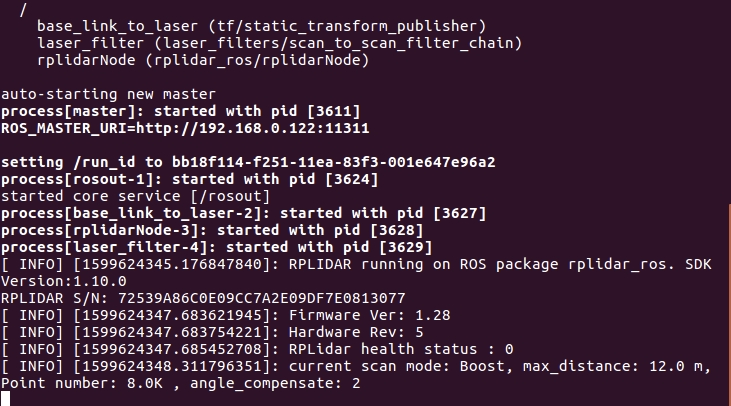
打开终端,开启激光雷达节点
roslaunch handsfree_lidar lidar.launch正常情况下,会显示:
打开第二个终端,查看当前的topic
rostopic list正常情况下会在终端打印这些信息,其中
/scan是我们要接收的topic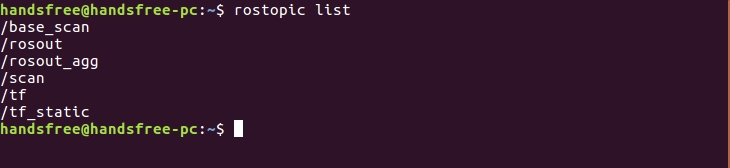
这个消息数据结构是由ros官方提供的LaserScan.msg
打开第三个终端,运行python文件
rosrun handsfree_tutorials get_lidar_scan.py正常情况下,会将数据打印出来:
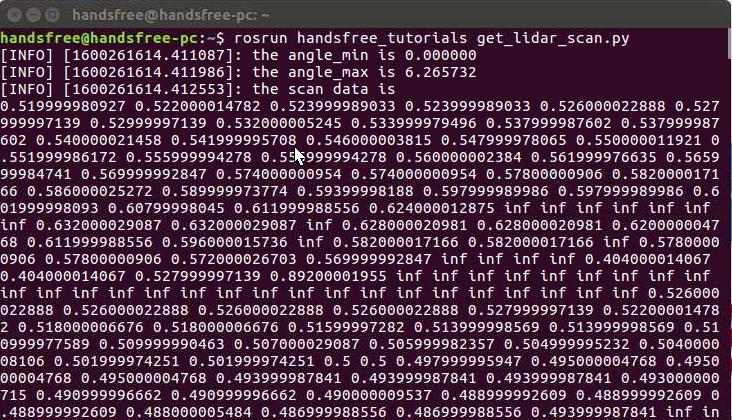
由于数据会一直在打印,所以需要同过Ctrl+C来停止打印
代码解析
我们可以简单的看一下代码,代码在
/home/handsfree/handsfree/handsfree_ros_ws/src/handsfree/handsfree_tutorials/script/1_get_sensors目录下,名为get_lidar_scan.py也可以看下方
 #!/usr/bin/env
 #coding=UTF-8

 import rospy
 from sensor_msgs.msg import LaserScan

 def callback(data):
     rospy.loginfo("the angle_min is %f",data.angle_min) #打印一些信息
     rospy.loginfo("the angle_max is %f",data.angle_max)
     rospy.loginfo("the scan data is ")
     for i in range(0, len(data.ranges)):
         print data.ranges[i],
     print "\n"

 def sub_state():
     rospy.init_node('sub_scan', anonymous=True)
     rospy.Subscriber("/scan", LaserScan, callback) #接受topic
     rospy.spin()

 if __name__ == '__main__':
     sub_state()
这个代码比较简单,跟
get_hardware_info.py很相近,就不进行赘述。
4 获取摄像头数据,并通过python的cv库将图像数据显示出来
摄像头数据就是图像,是指摄像头获取的色彩图像和深度图像等等,一般都将其封装在摄像头驱动之中,只需要直接调用即可。
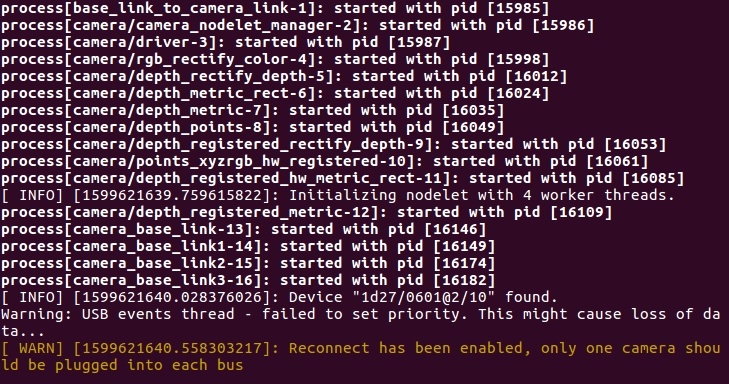
打开终端,开启摄像头节点
roslaunch handsfree_camera camera.launch正常情况下,会显示:
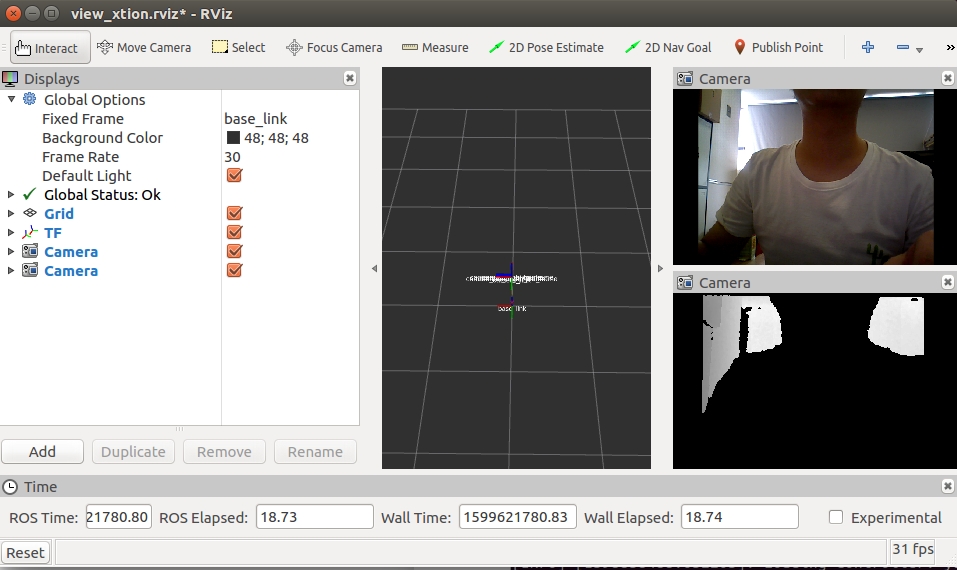
你也可以选择这条指令,在开启摄像头节点的同时,打开RViz可视化界面(二选一即可)
roslaunch handsfree_camera view_camera.launch正常情况下,会显示:
打开第二个终端,查看当前的topic
rostopic list正常情况下会在终端打印这些信息,其中
/camera/rgb/image_raw是我们要接收的topic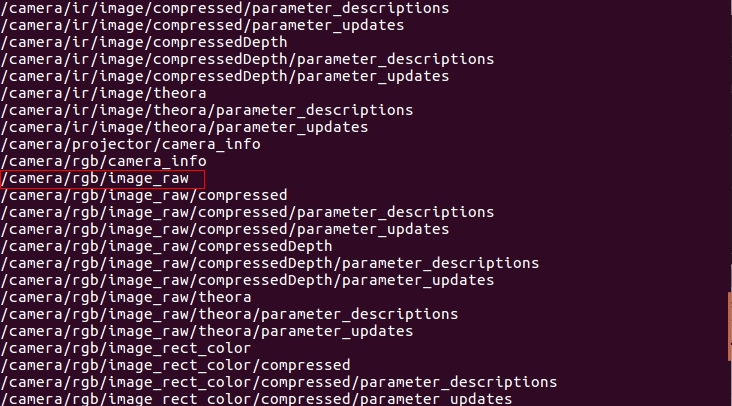
rgb为普通彩色图像,depth为深度图像
这个消息内部数据是由ros官方提供的Image.msg
打开第三个终端,运行python文件
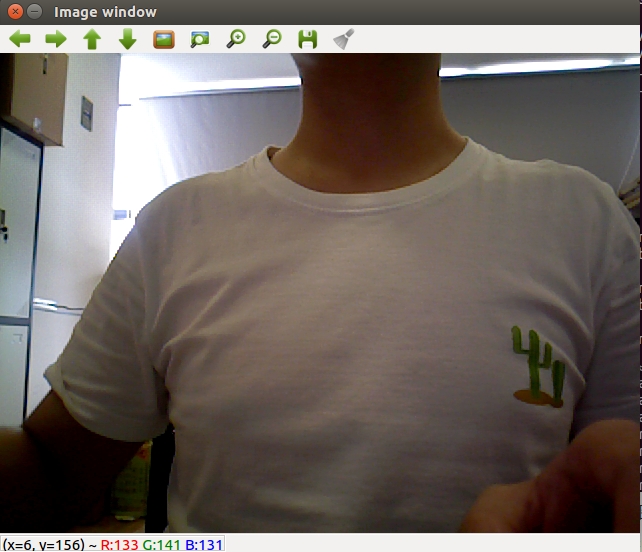
rosrun handsfree_tutorials get_photo.py正常情况下,会将图像视频流加载出来:
代码解析
我们可以简单的看一下代码,代码在
/home/handsfree/handsfree/handsfree_ros_ws/src/handsfree/handsfree_tutorials/script/1_get_sensors目录下,名为get_photo.py也可以看下方
 #!/usr/bin/env
 #coding=UTF-8

 import cv2
 import rospy
 from sensor_msgs.msg import Image
 from cv_bridge import CvBridge, CvBridgeError #ros转opencv需要用到这个cv桥

 def callback(data):
     try:
         cv_image = CvBridge().imgmsg_to_cv2(data, "bgr8") #使用cv_bridge将其转化为mat类型
     except CvBridgeError as e:
         print(e)
     (rows,cols,channels) = cv_image.shape
     cv2.imshow("Image window", cv_image) #显示出图像
     cv2.waitKey(30) #30ms 后播放下一帧

 def get_photo():
     rospy.init_node('get_photo', anonymous=True)
     rospy.Subscriber("/camera/rgb/image_raw", Image, callback) #接受topic名称
     rospy.spin()

 if __name__ == '__main__':
     get_photo()
这里我重点说一下cvbridge,因为我们想使用opencv将其显示出来,所以就需要将ros的信息将其转化为opencv的信息,而这就需要这个cvbridge来连接两端。
使用此函数
cv_image = CvBridge().imgmsg_to_cv2(data,"bgr8")就可将其转换过来变成cv能操控的对象,再使用imshow将其输出。