Install Ubuntu using a virtual machine under Windows
The ROS robot software runs on the Ubuntu operating system. For many novice developers, who may not have been exposed to the Ubuntu operating system, they can experience Ubuntu by installing a virtual machine on Windows. This tutorial uses: Windows10 + VirtualBox virtual machine to install Ubuntu. Also works on Windows7 and Windows8.
related introduction
Ubuntu
Ubuntu (Ubuntu) is a Linux operating system based on desktop applications, and it is one of the Linux distributions. Linux has many distributions, such as Debian, center, redhat, etc. are more popular, their relationship is like linux is human: ubuntu, Debian, center, redhat are people of different skin colors. Here we will use the 16.04 version of Ubunut.
Linux distribution
Linux distribution (English: Linux distribution, also known as GNU/Linux distribution), pre-integrated Linux operating system and various application software for general users. General users do not need to recompile. After direct installation, they only need to change the settings slightly to use. Usually, the software package management system is used to manage the application software. Linux distributions usually include application software including desktop environments, office packages, media players, databases, etc. These operating systems usually consist of the Linux kernel, a large number of function libraries from the GNU project, and a graphical interface based on X Window.
virtual machine
A virtual machine refers to a complete computer system with complete hardware system functions simulated by software and running in a completely isolated environment. Anything that can be done in a physical computer can be done in a virtual machine. Common virtual machine software includes VirtualBox and Vmware.
Getting Start
Download the Oracle VM VirtualBox main program
Go to Oracle VM VirtualBox official website to download (URL: https://www.virtualbox.org/)
Select
Downloadson the left, after the page jumpsChoose your platform, we take windows10 as an example, so choose
Windows hosts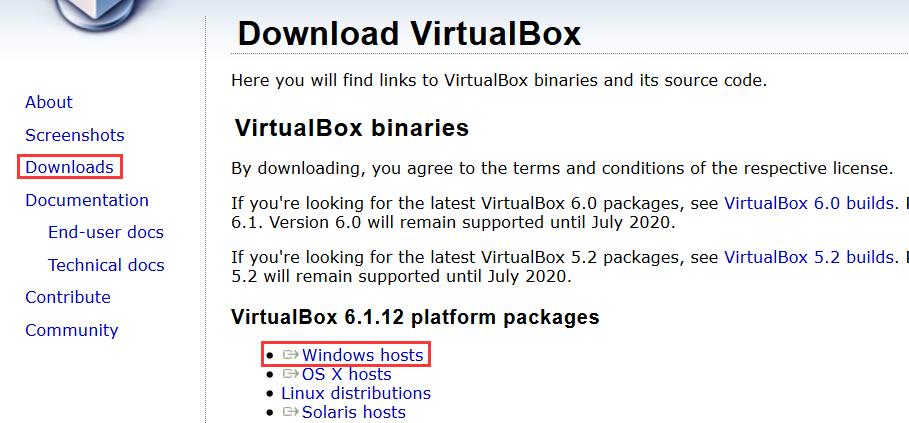
Description: Oracle VM VirtualBox is an open source virtual machine software. The virtual machine software can establish an environment between the computer platform and the end user, and the end user operates the software based on the environment established by the software. In computer science, a virtual machine refers to a software implementation of a computer that can run programs like a real machine
Download the Oracle VM VirtualBox expansion pack
Or on the Downloads page of the Oracle VM VirtualBox official website, just below the main program
Select
All supported platforms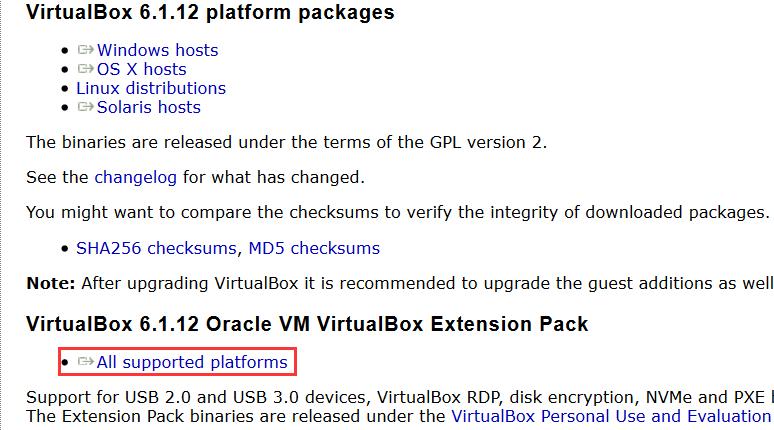
Description: VirtualBox Extension Pack provides support for USB2.0, USB3.0, NVMe, etc. Therefore, it is very helpful to improve the performance of VirtualBox.
Download the image file extended by Virtualbox GuestAdditions (this seems to have been downloaded when downloading the Oracle VM VirtualBox main program, if not, you need to download it manually)
Virtualbox GuestAdditions download link: http://download.virtualbox.org/virtualbox/6.1.4/
Select
VBoxGuestAdditions_6.1.4.ios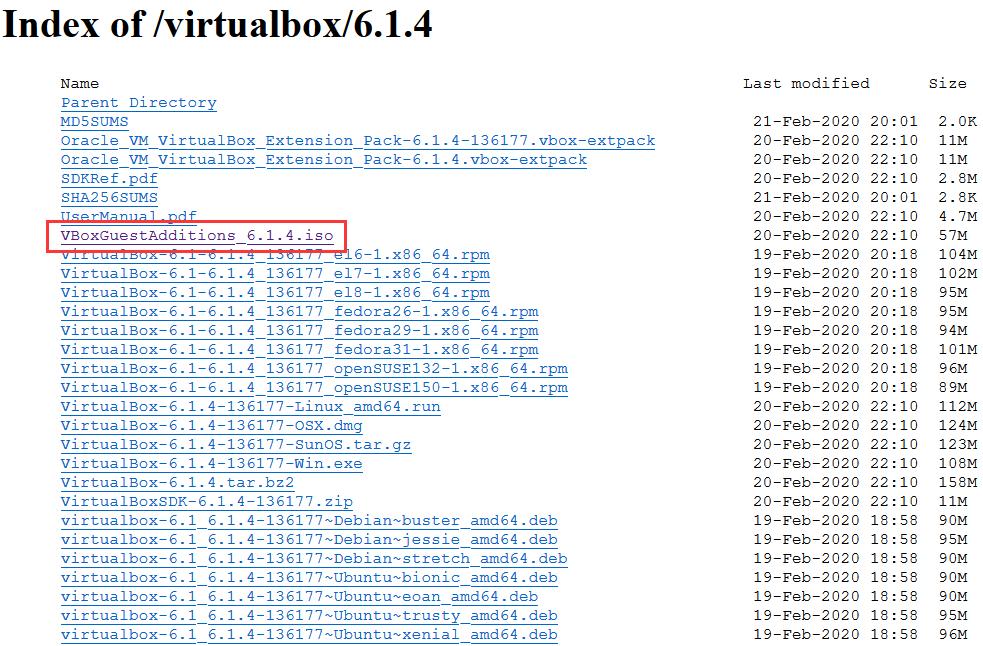
Description: This file is to improve user experience, such as: resolution enhancement, file sharing between local computers and virtual computers, clipboard sharing, etc.
Download the image of Ubuntu16.04.6
Here we use Tsinghua University Open Source Software Mirror Station(URL: https://mirrors.tuna.tsinghua.edu.cn/)
Scroll down and select
ubuntu-releases
Select the directory as
16.04/, and find the mirror of version 16.04.6 in it
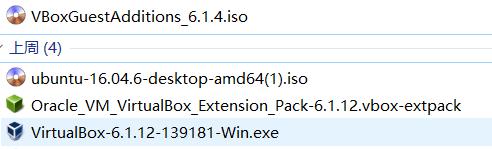
At this point, we downloaded these contents, as shown in the figure
Install the virtual machine
Double-click to open the VitualBox.exe you downloaded, this time we are using
VtualBox-6.1.12-139181-Win.exe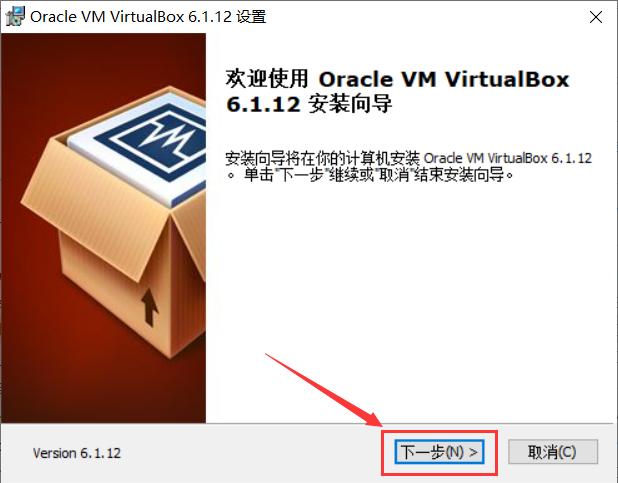
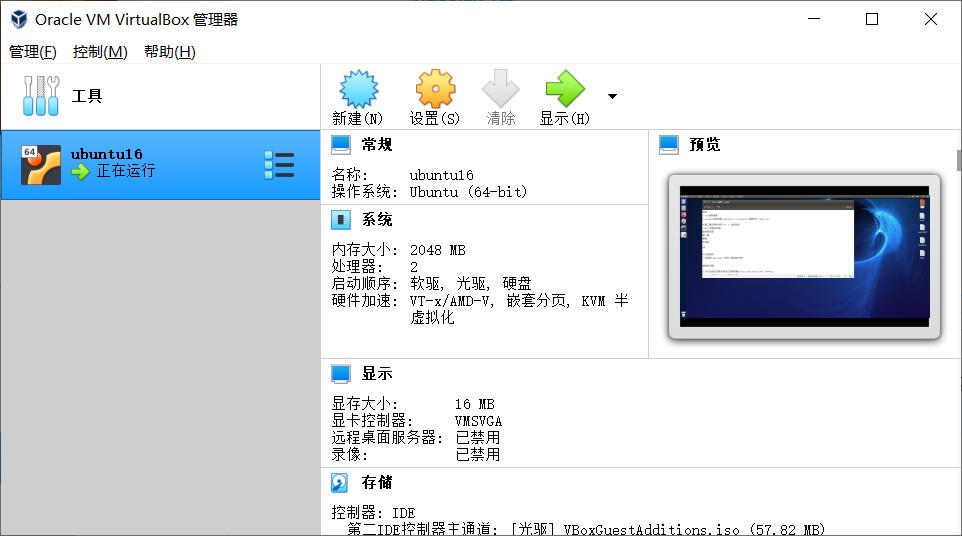
Run VirtualBox, the interface is as follows, this is a previously created virtual machine
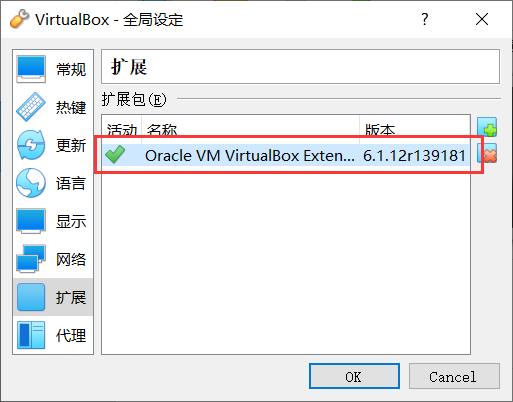
Install Oracle_VM_VirtualBox_Extension_pack
Click
Manage,Global Settings,Extension,Add Icon, select the downloaded VirualBox expansion package, and clickOpen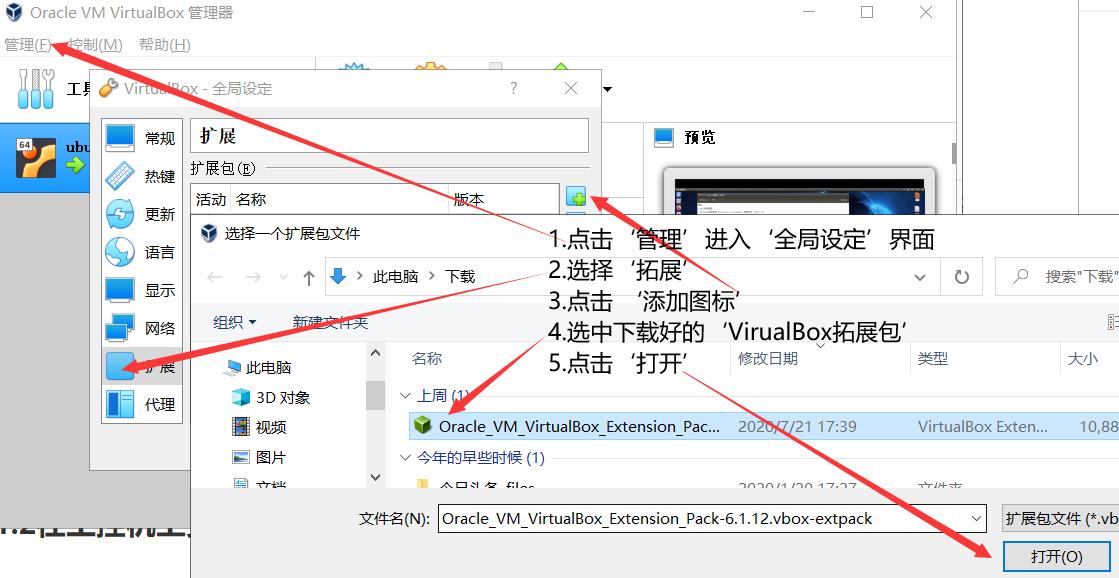
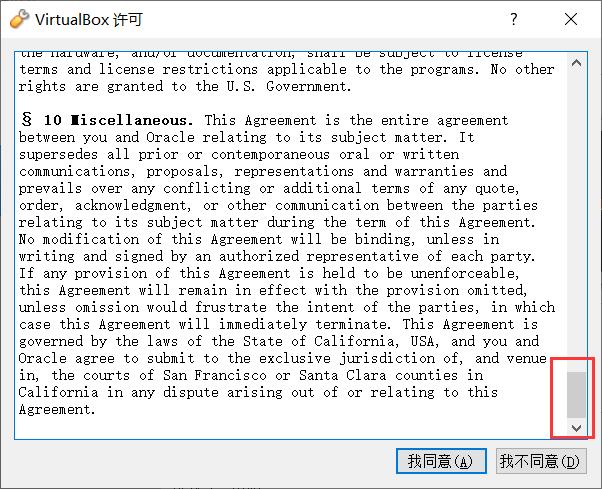
Here you have to pull this license to the end before you can click the button
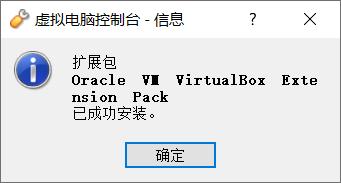
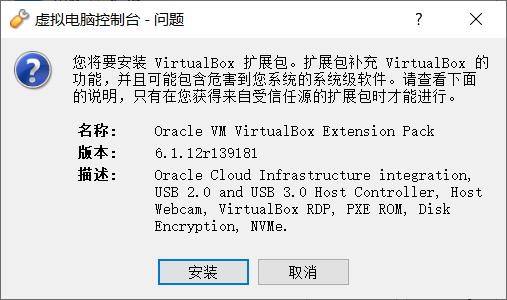
When the installation is successful, you will be prompted that the installation has been successful, and there will be an additional message under the expansion package.
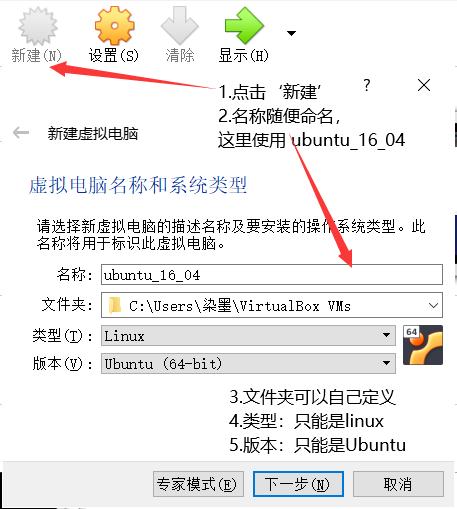
Create a virtual machine (virtual computer)
Click New, set name, folder, type, version according to your needs, and then go to Next
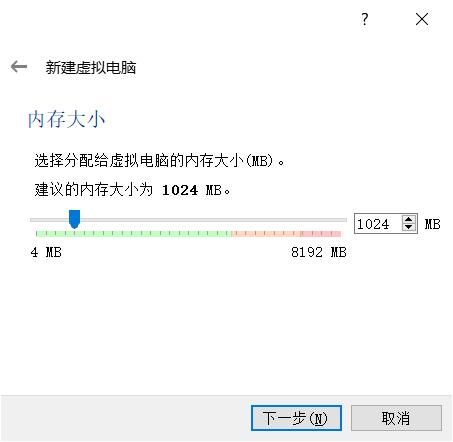
Allocate memory: Allocate the local memory to the virtual machine. When the virtual machine is running, all the memory you allocate will be occupied by the virtual machine.
According to the suggestion, we go directly to the next step. Of course, you can also adjust the allocated memory according to your own preferences, or adjust it after you are not satisfied with it.
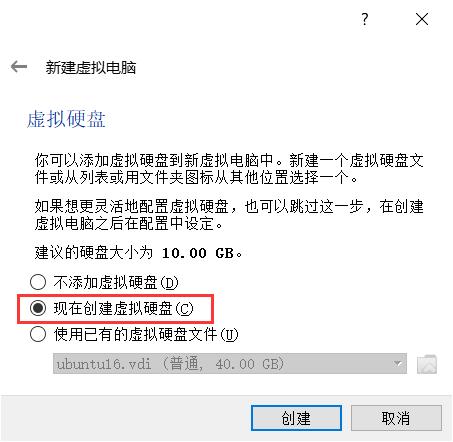
Virtual hard disk: A virtual hard disk is a technology that virtualizes one or more disks in memory. Like virtual memory, the speed of memory is much faster than that of hard disk. Taking advantage of this, virtualizing one or more hard disks in memory can speed up the data exchange speed of the disk, thereby improving the running speed.
Select Create a virtual hard disk now and click Create
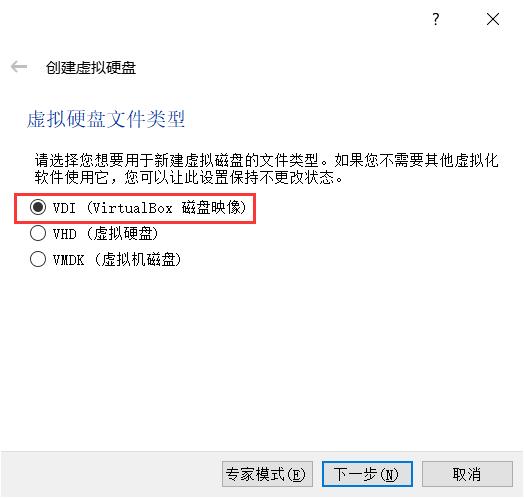
Select VDI (VirtualBox Disk Image) and click Next
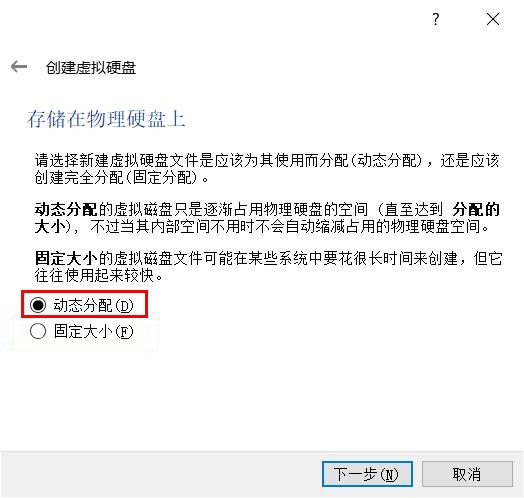
Both dynamic allocation and fixed size can be selected. This time, select fixed size and click Next
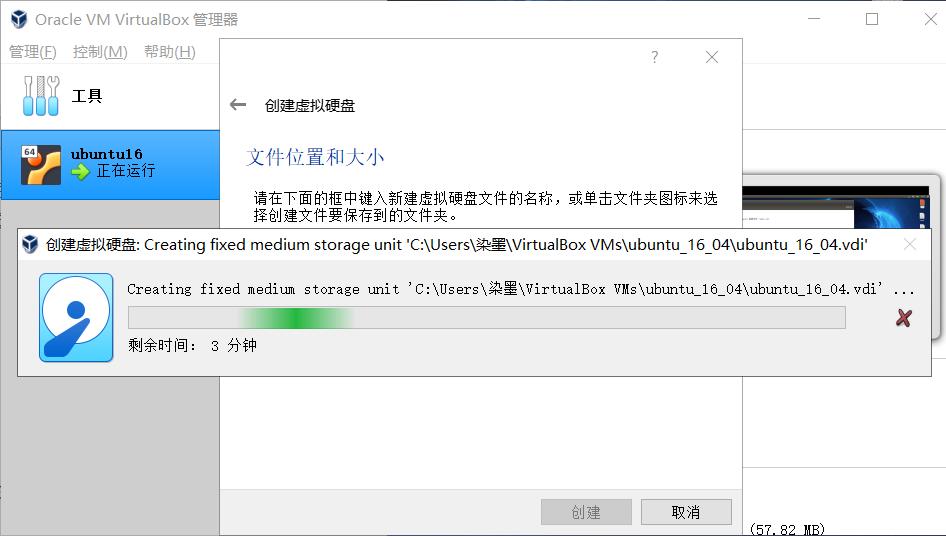
The default size is 10.00GB, it is recommended to adjust it to more than 30GB to facilitate the installation of more software in the future
Then click Create

Waiting for the virtual hard disk to be created
Install Ubuntu on the virtual machine
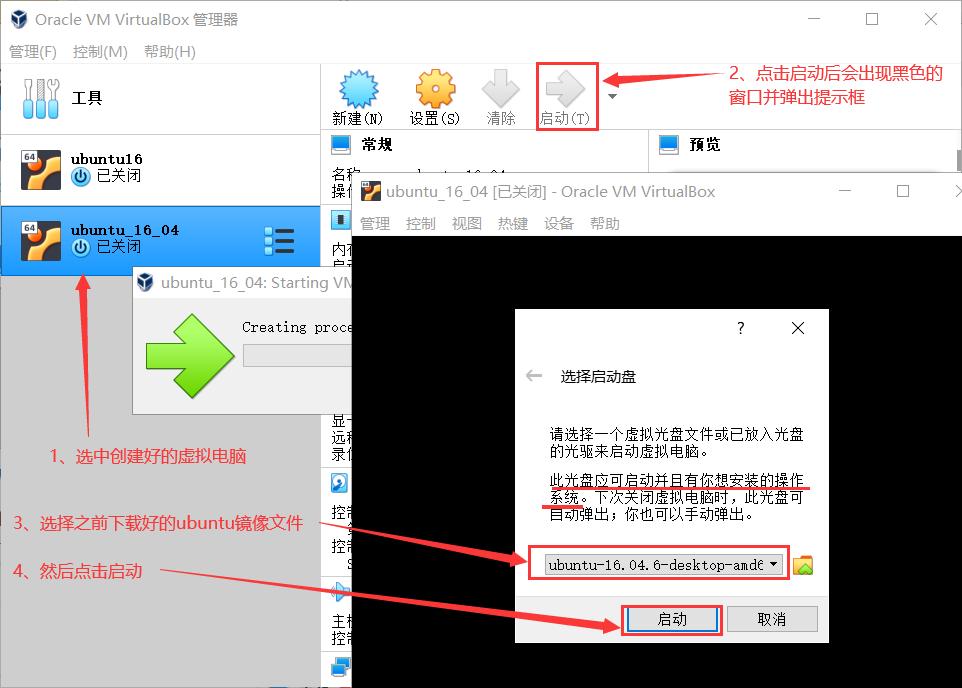
After the creation is complete, select the created virtual computer, as shown below
In order to facilitate future use, we need to click Settings to improve it
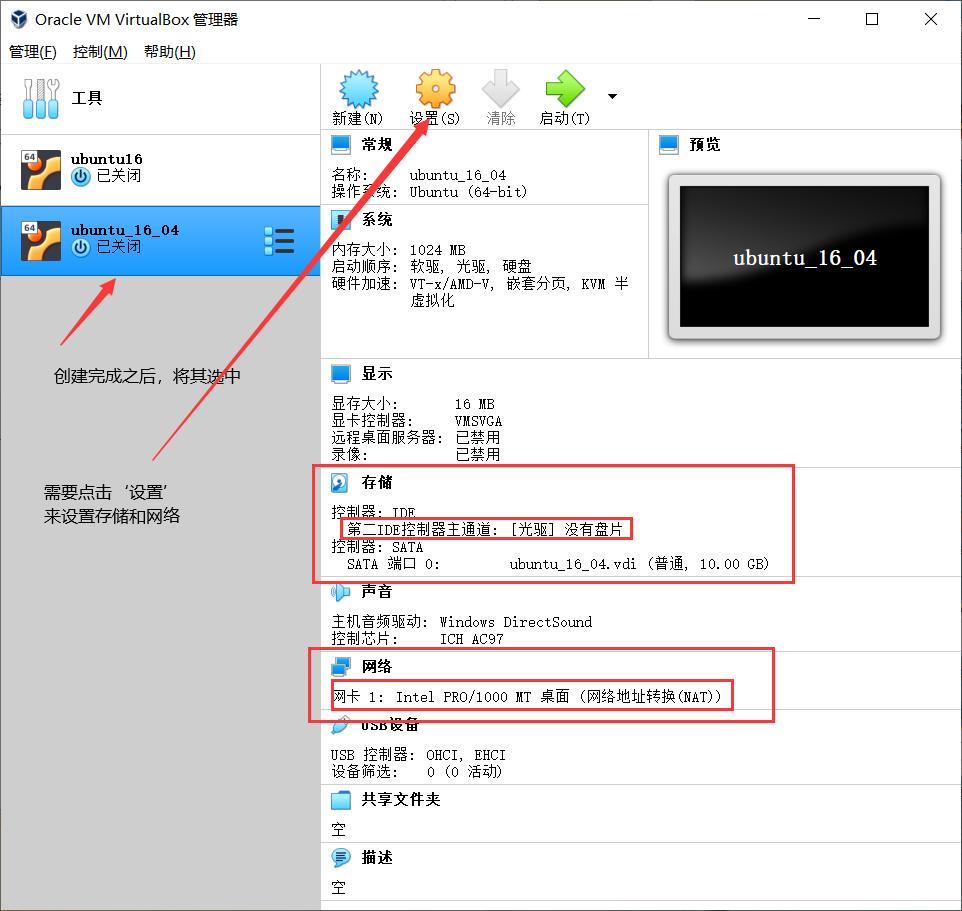
Enter the setting interface
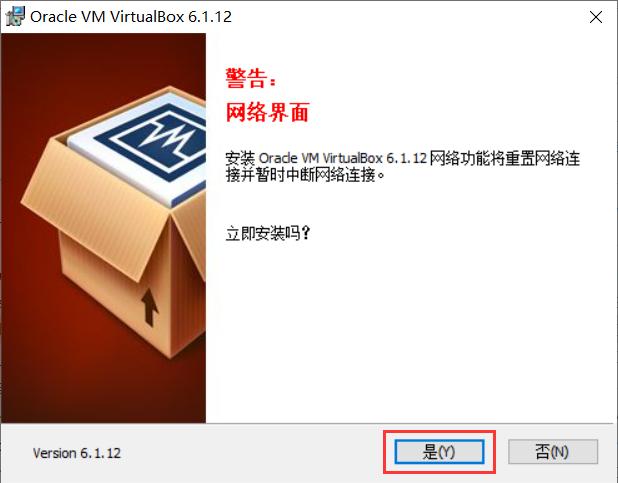
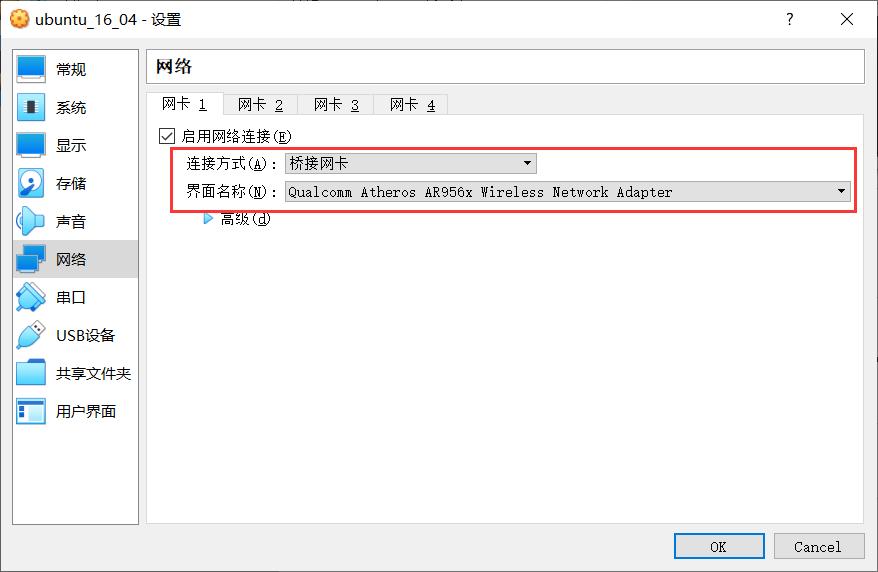
Set the connection method in the network as: Bridged network card, the interface name is: Qualcomm Atheros AR956x... Click the ok button, so that the network speed of the virtual machine will be faster.
After clicking start, a window will open, prompting you to select a startup disk. At this time, we need to select the ubuntu image file downloaded before.
Now start to install ubuntu16.04, it is recommended to disconnect from the network, disconnect from the network, disconnect from the network, otherwise the installation process will be very long.
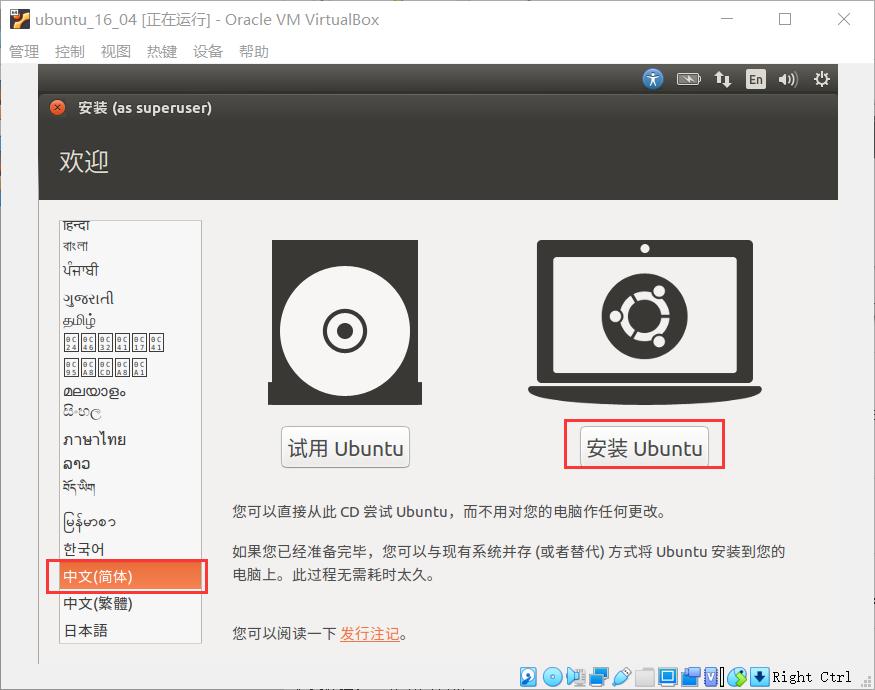
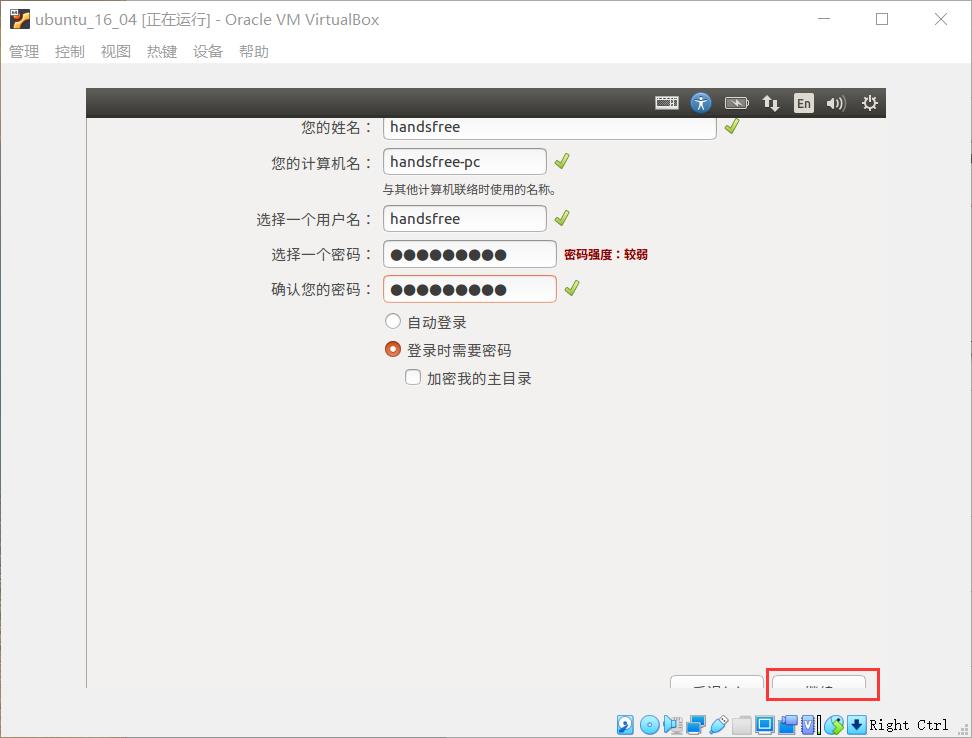
Select the language Chinese (Simplified), click the Install Ubuntu button
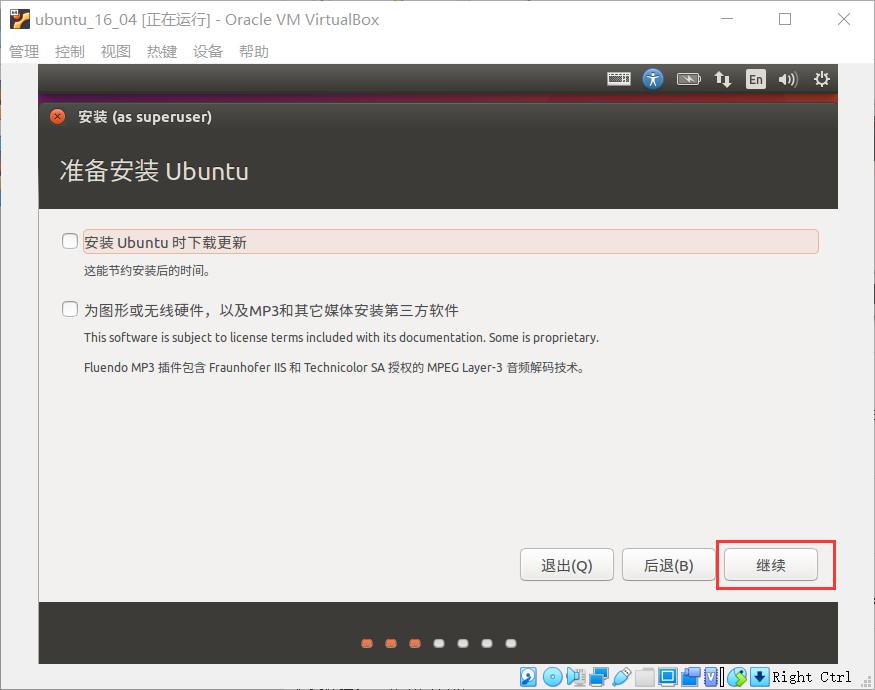
Do not select other options, click the Continue button (if you missed it, click again to cancel)
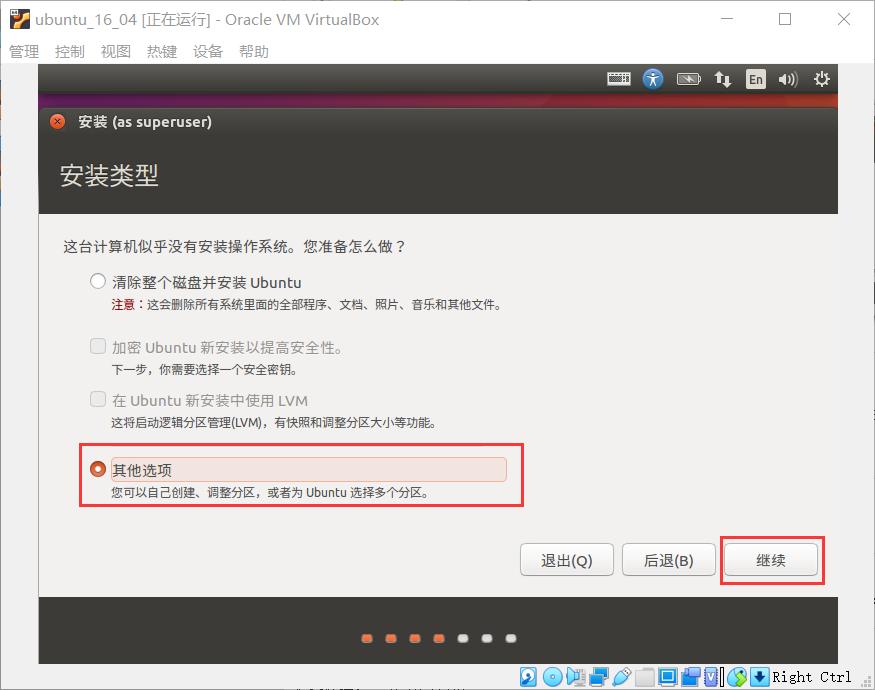
Tick the last Other options and click the Continue button
This step may occur, the interface is not fully displayed, hold down alt + left mouse button and drag it to the appropriate position
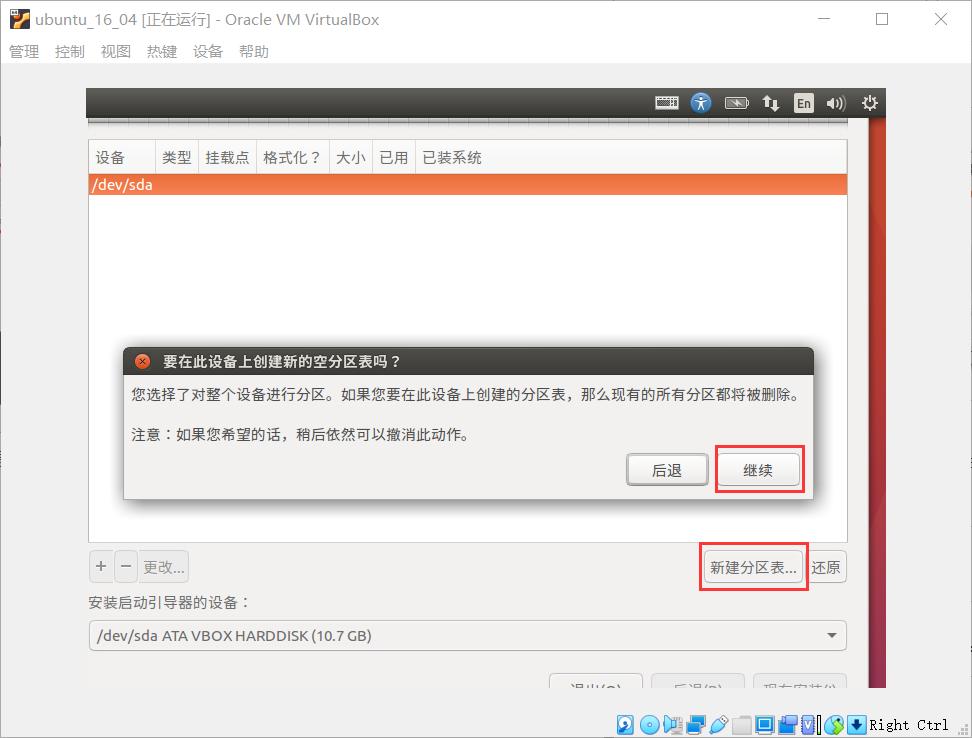
Click New Partition Table, and when prompted, click Continue.
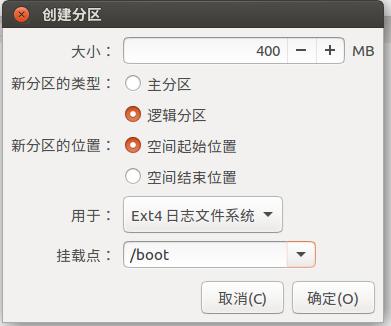
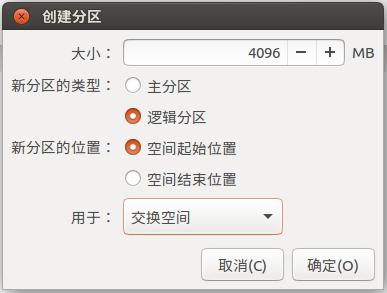
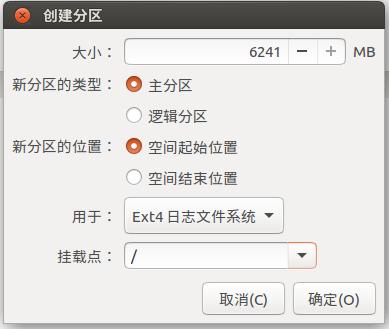
Select Idle and click + in the lower left corner

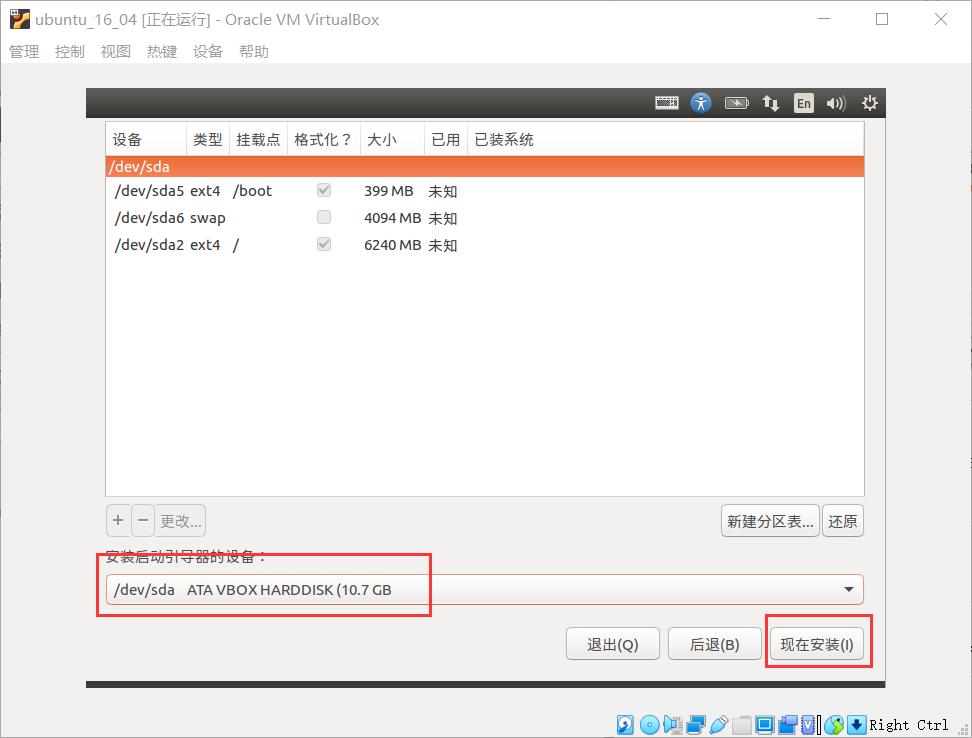
A total of three partitions are to be created, as shown in the figure
After the creation is complete, as shown in the figure below, set the device to start the boot after installation, and then click the Install Now button
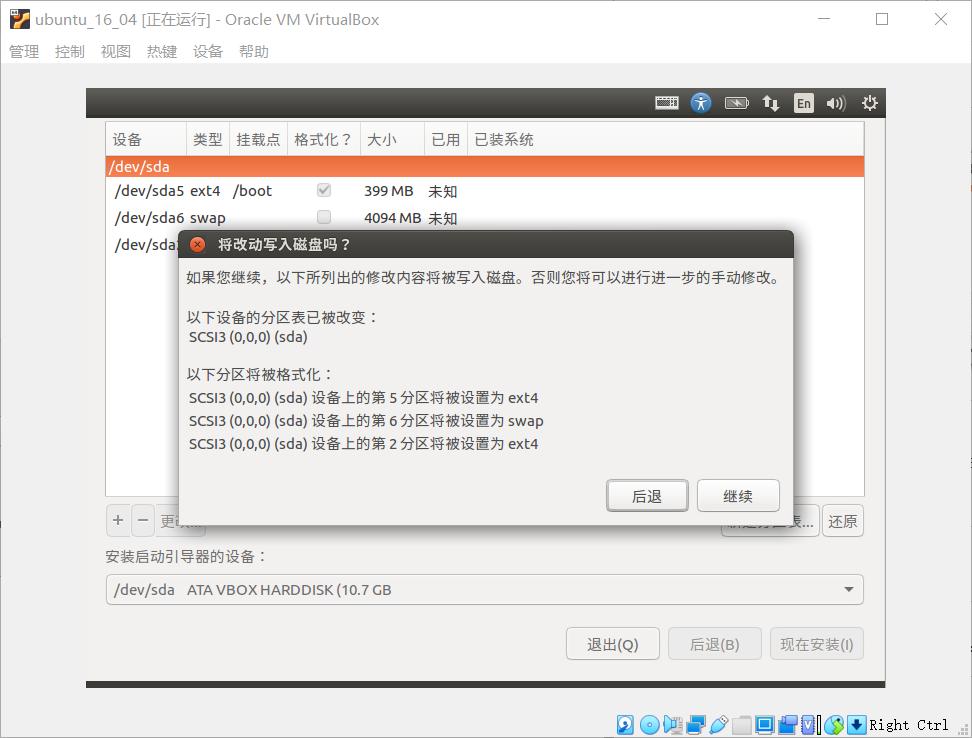
The following prompt appears, click the Continue button


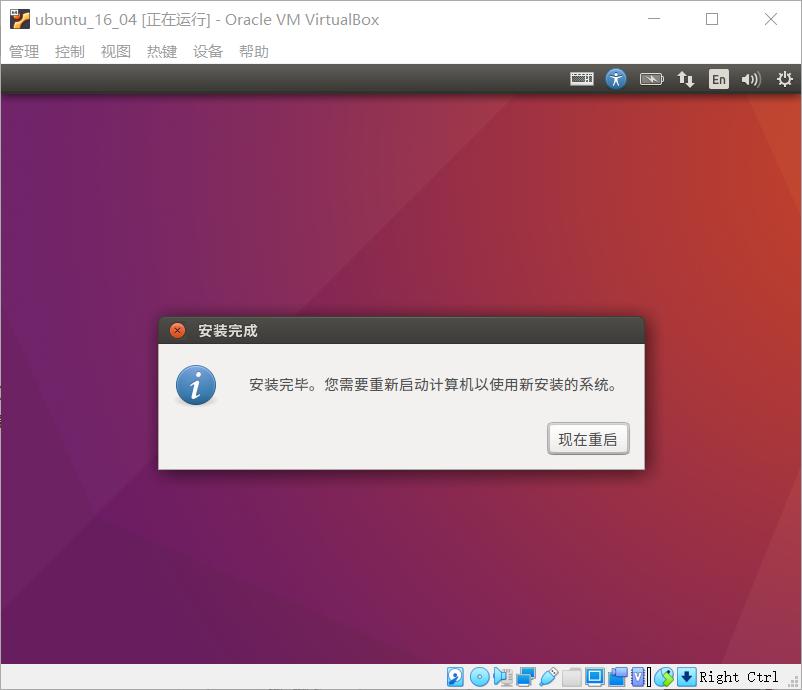
Wait for the installation, if you do not disconnect the network connection before installation, the waiting time will be longer

Wait for a while, after the installation is successful, you will be prompted to restart
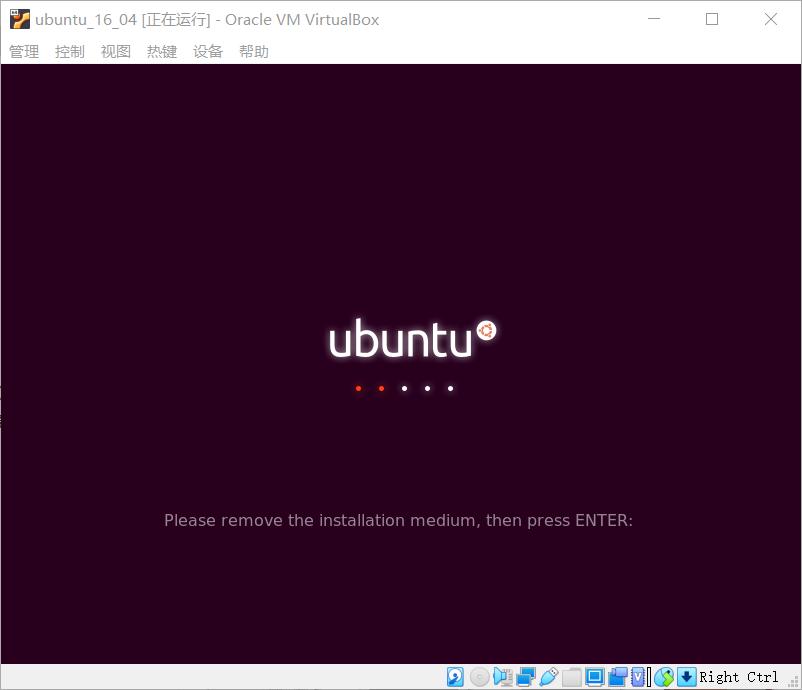
After restarting, there is a line at the bottom of the boot interface prompting Please remove the installation medium, then press ENTERt means Please remove the installation medium, and then press Enter, we can just press Enter.
After that it will restart again, and then enter the password to enter the desktop
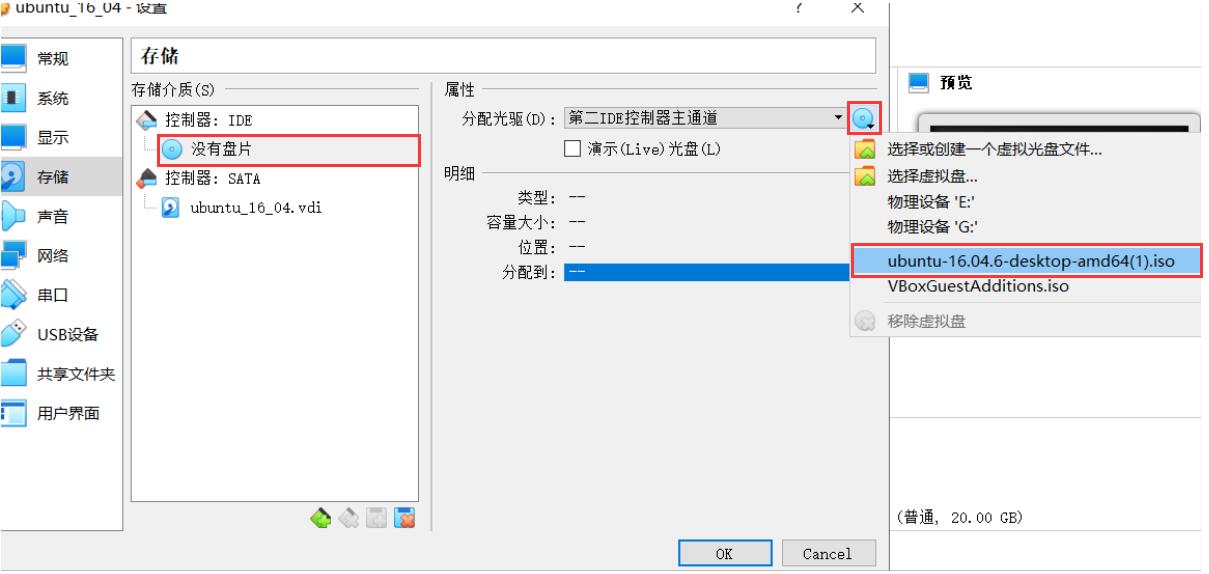
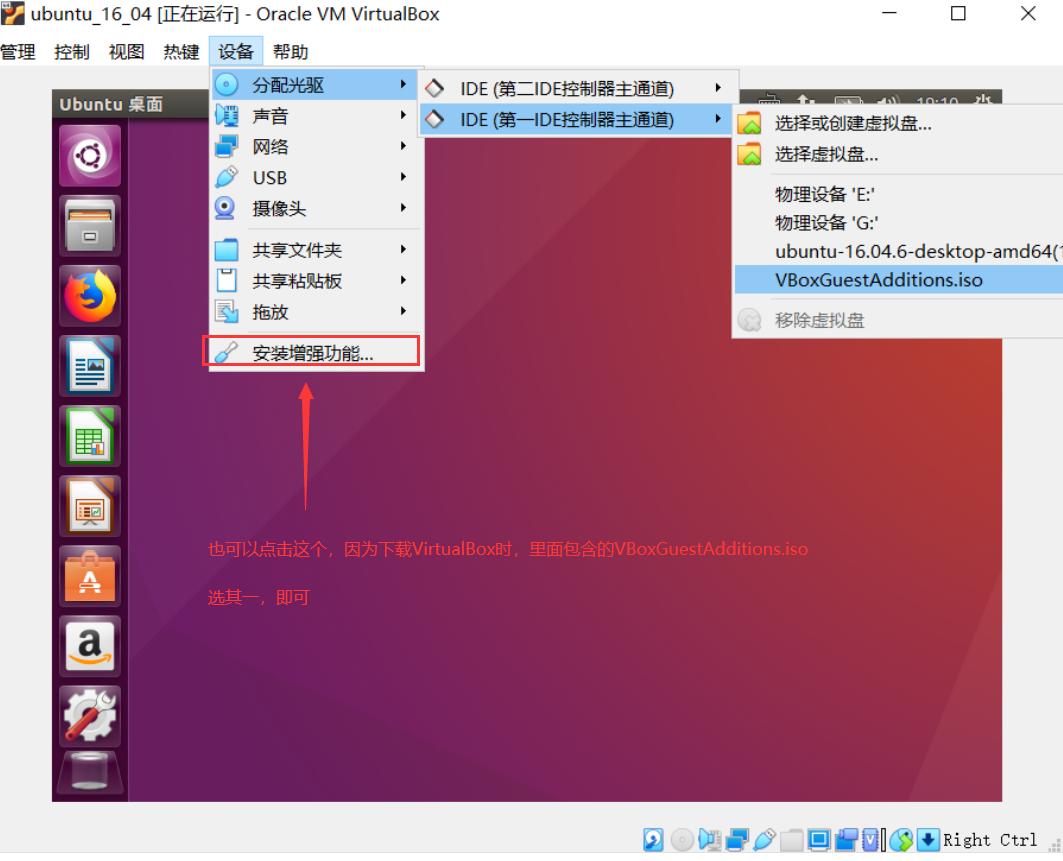
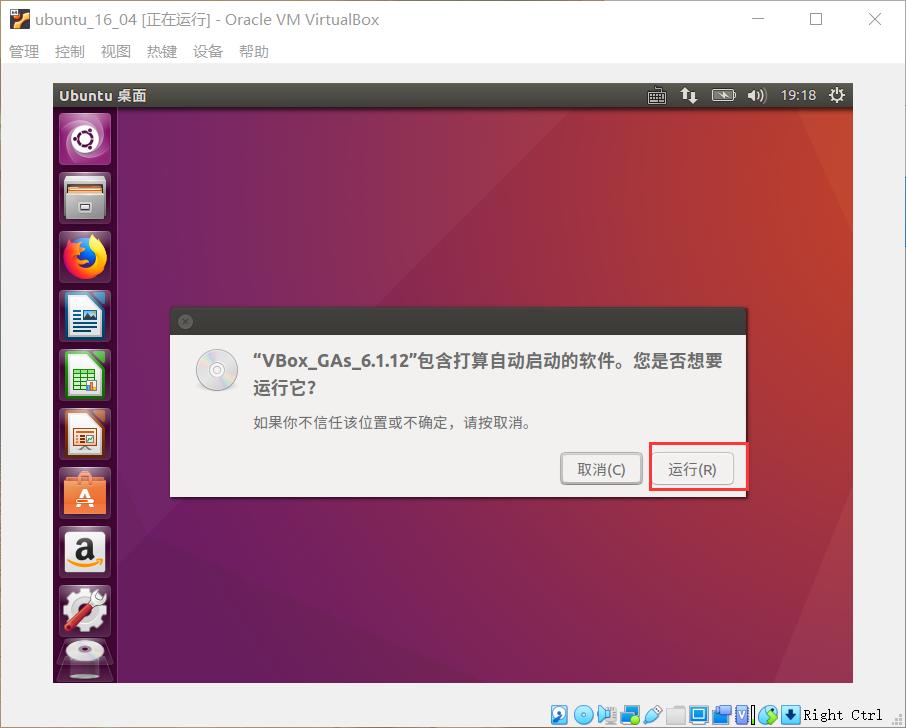
In order to facilitate our use of the ubuntu16.04 desktop system, add the VBoxGuestAdditions.ios file downloaded before (or that comes with Oracle VM VirtualBox) to the CD-ROM drive, as shown in the figure
Click the 'Run' button
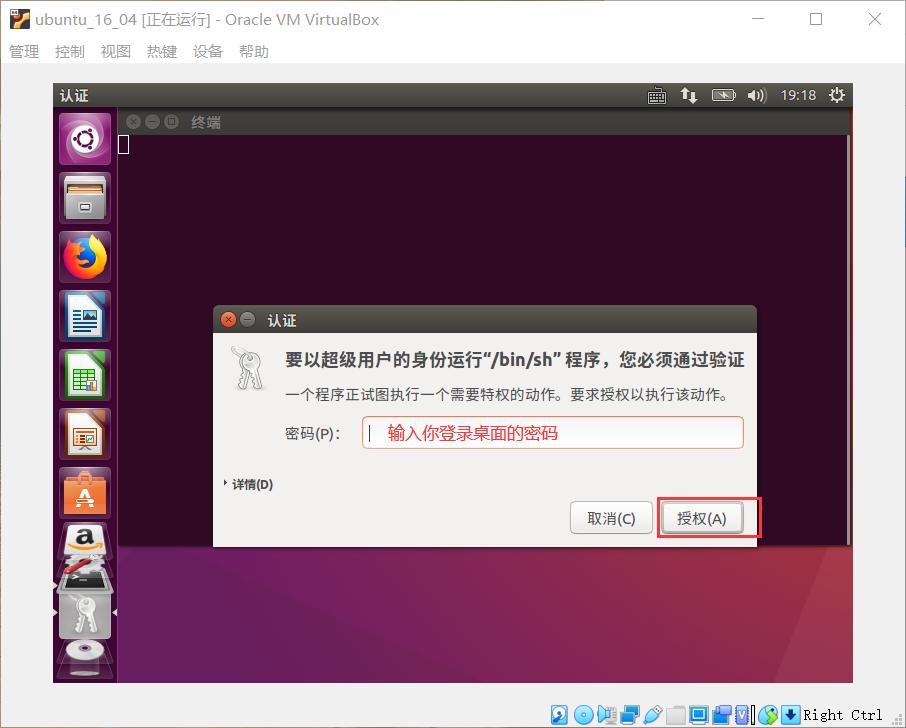
Enter your login password and click the Authorize button
Wait for the terminal to finish running
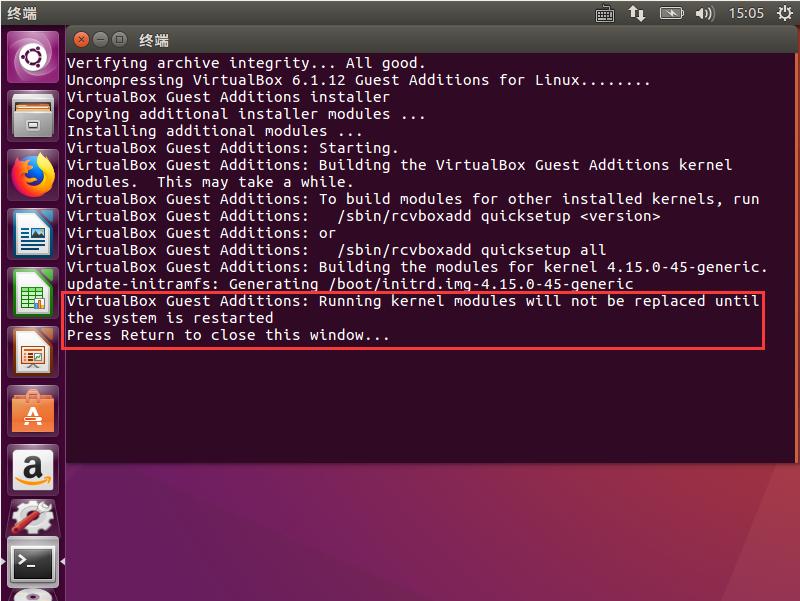
It probably means that it will not take effect until it is restarted, prompting you to press enter on the keyboard to close the window
You can reboot by opening a terminal ctral+alt+t after closing the window and typing reboot
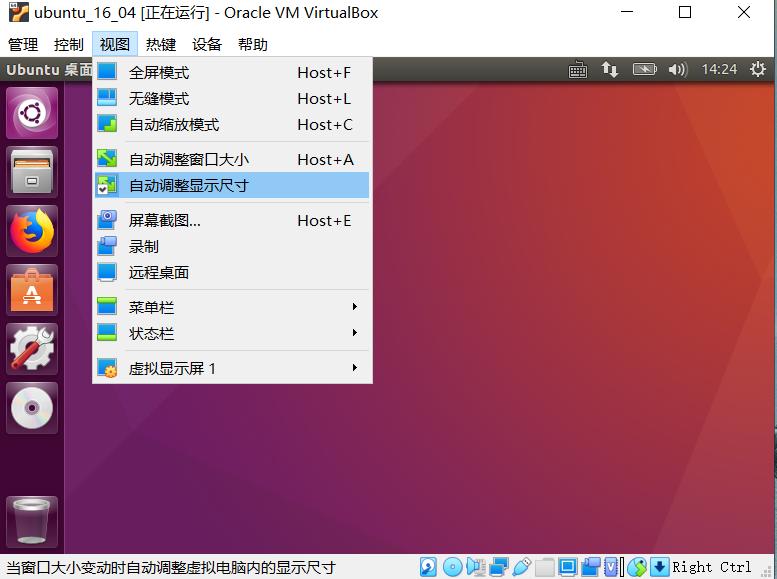
This way you can select Automatically adjust display size on View, so your desktop will become clear and easy to operate