- HandsFree robot remote control, map building, comprehensive video tutorials for autonomous navigation. Video URL
Radar Mapping
This section introduces how to use lidar to build a 2D map and save the map to a specified directory. The constructed map will be used in subsequent autonomous navigation experiments.
1 Ready to start
- Make sure the robot is powered on and the emergency stop switch is turned on
- Make sure that the robot host is installed and connected to the laser radar USB interface and the USB communication interface of the chassis.
- Make sure that the experiments in the previous tutorials have passed the normal test
- Make sure to gracefully close the programs and terminals that the previous tutorials were running on.
2 detailed steps
Open the terminal and run the robot chassis control driver node:
roslaunch handsfree_hw handsfree_hw.launchOpen a new terminal and run the robot radar node driver node:
roslaunch handsfree_lidar lidar.launchOpen a new terminal and run the robot slam mapping node:
roslaunch handsfree_2dslam slam_gmapping.launchOpen a new terminal and run the robot keyboard control node:
roslaunch handsfree_teleop keyboard_teleop.launchThe robot will automatically open the chassis control drive, radar node, keyboard control node and rviz map display interface
rviz -d ~/handsfree/handsfree_ros_ws/src/handsfree/handsfree_2dslam/rviz/gmapping.rviz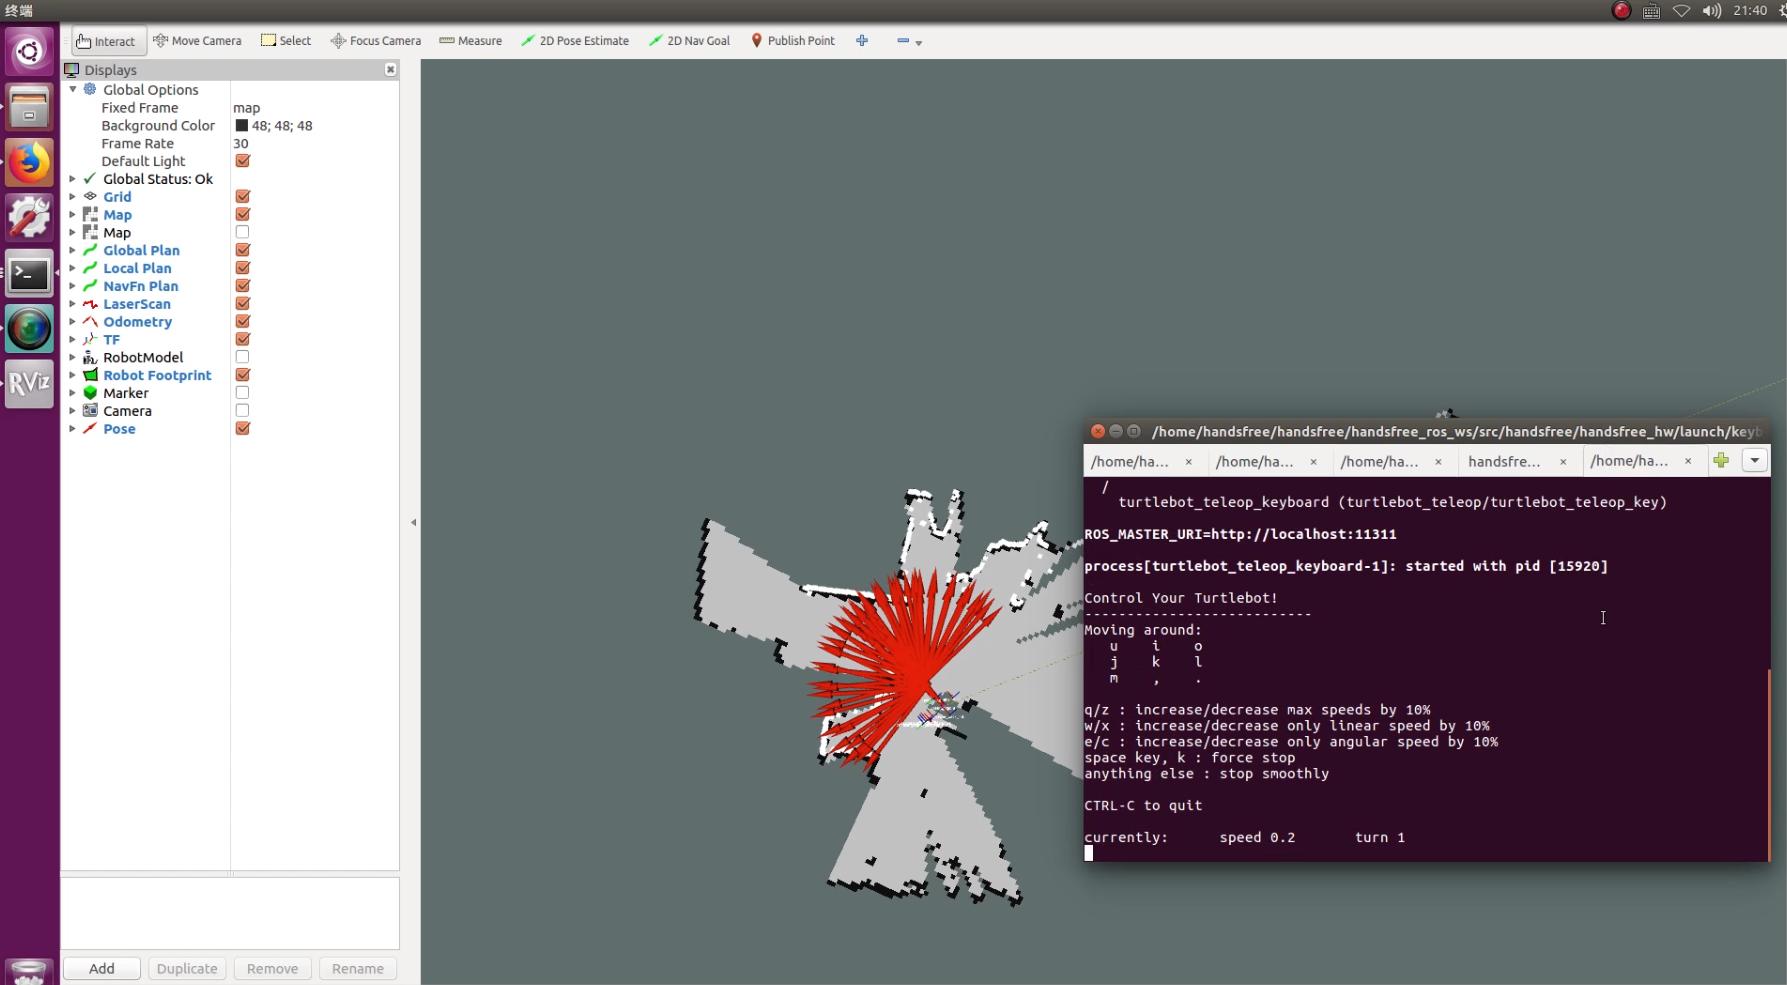
The rviz file can also be manually configured, select file -> open config on the rviz software interface, and manually select the
handsfree/handsfree_bringup/rviz/gmapping.rvizfile as its configuration file. If it is normal, you can see the robot model and the visualized data scanned by the lidar in RVIZ, and then proceed to the next step to open the keyboard remote control node to build a map.Use the keyboard to remotely control the robot to move slowly, and the map displayed in RVIZ will gradually be completed. When the range of the map you build meets the requirements, you can run relevant commands to save the map. It is recommended that the area for beginners to build a map should not be too large, within two to three hundred square meters, and test the effect first.
Open a new terminal and run the command to save the map
First switch to the folder where you want to save the map (it is recommended to save it in handsfree_2dslam/map/)
roscd handsfree_2dslam /map/Then run the node that holds the map:
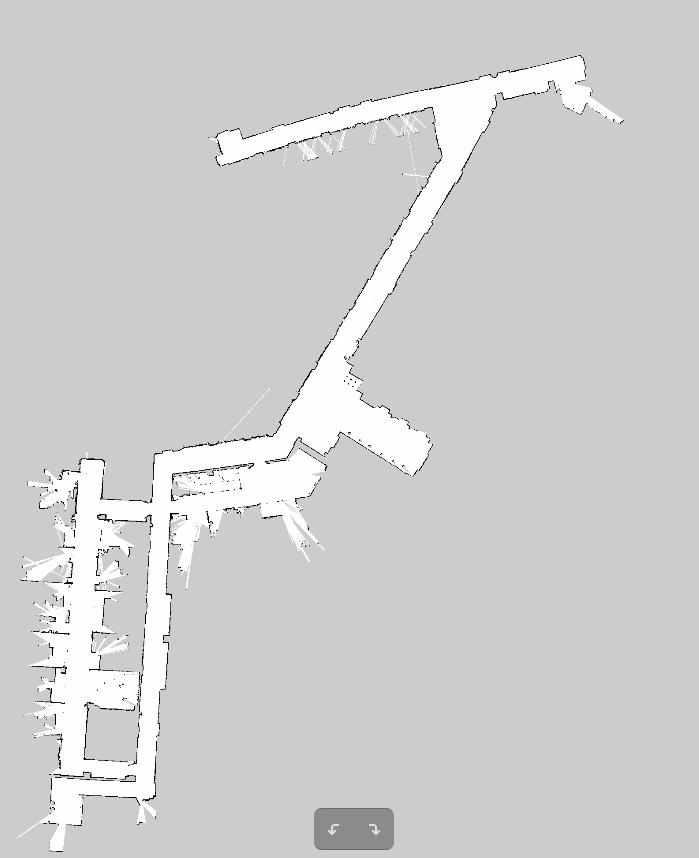
rosrun map_server map_saver -f my_map-f is followed by the name of the map save, the name of my_map can be changed according to your needs
This command will generate a .pgm image file and a .yaml configuration file in the handsfree_2dslam/map directory. At this point, the mapping process is complete. The resulting map:
- The above is the step-by-step method of starting the map building, and you can also use the command to start the map building with one key. First close all previous terminals, open a new terminal, and execute the command:
roslaunch handsfree_2dslam slam.launch sim:=false slam_methods:=gmapping
Among them, sim is a parameter to choose between simulation and real machine mapping, and slam_methods is a way to choose the mapping. We support four mapping methods: gmapping, cartographer, hector, and karto.