Android App Tutorial
In the previous tutorials, we controlled the robot from a remote computer.In this section, we will try to control the robot remotely through a mobile app.
Preparation
Download the App
To control the robot from your cell phone, you need to install the corresponding Android app on your phone first.
ROS officially provides support for the Android platform and some test DEMO.Download link: ROS-APP-Github.
We have made some changes to the code in order to make the official program work on the HandsFree robot.Download link: ROS-Handsfree_APP-Github.
We have also packaged it into an Android Application Package(APK), which you can download and install directly: Android Application Package.
HandsFree Android APP Download Links:
These are the three apps we downloaded:
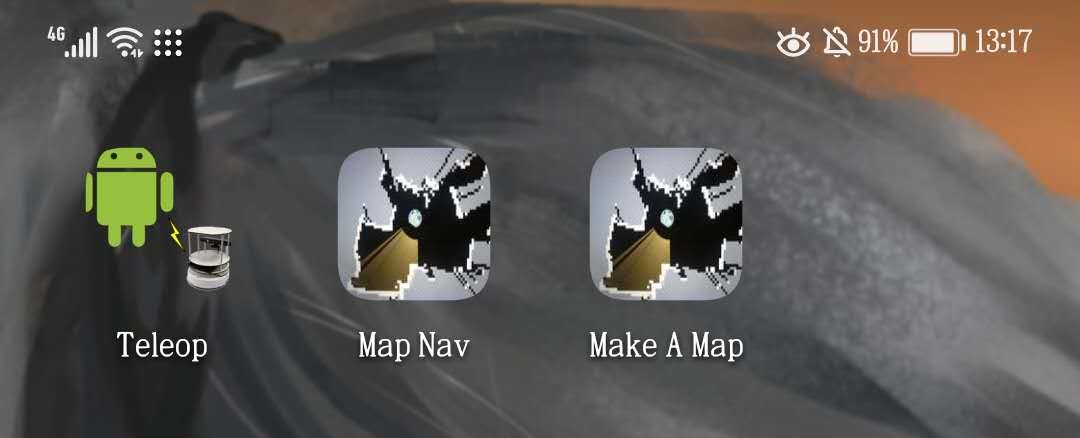
Teleop is used to control the movement of the robot.
Make A Map is used to control the robot to create maps.
Map Nav is used for robot navigation which can load the created map and the images captured by the camera.Find your IP address of the robot's IPC
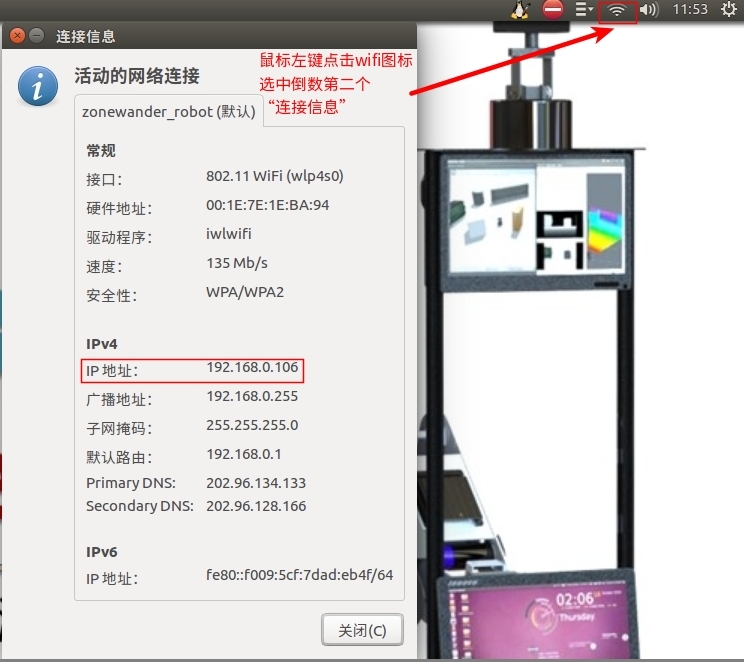
You can open the following window by left clicking on the small wifie icon in the top right corner of your desktop, then click on "Connection Information" in the penultimate line and find your IP address in it.
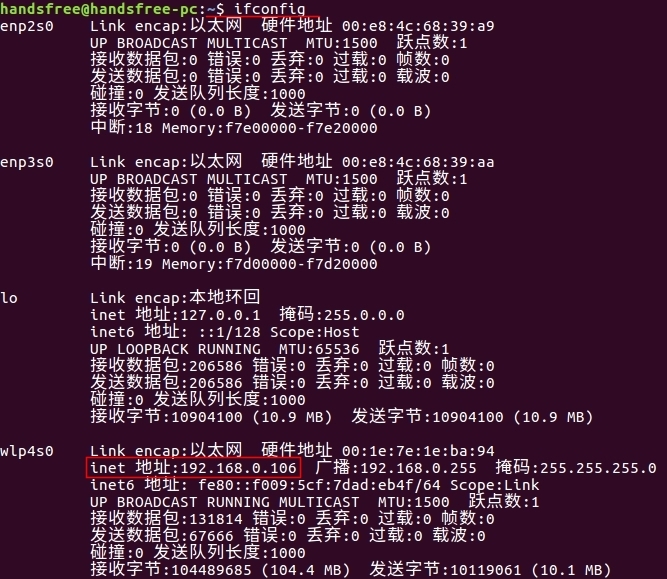
You can also open a terminal and find your IP address by running the following command.
```
> ifconfig
```
Normally, the terminal will display the following information, What we want is the information of the wireless network `wlp4s0`.
(Note: the name of the wireless card of different computers is not necessarily `wlp4s0`, there may be `wlan` and other names), find the inet address in the corresponding network card. For example, the address shown here is 192.168.0.106.
Remote Settings
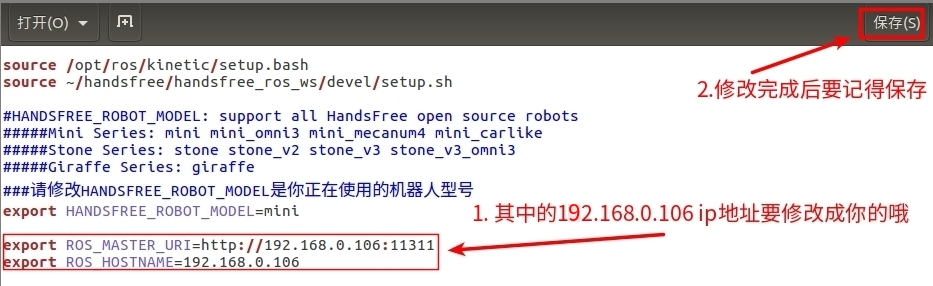
Go to the .bashrc file and add the IP address information of the robot's IPC:
> gedit ~/.bashrcAdd the following code to the end of the file:
 export ROS_MASTER_URI=http://IP_OF_ROBOT_PC:11311
 export ROS_HOSTNAME=IP_OF_ROBOT_PC
The IP_OF_ROBOT_PC is the IP address of the robot's IPC (or the IP address of the device connected to the robot), click Save after making the changes. Close the file and the terminal to make it effective.
Connecting to the same router
Before you start, make sure that the phone and the IPC are in the same LAN, that is, connected to the same router, otherwise the app will not be able to control the robot.
Using Teleop
Brief Steps
Open a terminal on the robot-side IPC and run the following command:
> roslaunch handsfree_hw handsfree_hw.launchEnter the IP of the IPC in the mobile app and click
CONNECT, then you can control the robot to move.
Detailed instructions
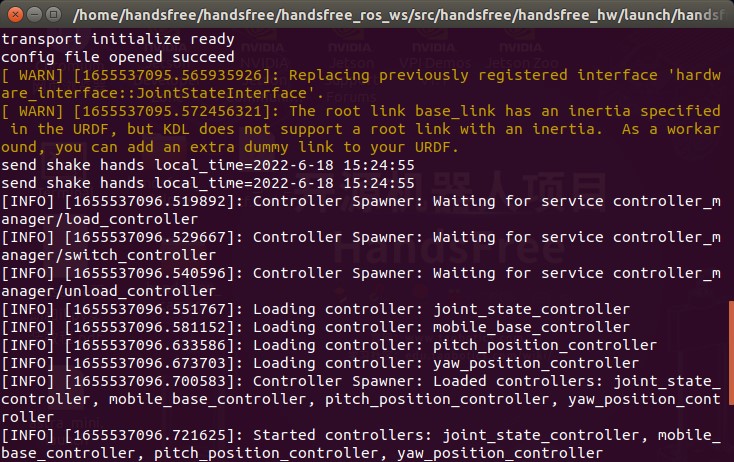
Open a terminal on the robot-side IPC and run the following command:
> roslaunch handsfree_hw handsfree_hw.launchThis command launches the robot driver node, which is responsible for the communication and data transfer between the APP and the robot's underlying device.Normally, the terminal will display the following information:
Run the Teleop APP
Remember not to close the terminal running the abstract node on the robot side.
Open the downloaded HandsFree Android app on your phone (all three apps can be used to teleoperate your robot), and enter the IP address of the robot's IPC in the app and clickCONNECTto complete the connection between the IPC and your phone.
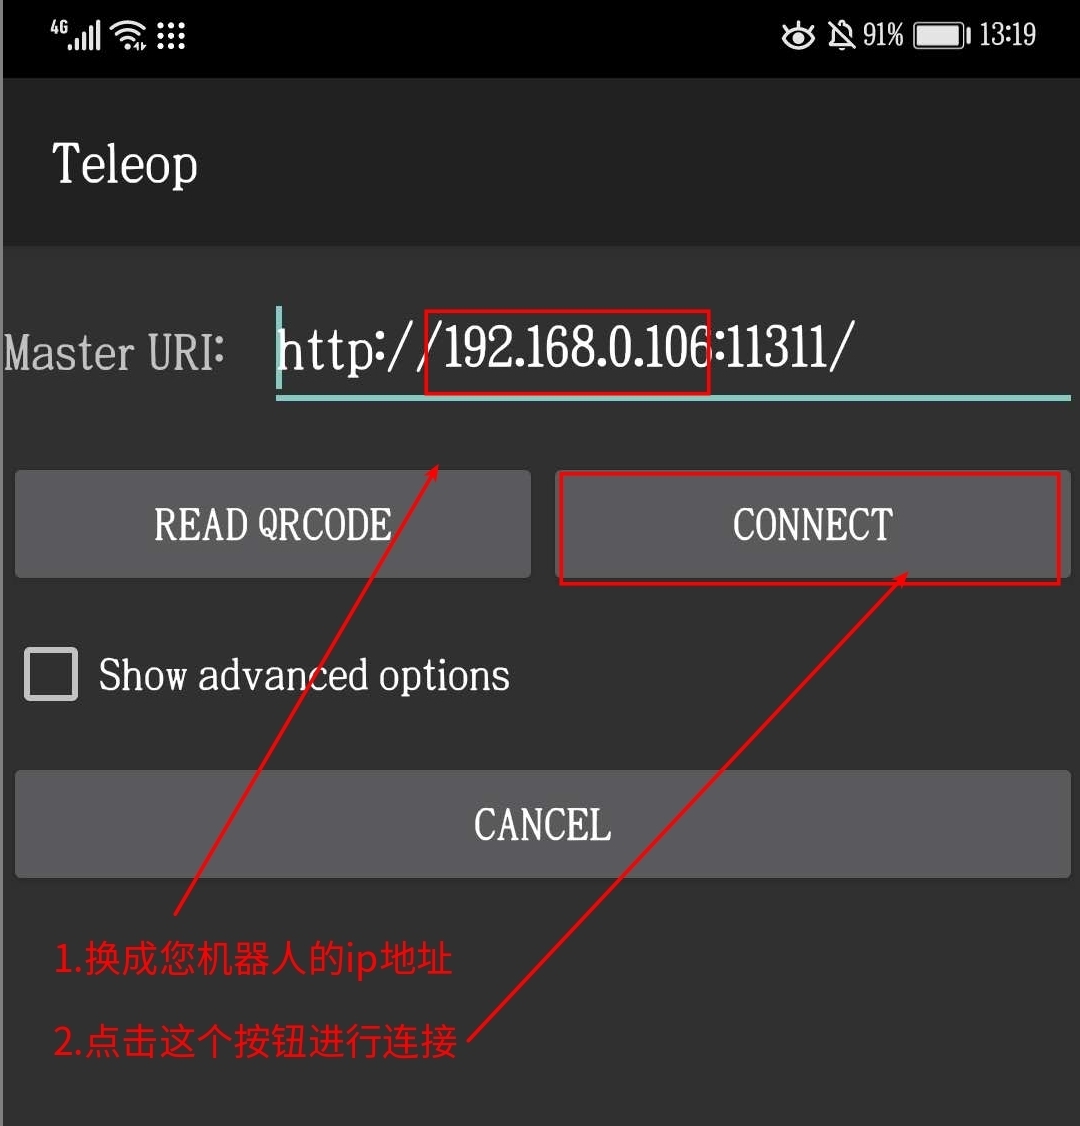
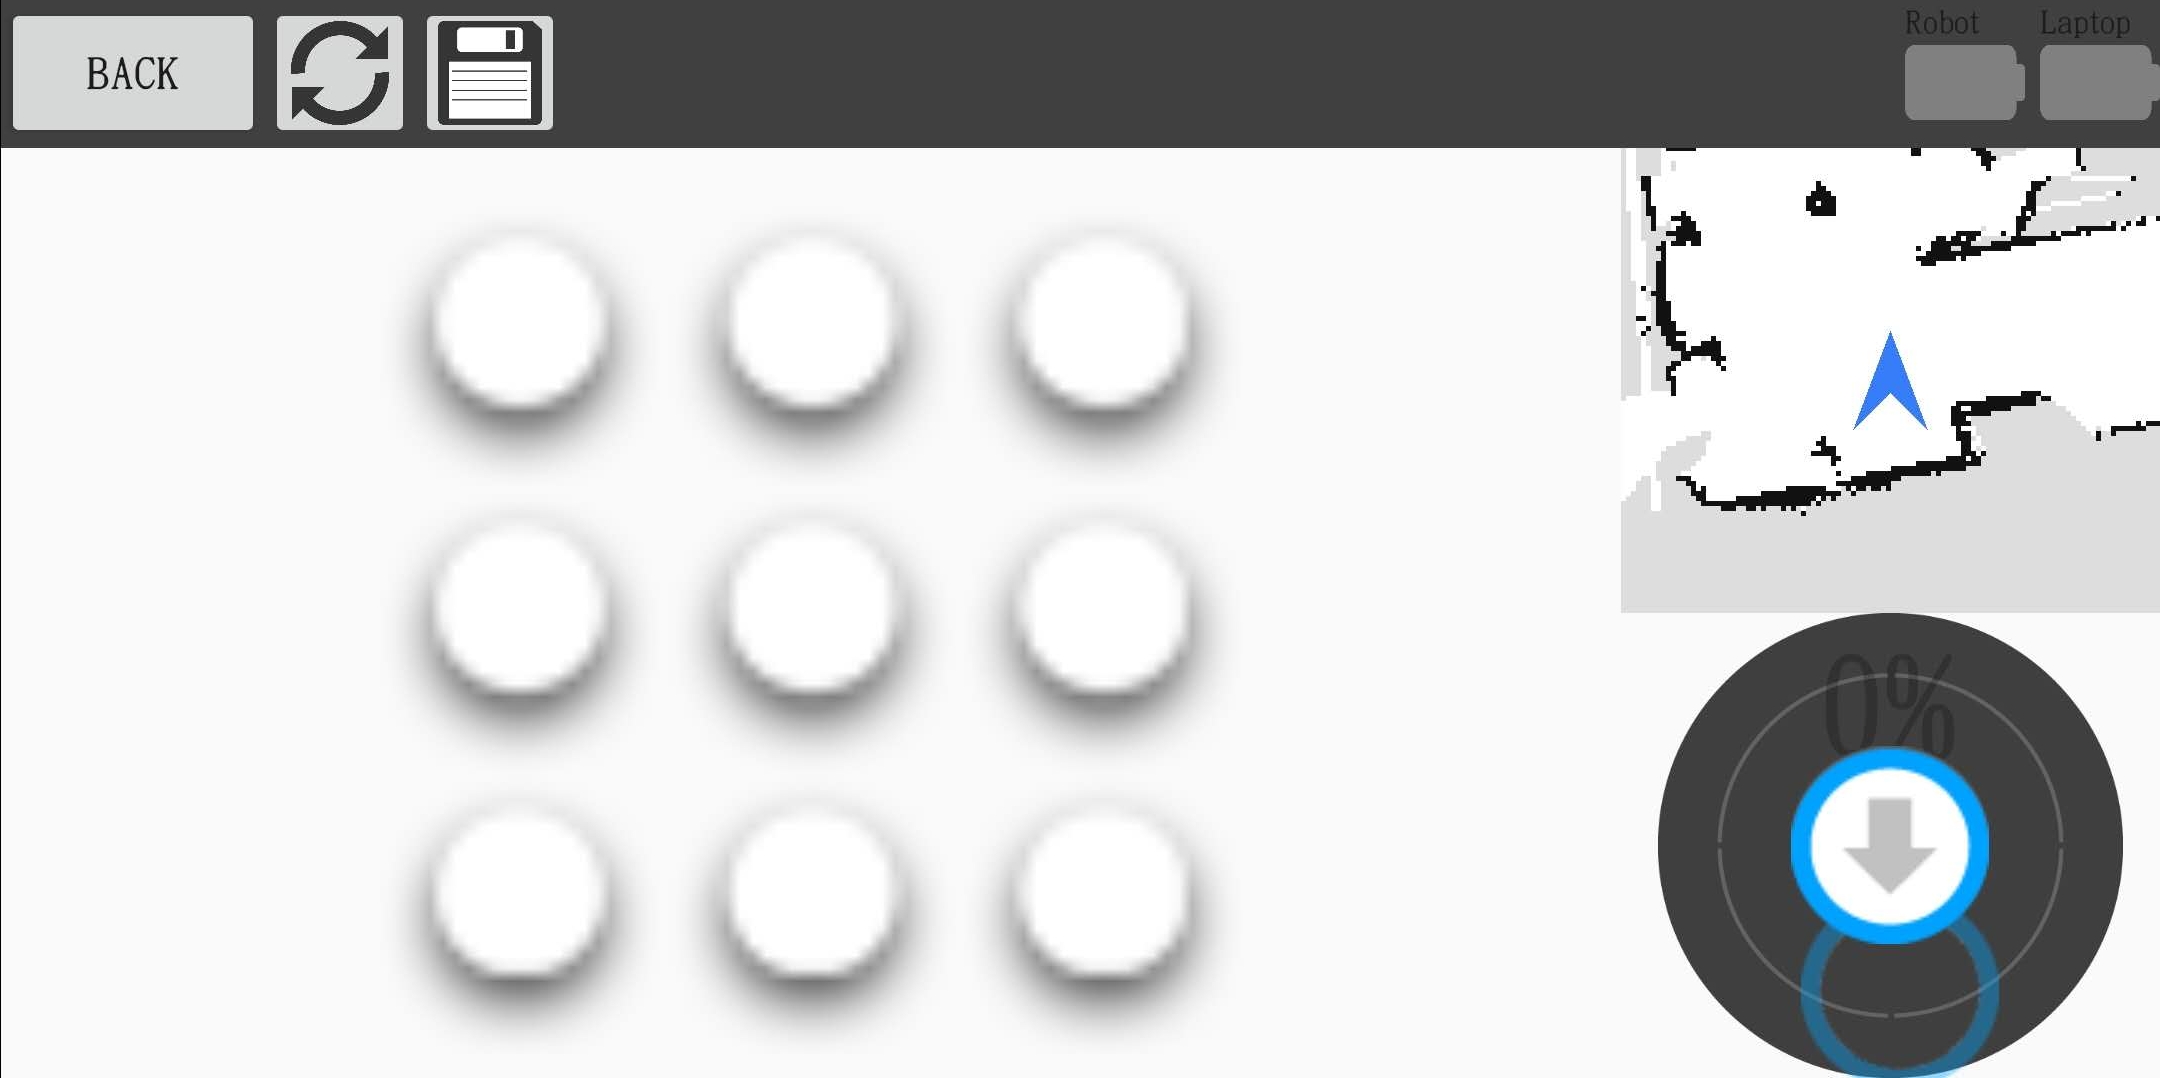
After the connection is established, the interface of your phone will switch to the control interface(as shown in the following figure):

Now you can control the robot's movement through the control button on the right side of the phone interface (the farther the button is from the center, the faster the robot will move, but for beginners, we don't recommend moving the robot too fast)
The nine white dots on the Teleop APP interface are not buttons, if you want to view the map or the images from the camera, you can view them in the other two apps.
Make A Map
Brief Steps
Open a new terminal and run the following command :
> roslaunch handsfree_2dslam slam.launch sim:=falseOpen
Make A Map, enter the IP of the IPC and clickCONNECT, then you can control the robot to move and build the map.
Detailed instructions
Open a terminal on the robot-side IPC and run the following command:
> roslaunch handsfree_2dslam slam.launch sim:=falseOpen
Make A Map, enter the IP of the IPC and clickCONNECT, then you can control the robot to move and build the map.
 You can switch to a different image window by clicking on the small window in the upper right corner, and zoom or rotate the image with your finger.
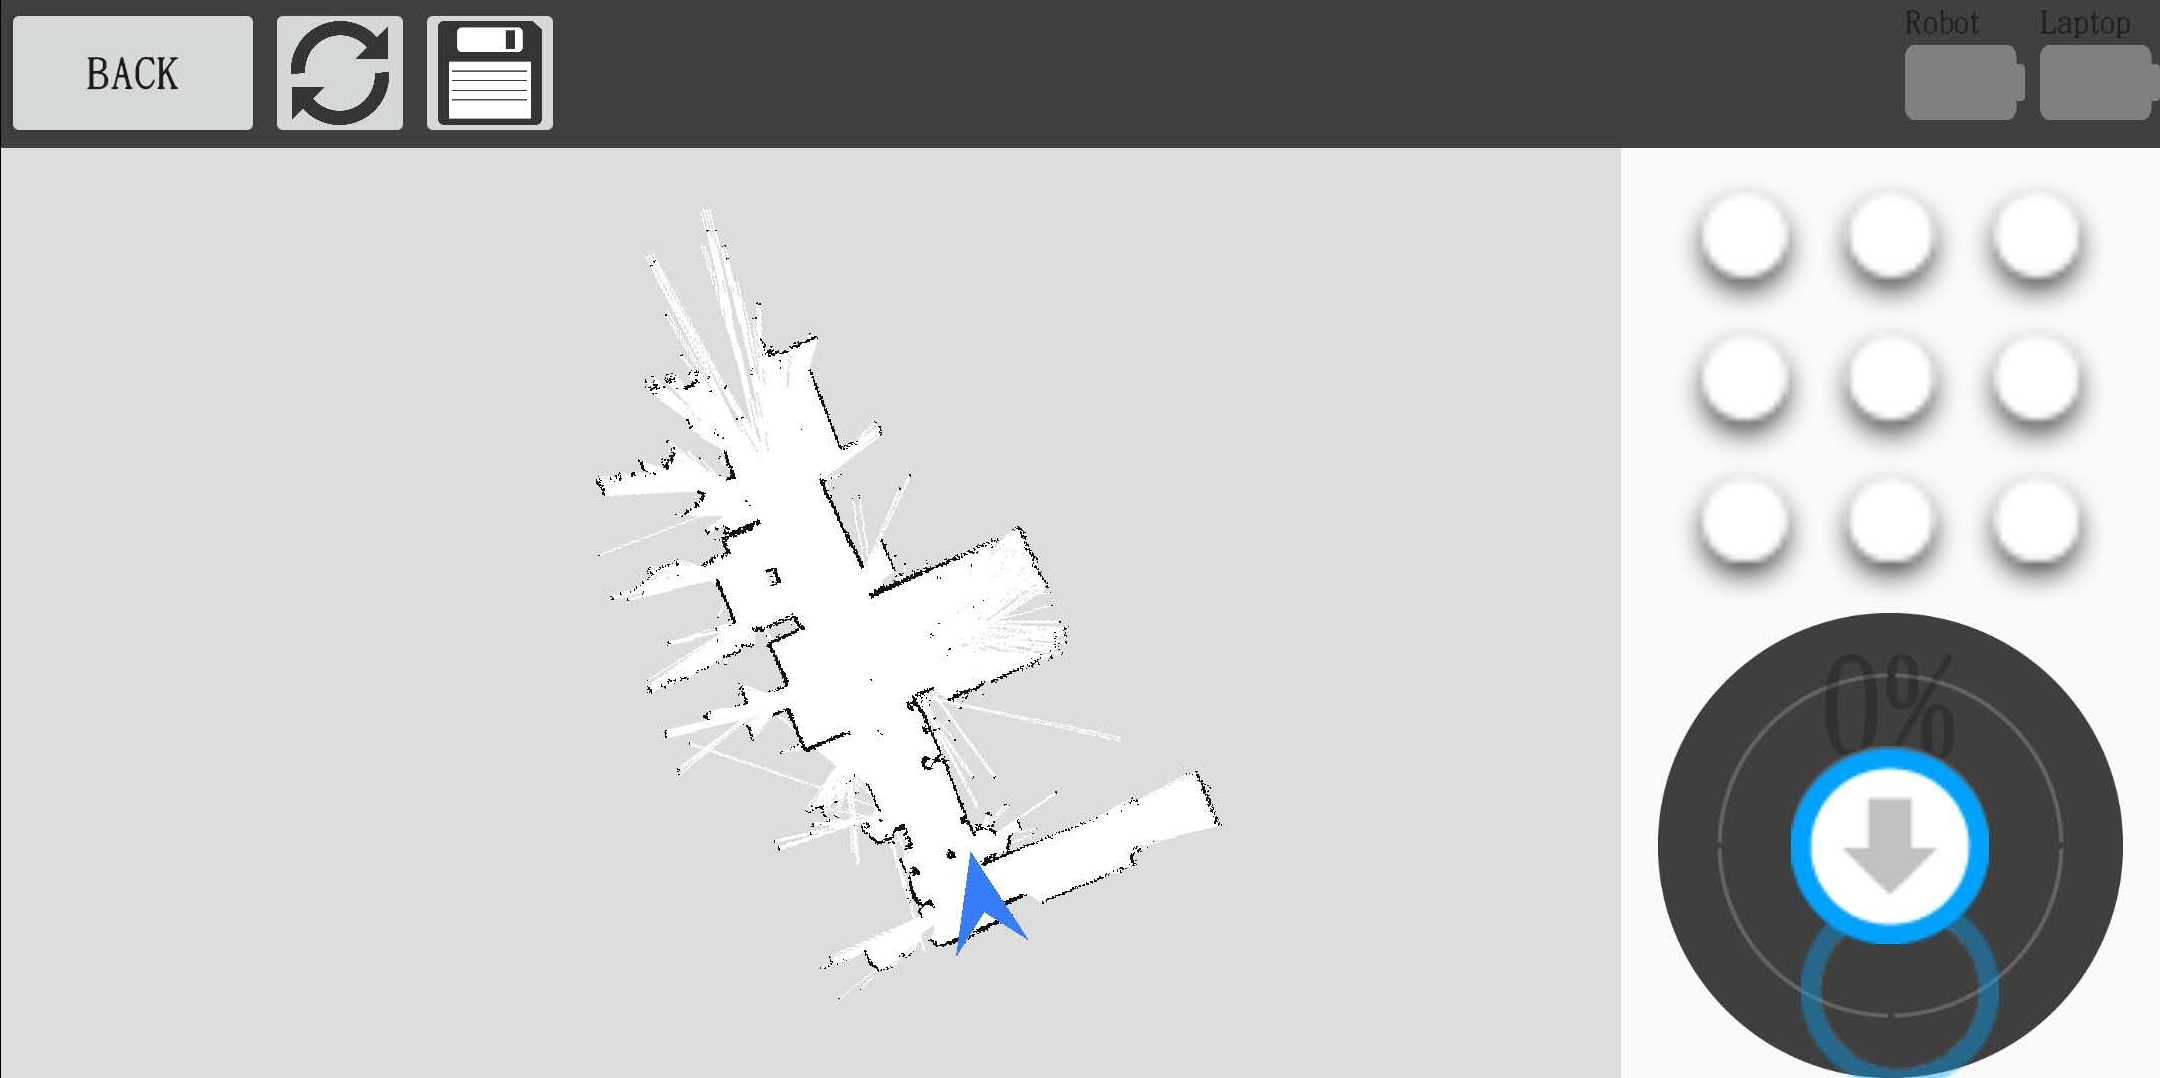
Although this map is not saved, it does not affect the use in Map Nav.
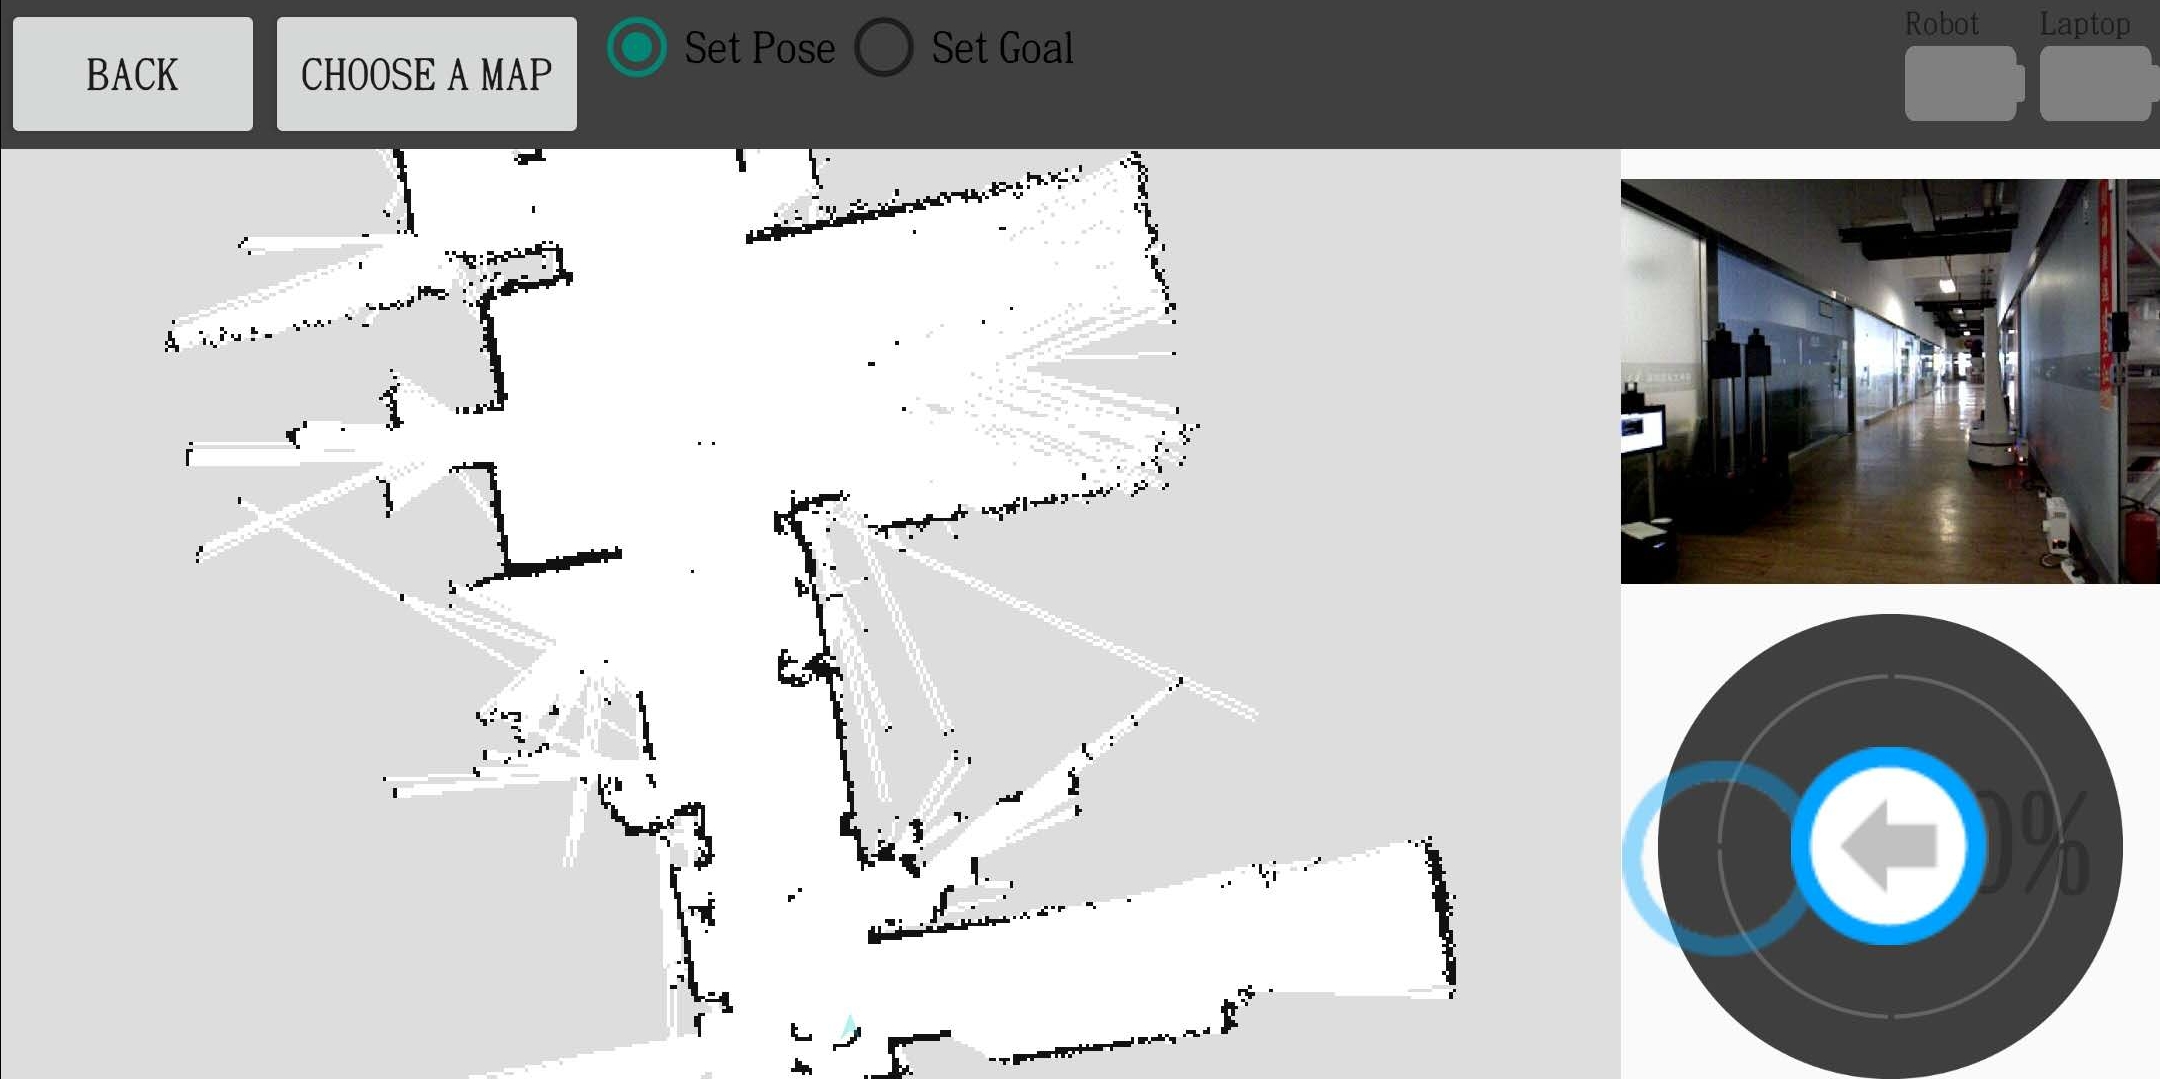
Map Nav
Brief Steps
Open two terminals and run the following two commands separately:
 > roslaunch handsfree_hw handsfree_hw.launch
 > roslaunch handsfree_camera view_astra_dabai.launch
Open
Map Nav, enter the IP of the IPC and clickCONNECT, then the robot will get the image captured by the camera and move around the map we have made.
Detailed instructions
Open a terminal on the robot-side IPC and run the following command:
> roslaunch handsfree_hw handsfree_hw.launchThis command launches the robot driver node, which is responsible for the communication and data transfer between the APP and the robot's underlying device.
Open a second terminal and launch the camera driver node:
> roslaunch handsfree_camera view_astra_dabai.launchWe can open the rviz graphical interface and display the image by running this command.
Open
Map Nav, enter the IP of the IPC and clickCONNECT, then the robot will get the image captured by the camera and move around the map we have made.
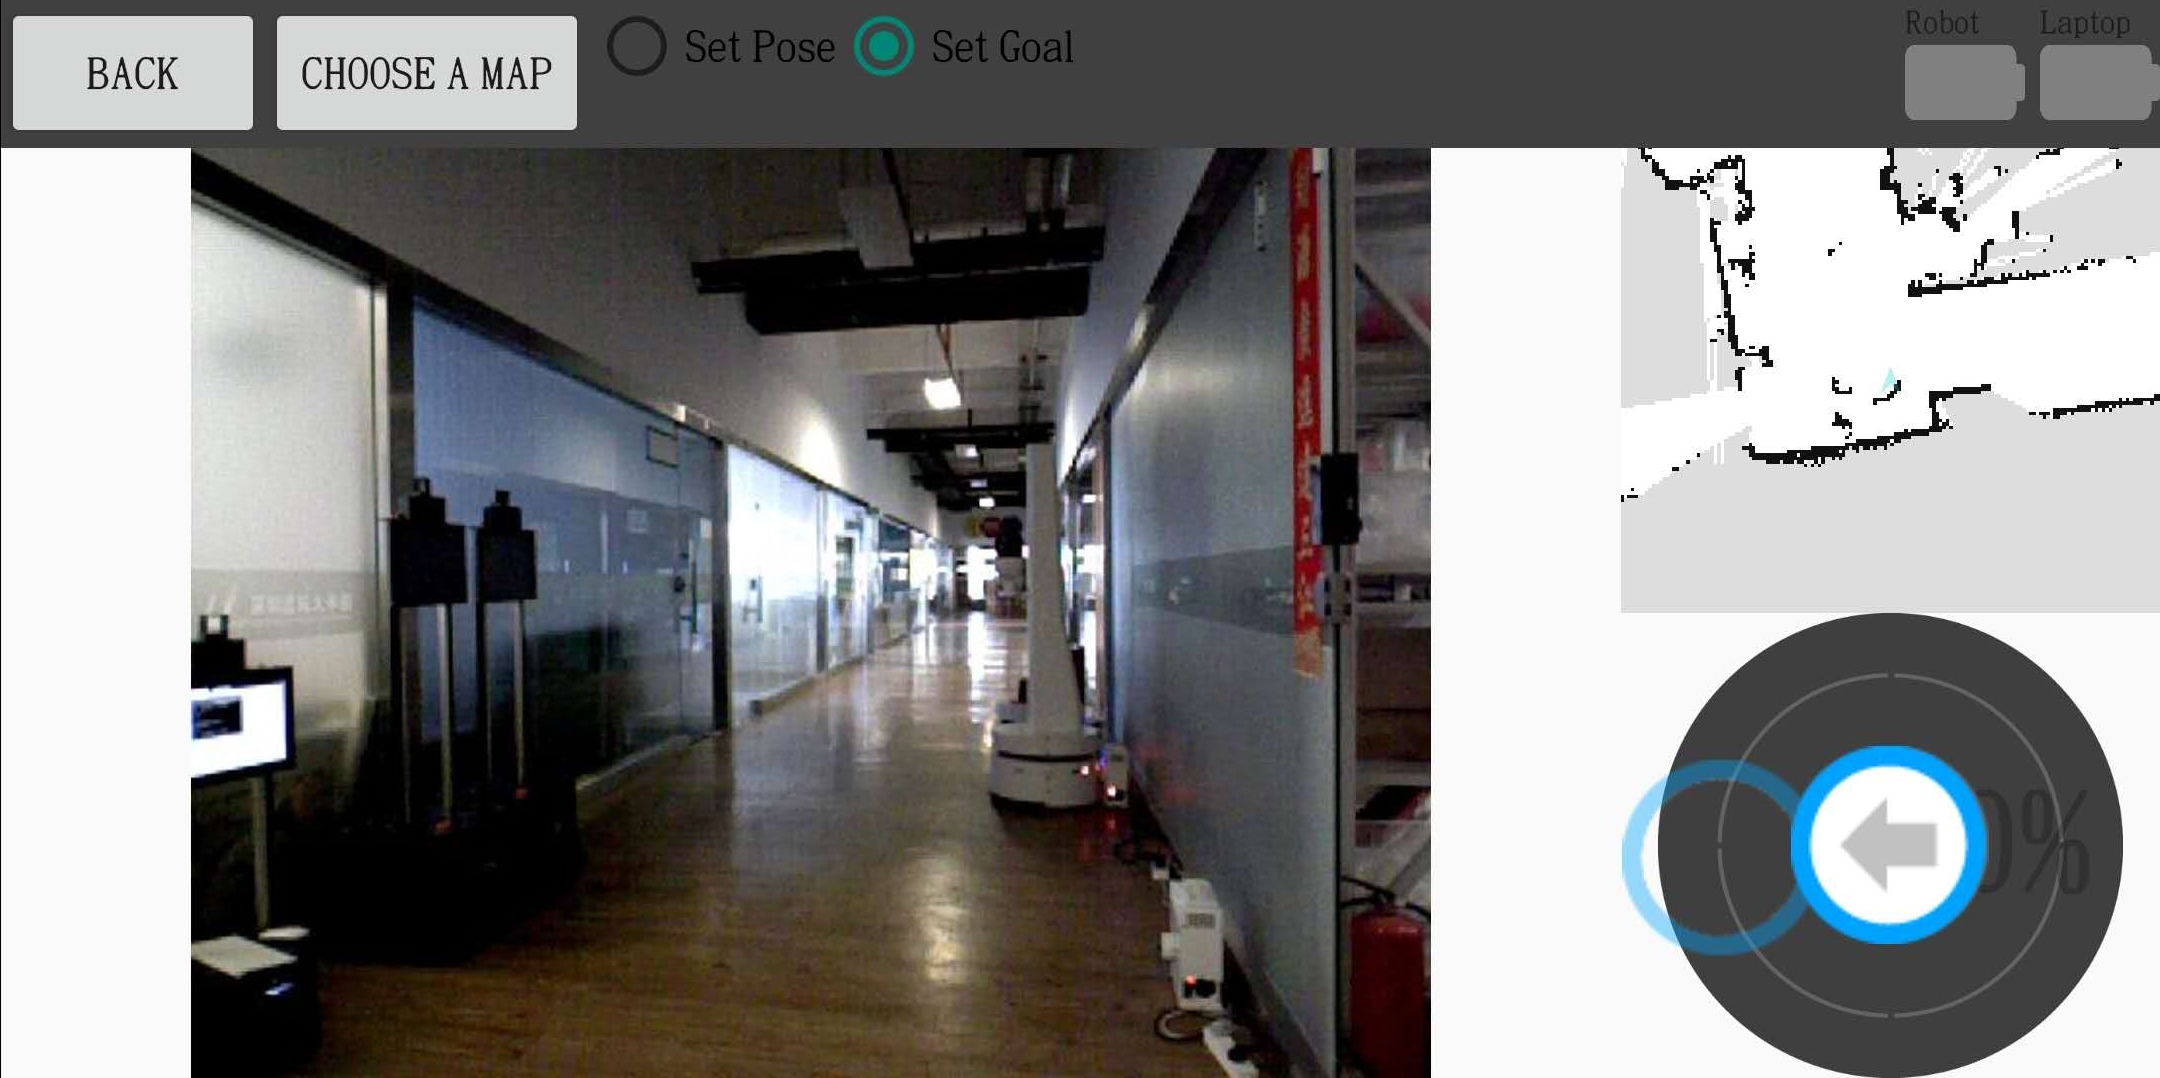
This can be switched by clicking on the small window above the button.