Quick Start
The quick start procedures include the following steps:
- Firmware setup
- Propeller mounting
- Manual flight in position mode
1. Firmware Setup:
The onboard flight control unit Pixhawk has been loaded with stable px4 firmware based on V1.10.0, and parameters are tuned well with real flight tests in factory. In most cases, users do not need to change those onboard parameters such as attitude and position control gains. The official setup for px4 can be referred in: https://dev.px4.io/master/en/setup/config_initial.html. Due to transport vibrations and district differences, users are strongly recommended to conduct sensor calibration for compass, gyroscope and accelerometer sensors to avoid unexpected behaviors. We can easily do so by using the provided micro USB cable or telemetry set to connect the pixhawk with a computer running Qgroundcontrol (QGC) software.
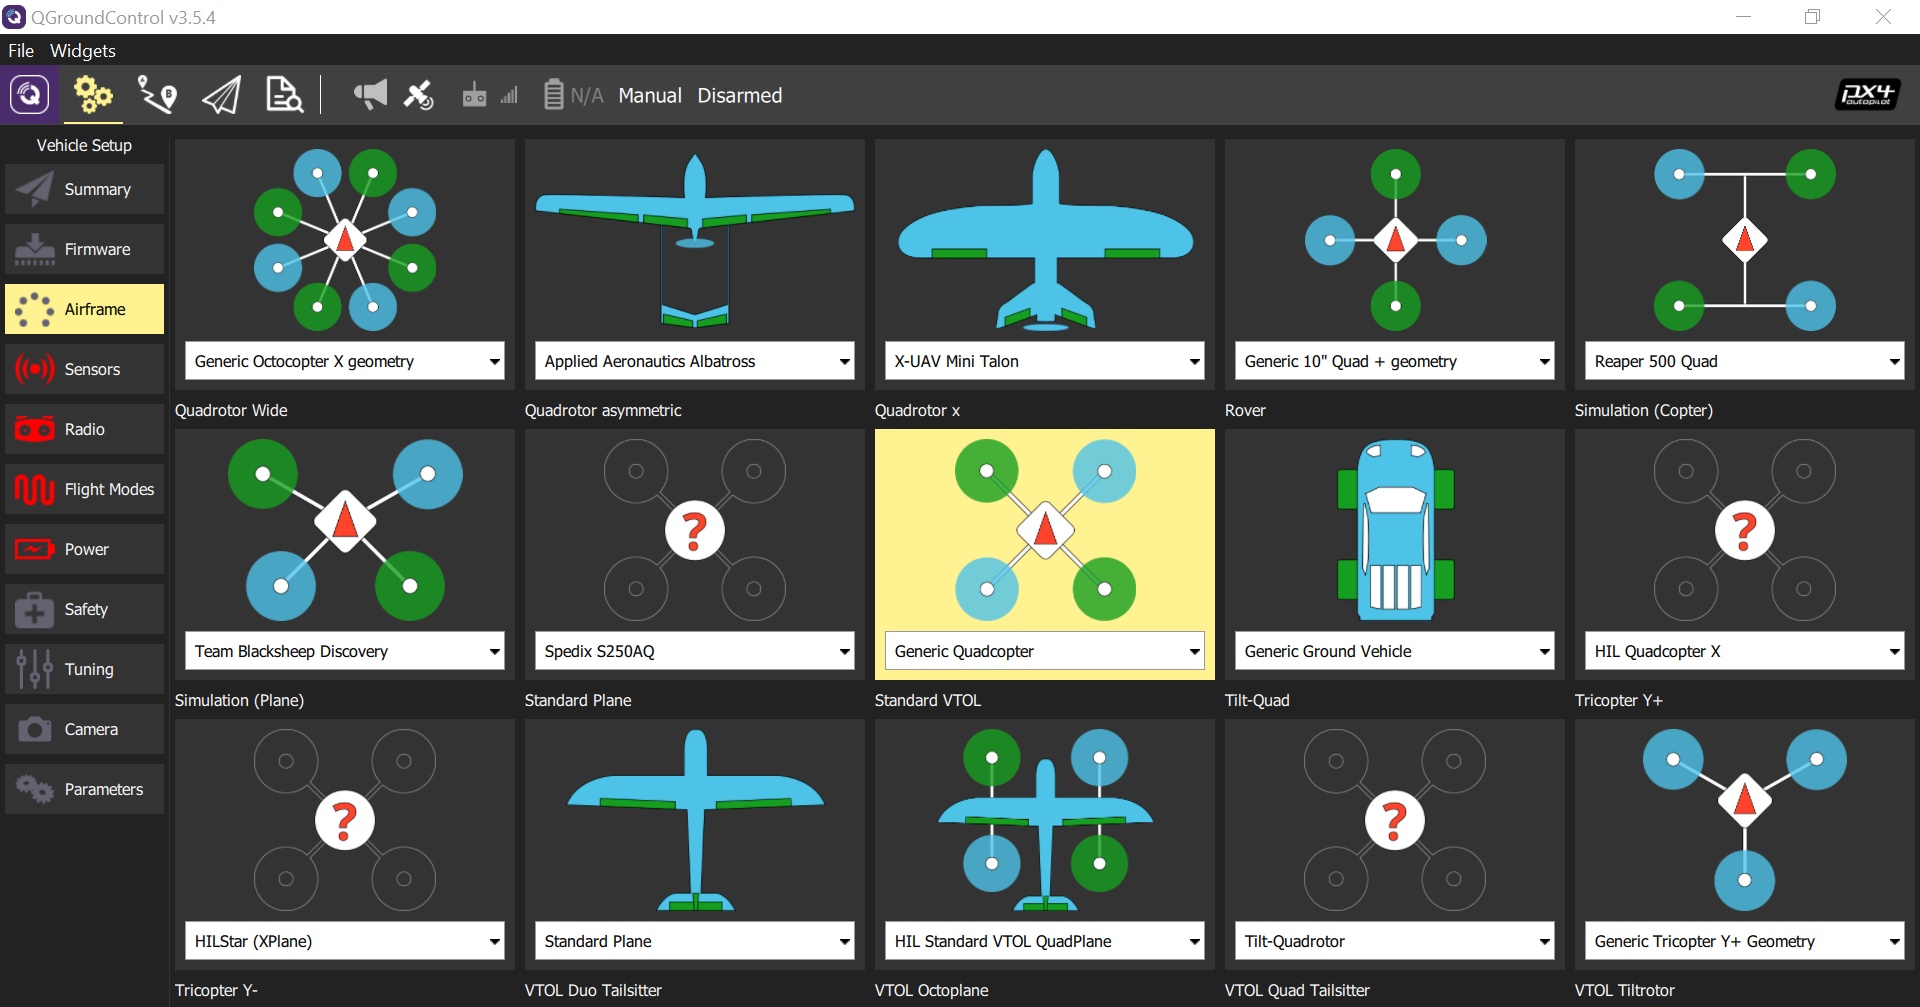
Airframe Setting:
This step is not necessary for quick start. The default airframe for TAObotics Q products is Generic Quadcopter, depicted as:
 Sensor Calibration:
Sensors can be calibrated by following the tips in QGC:
Sensor Calibration:
Sensors can be calibrated by following the tips in QGC:
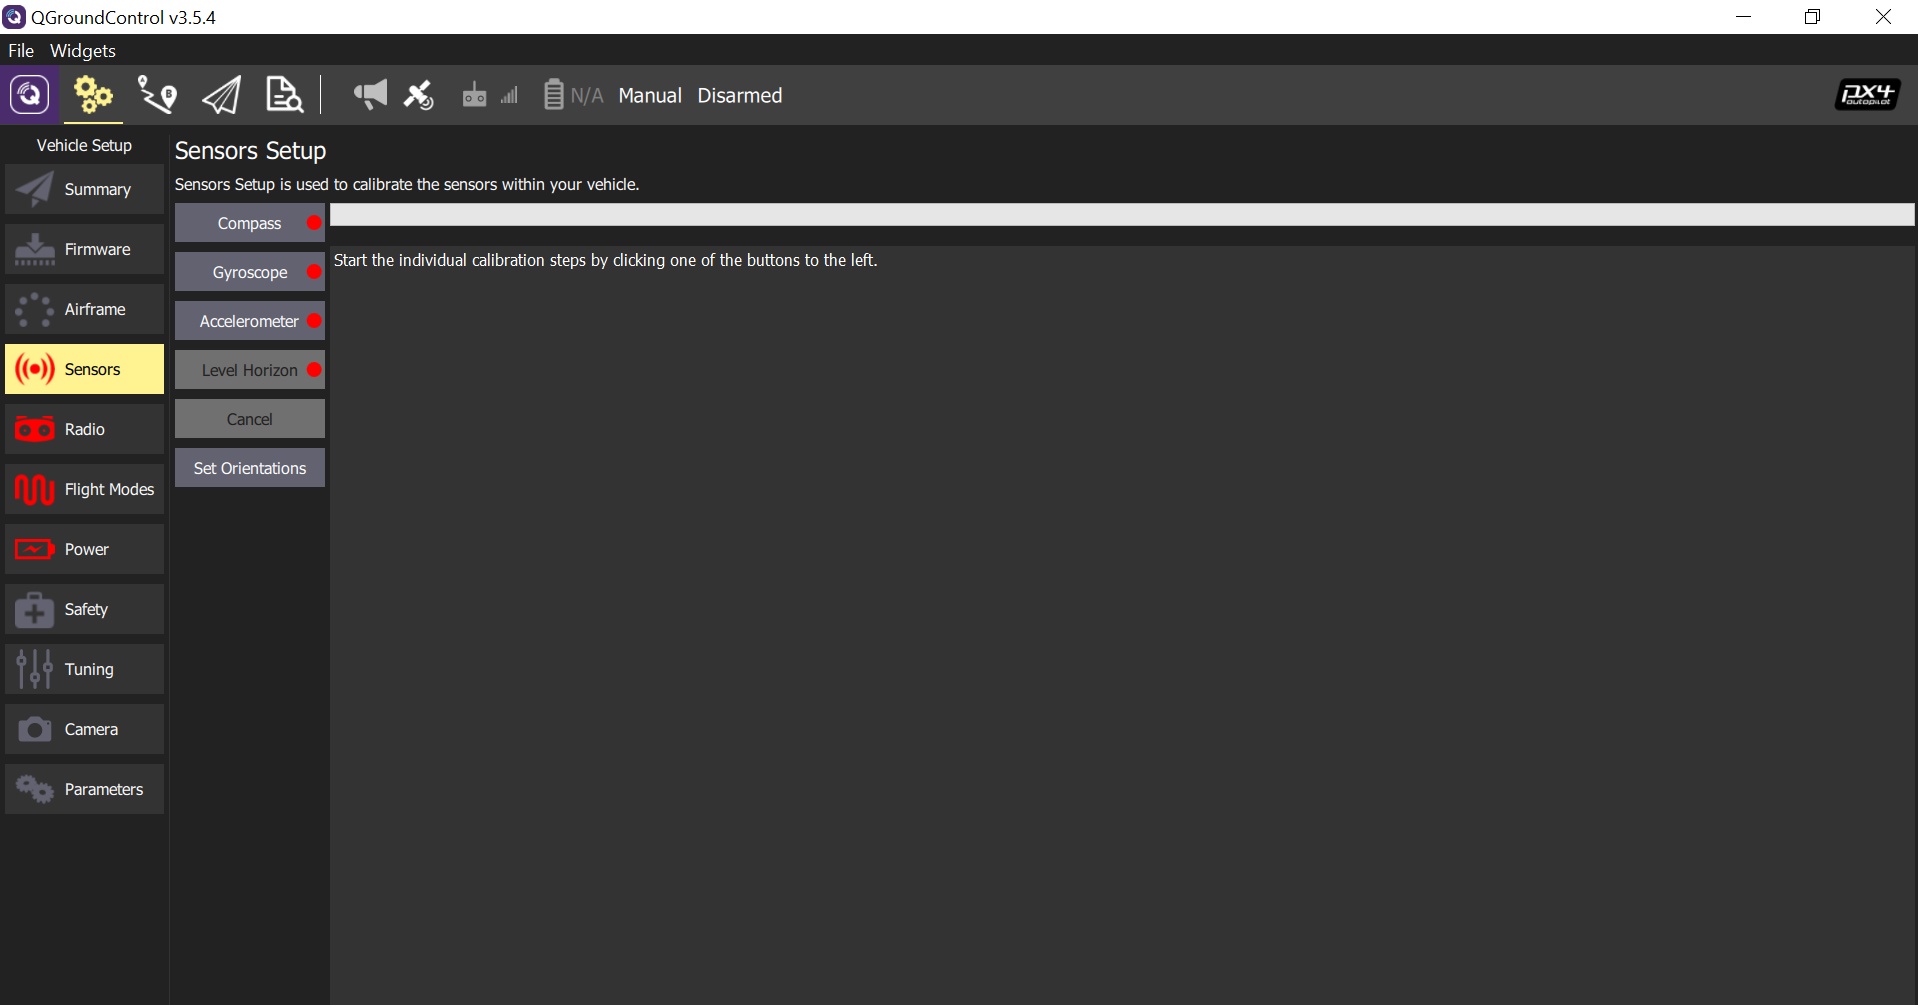 Users are suggested to connect the GPS to the autopilot before compass calibration, as the external compass is equipped in the GPS module, then both the onboard and external compasses will be calibrated. Users should keep the autopilot absolutely static during gyroscope calibration, as even small motion can cause calibration failure or lead to unacceptable gyro bias. The UAV can be placed on flat table surfaces or vertical walls for accelerometer calibration. Hand-hold calibration is not recommended.
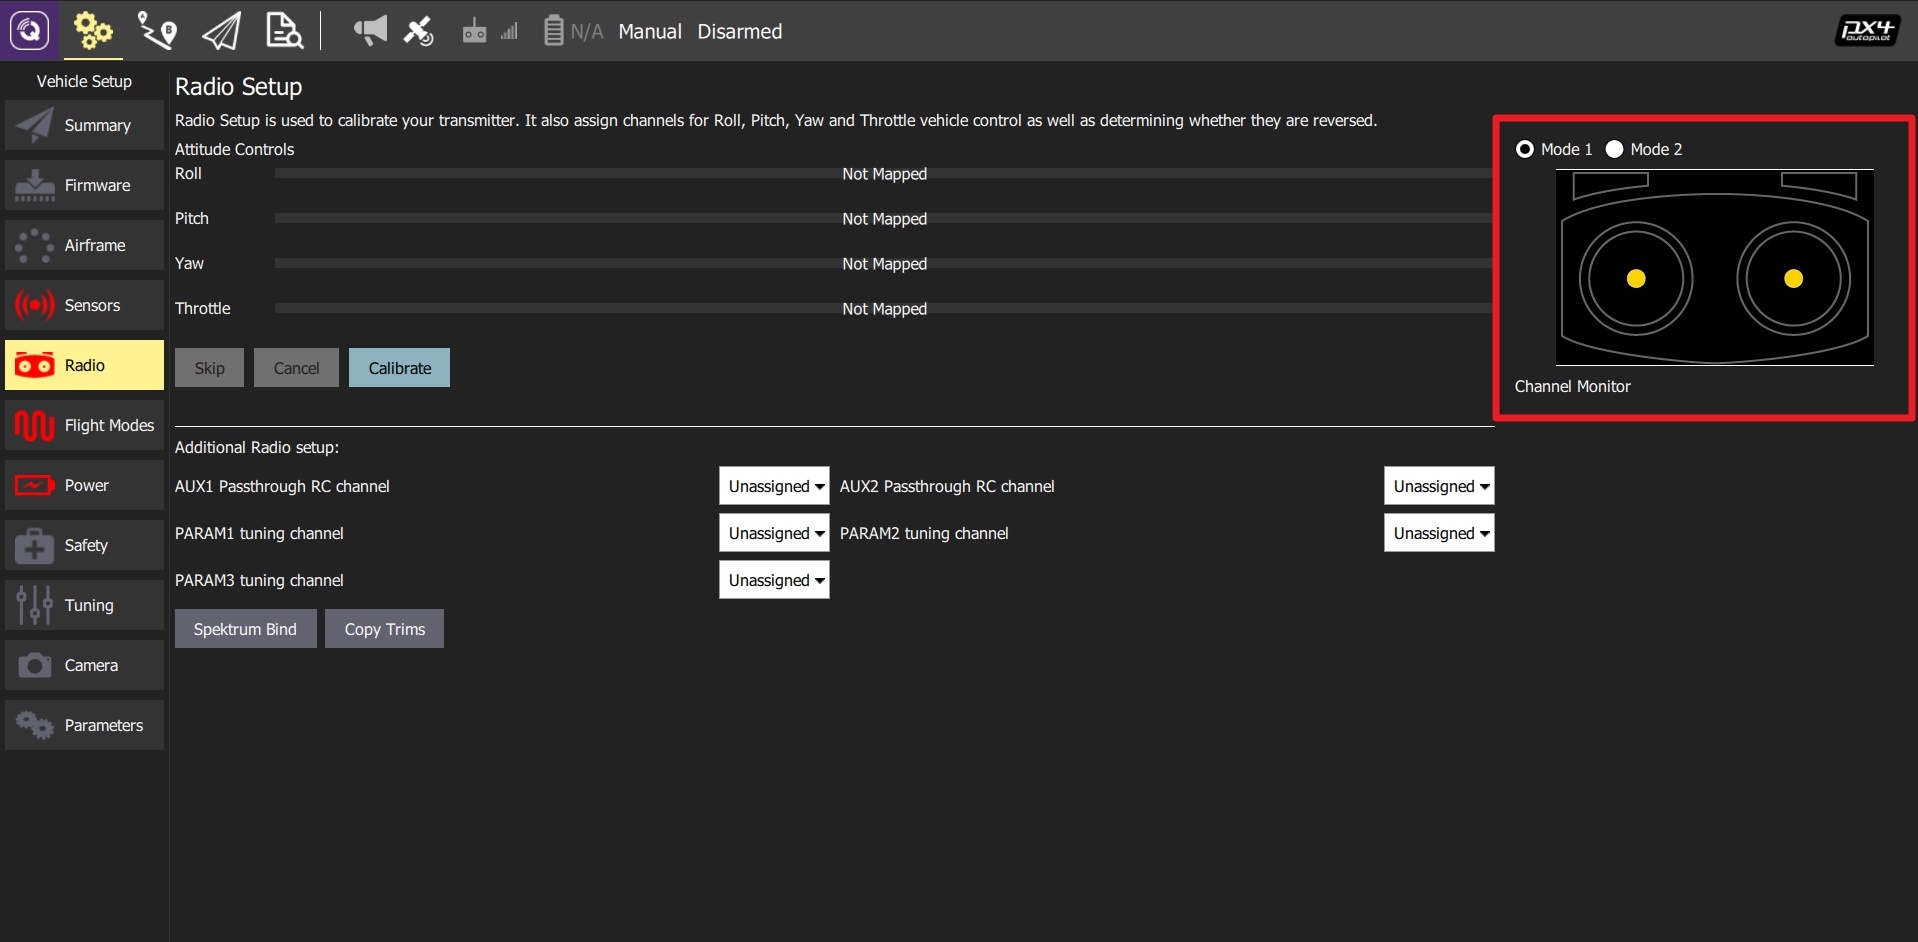
RC Calibration:
We can select either right hand mode (Mode 1, Japanese Hand) or left hand mode (Mode 2, American Hand) for RC operation. By clicking the Calibrate button, users can complete the procedure easily by following QGC commands.
Users are suggested to connect the GPS to the autopilot before compass calibration, as the external compass is equipped in the GPS module, then both the onboard and external compasses will be calibrated. Users should keep the autopilot absolutely static during gyroscope calibration, as even small motion can cause calibration failure or lead to unacceptable gyro bias. The UAV can be placed on flat table surfaces or vertical walls for accelerometer calibration. Hand-hold calibration is not recommended.
RC Calibration:
We can select either right hand mode (Mode 1, Japanese Hand) or left hand mode (Mode 2, American Hand) for RC operation. By clicking the Calibrate button, users can complete the procedure easily by following QGC commands.
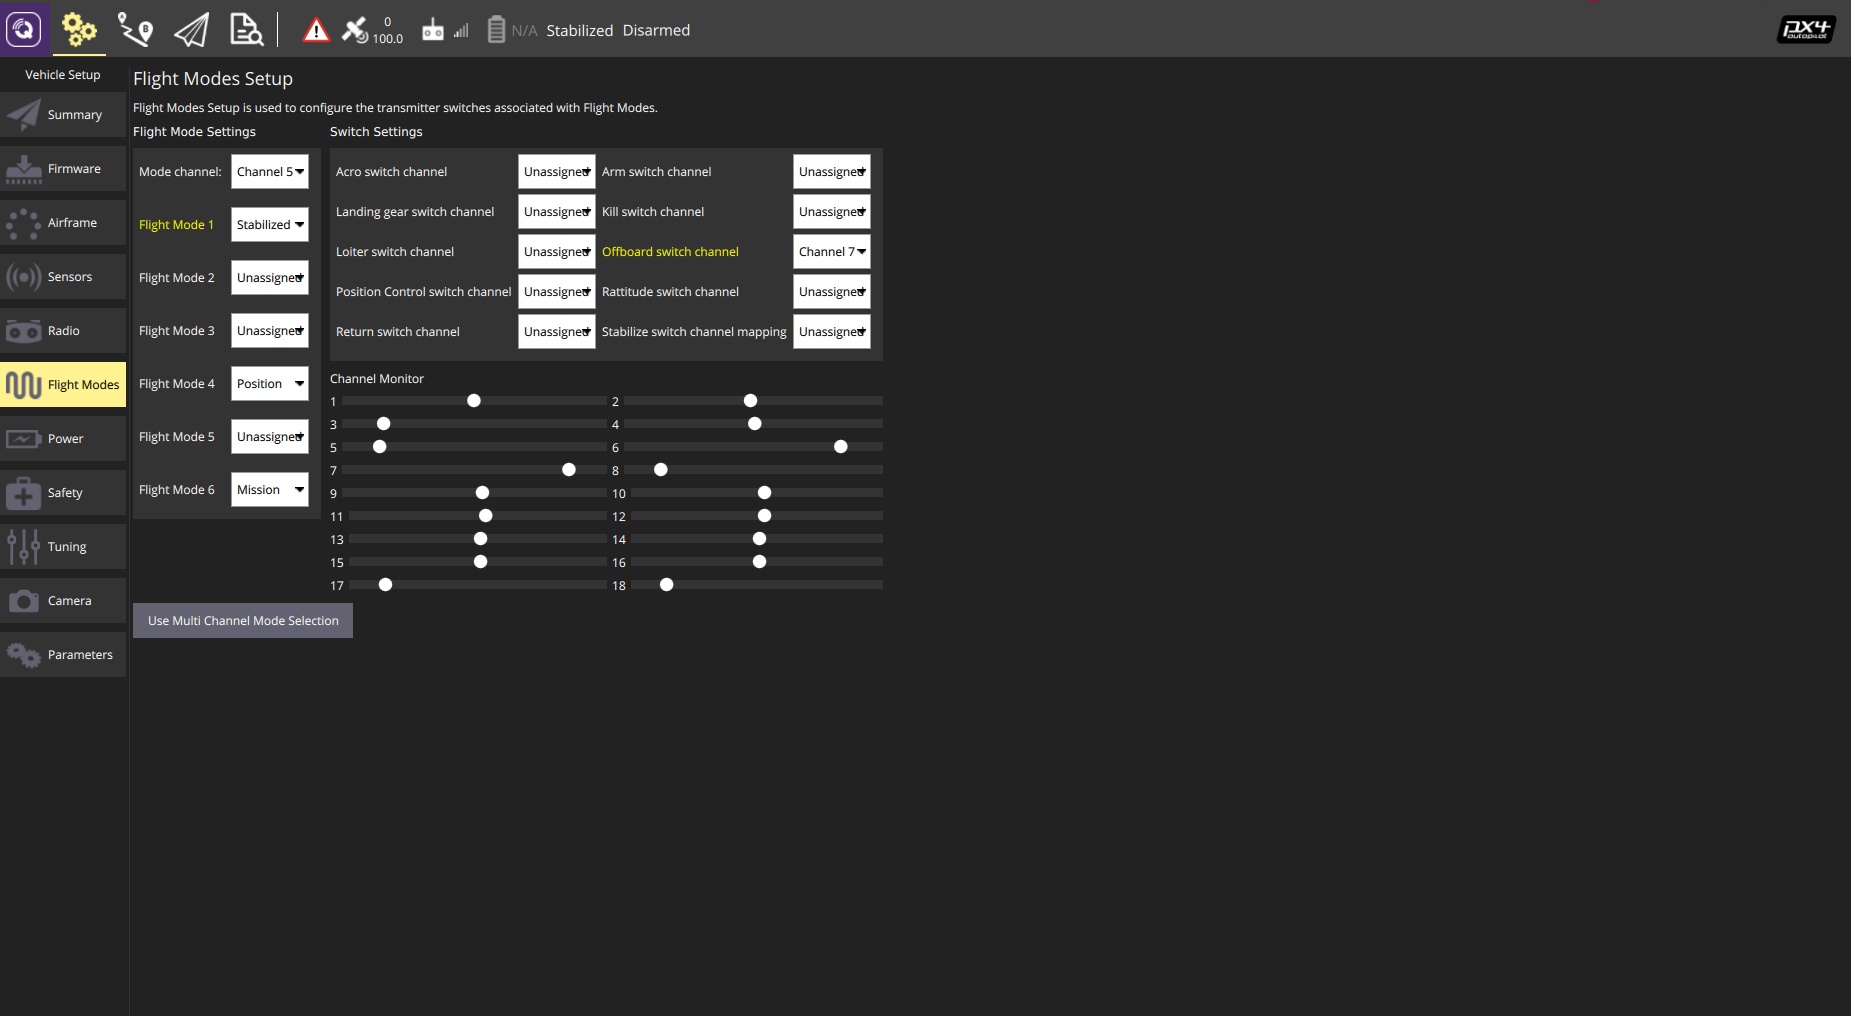
 Flight Mode Setting:
Users should allocate one channel (e.g. channel 5) for flight mode setting, and another (e.g. channel 7) for offboard control triggering. Users are suggested to set at least STABILIZED, POSITION and OFFBOARD modes for TAObotics Q.The STABILIZED and POSITION modes are used for manual control via the RC transmitter. To highlight here, the STABILIZED mode is for experienced pilots wherein joystick inputs are mapped to the attitude reference, while joystick inputs in POSITION mode are feed into the velocity reference. In the OFFBOARD mode, the uav is commanded by the onboard computer to achieve autonomous tasks such as waypoint flight, trajectory tracking, and visual tracking, etc. Another mode is called MISSION mode, wherein the uav will carry out autonomous waypoint flight tasks. Usually the MISSION mode is operated through the ground control station interface.
Flight Mode Setting:
Users should allocate one channel (e.g. channel 5) for flight mode setting, and another (e.g. channel 7) for offboard control triggering. Users are suggested to set at least STABILIZED, POSITION and OFFBOARD modes for TAObotics Q.The STABILIZED and POSITION modes are used for manual control via the RC transmitter. To highlight here, the STABILIZED mode is for experienced pilots wherein joystick inputs are mapped to the attitude reference, while joystick inputs in POSITION mode are feed into the velocity reference. In the OFFBOARD mode, the uav is commanded by the onboard computer to achieve autonomous tasks such as waypoint flight, trajectory tracking, and visual tracking, etc. Another mode is called MISSION mode, wherein the uav will carry out autonomous waypoint flight tasks. Usually the MISSION mode is operated through the ground control station interface.
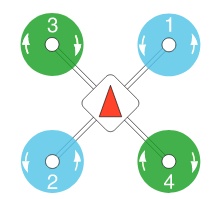
2. Propeller Mounting
For the sake of transportation safety, the propellers are not mounted on the airframe. We have to mount them properly according to the quadrotor configuration given below. Note carefully those rotation directions, and the wrench provided in the package can be used to save some efforts.
3. Manual Flight in Position Mode
The position mode is the easiest way for users to get the machine fly. The basic steps are listed in sequence:
Make sure that the battery voltage is sufficient, and the voltage should be above 4.0v per cell (16v for a 4S battery).
Mount the battery ready with a battery cable, make sure that it will not fall down during flight.
Make sure that all switches are in their initial position and the throttle channel is lowered down.
Power on with the battery.
Connect the telemetry on a PC, and monitor the UAV in the QGC interface.
Wait for the GPS to be fixed: usually we can hear a reminding sound after 2-3 minutes, and the main LED in the pixhawk will turn green.
Prearm the UAV by pressing the safety button for 1 second, and the button will be double-blinking. (Note: this step is not needed for TAObotics mini autopilot)
Arm the UAV by lowering down the throttle and move the yaw stick to the right, then we will hear a long beep from the machine. Pay attention to the channel differences between American and Japanese hands.
Switch to the POSITION mode with the specified stick (e.g. channel 5).
Push the throttle stick slowly above the middle, and the UAV will take off smoothly.
Pull down the throttle stick slowly if we’d like the UAV to land.
Disarm the UAV after it lands successfully by lowering down the throttle and move the yaw stick to the left.