Gemini User Manual
1 Introduction
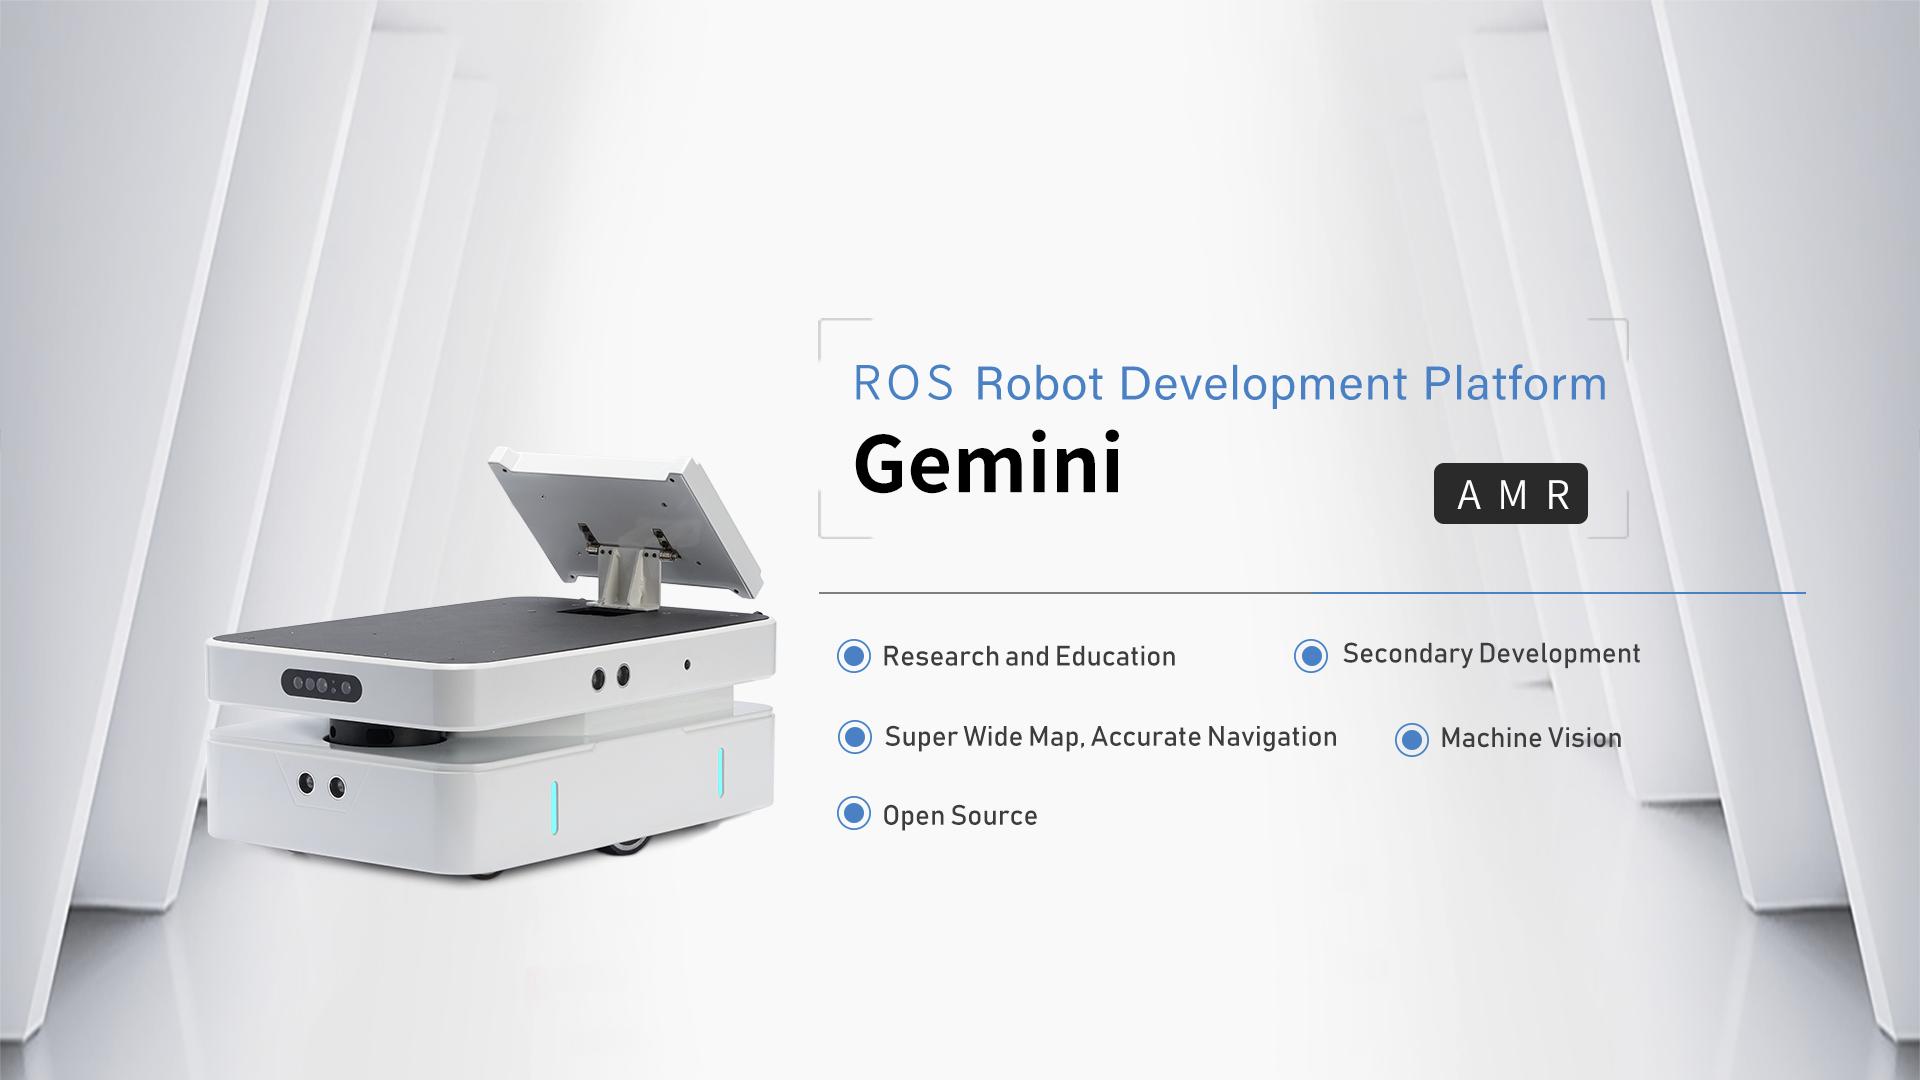
Gemini is an open source robot platform for scientific research, education and personal development. It is finely designed and cost-effective. Gemini combines AGV and AMR robots concepts, based on two-wheel differential motion mechanism, integrates more than 10 sensors such as lidar, depth camera, ultrasonic array, microphone array, monocular array, etc., and provides NVIDIA's rich computing resources. Rich ROS/ROS2 software package and simulation environment are provided for beginner developers, and users can easily develop functions such as robot systems, positioning and navigation, voice vision, machine learning, warehousing and logistics.
2 Package Contents
The list of Gemini high-end shipments is as follows, the following list is for reference only
| No. | Name | Image | Quantity |
|---|---|---|---|
| 1 | Gemini Robot | 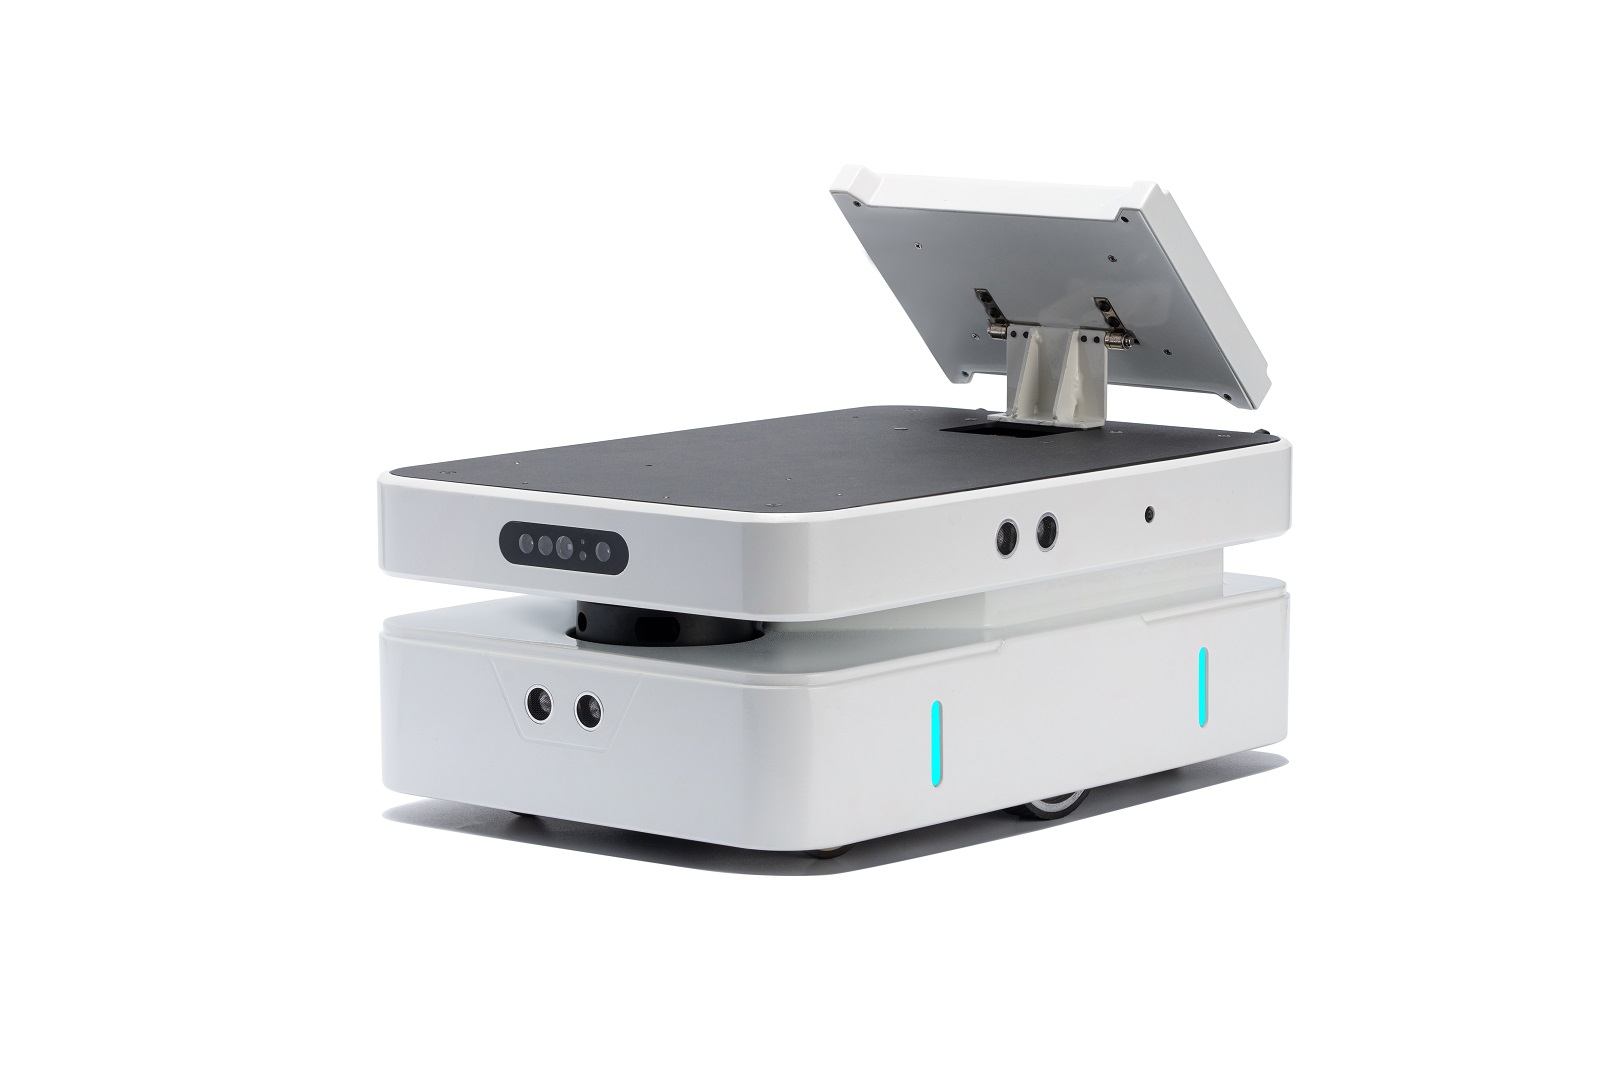 |
x1 |
| 2 | Battery Charger (12.6V/4A) | 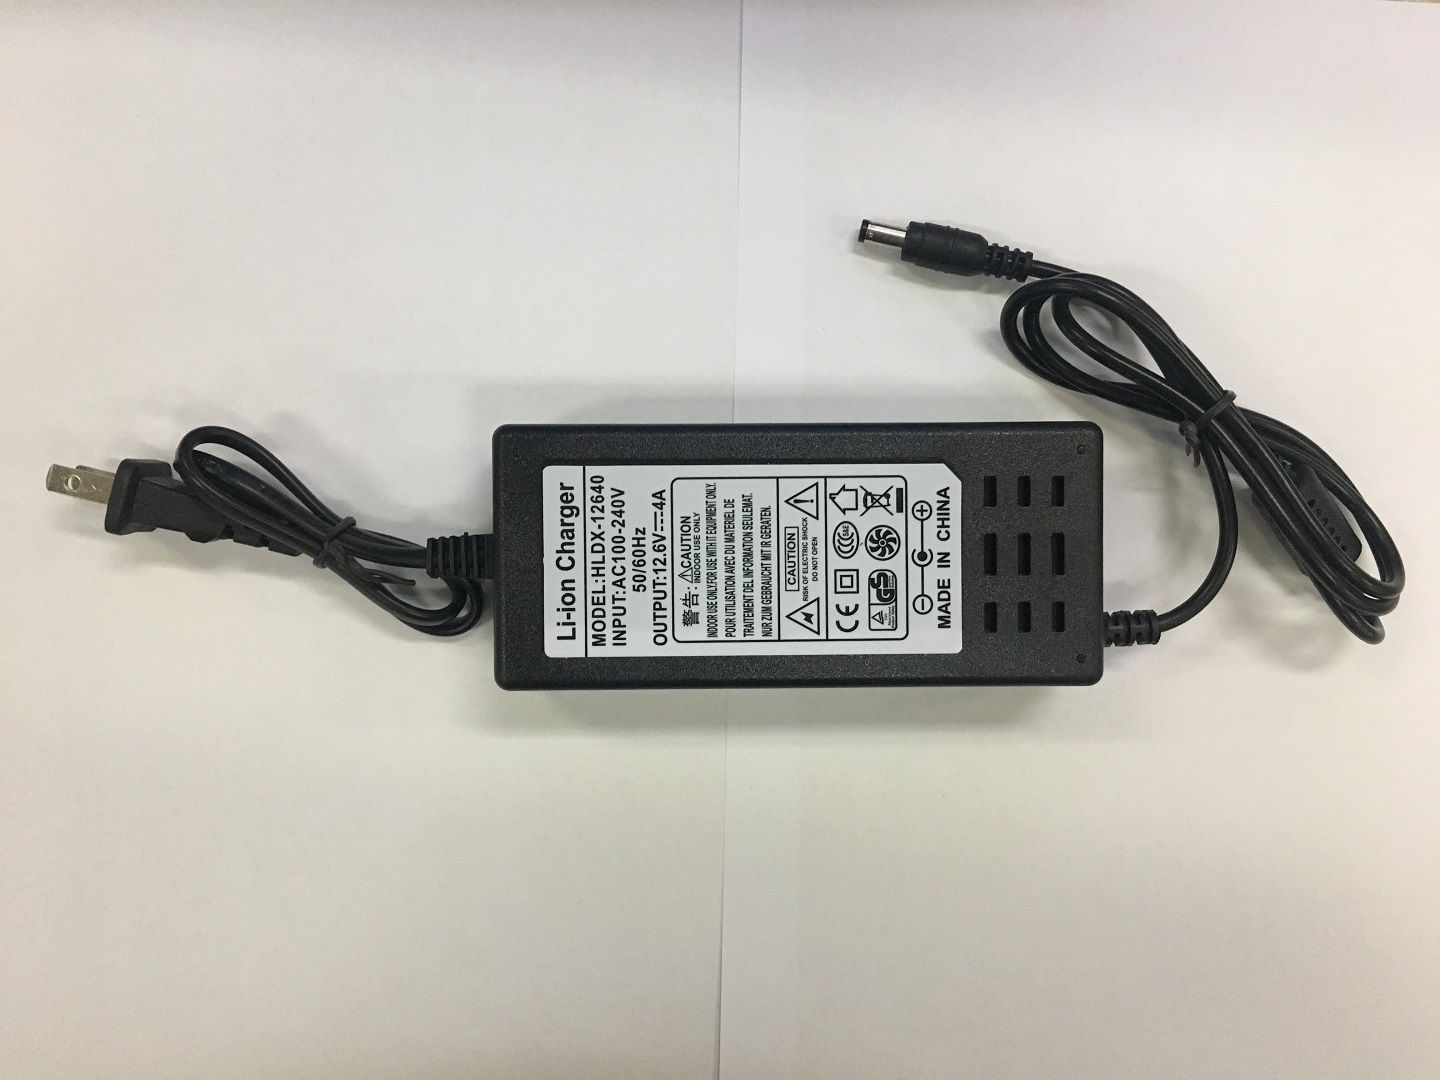 |
x1 |
| 3 | Tool |  |
x1 |
| 4 | Product Warranty Certificate/After-Sale Service Manual |  |
x1 |
| 5 | Inspection Sheet | 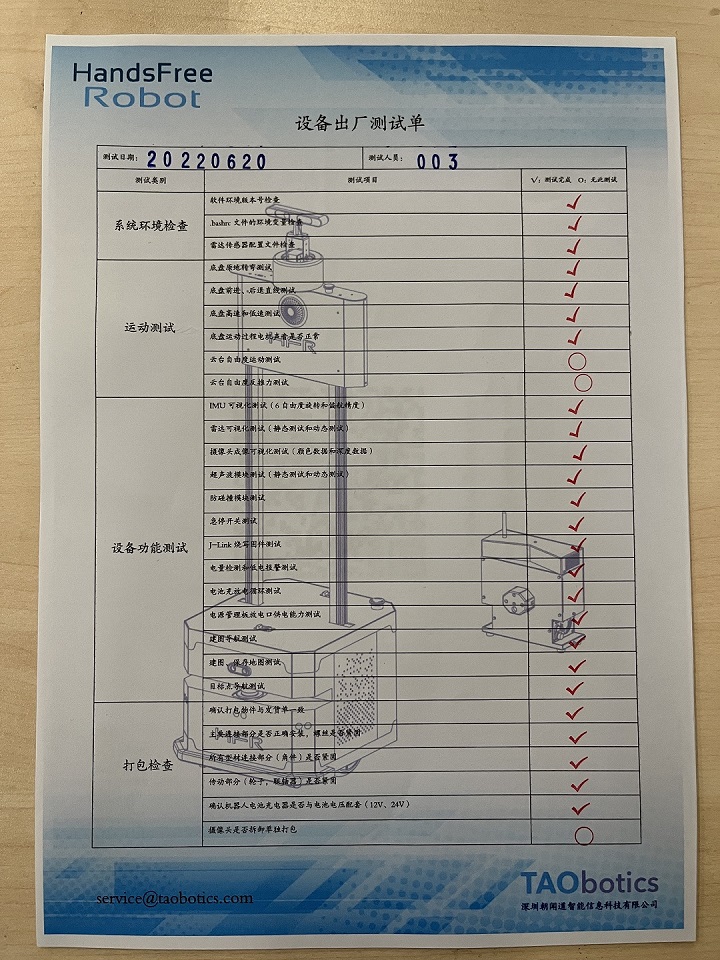 |
x1 |
| 6 | Product certificate |  |
x1 |
3 Product Overview
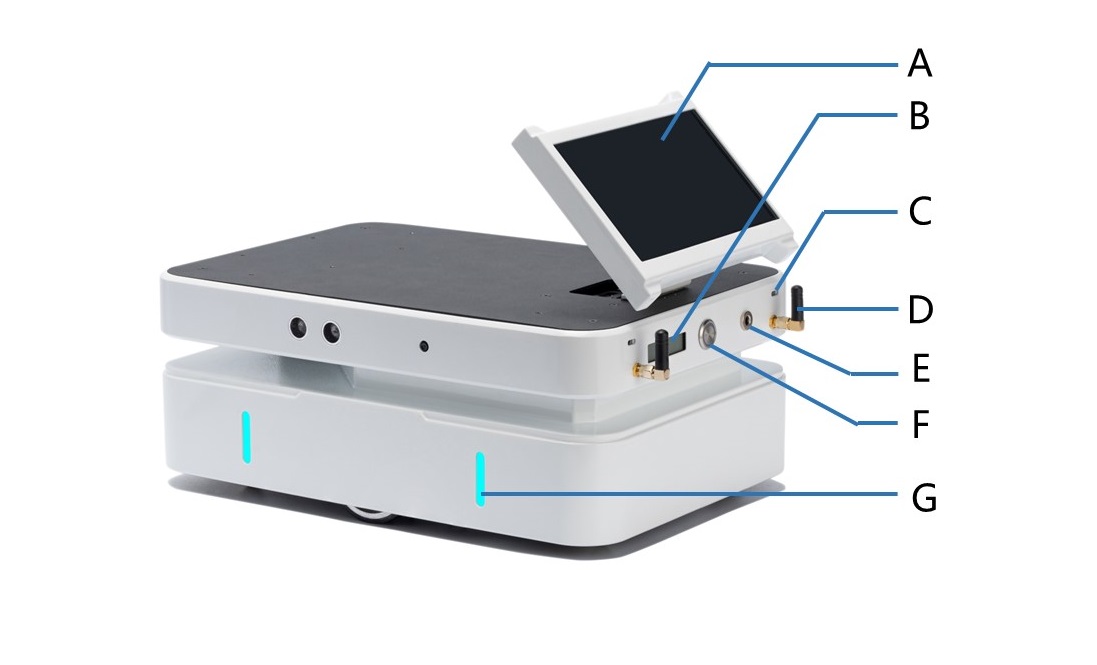
3.1 The Basic
| No. | Description |
|---|---|
| A | 7-inch touch screen |
| B | Battery display |
| C | Microphone x 2 |
| D | WiFi Antenna |
| E | High Speed Charger |
| F | Power Switch |
| G | RGB Strip x 4 |
| No. | Description |
|---|---|
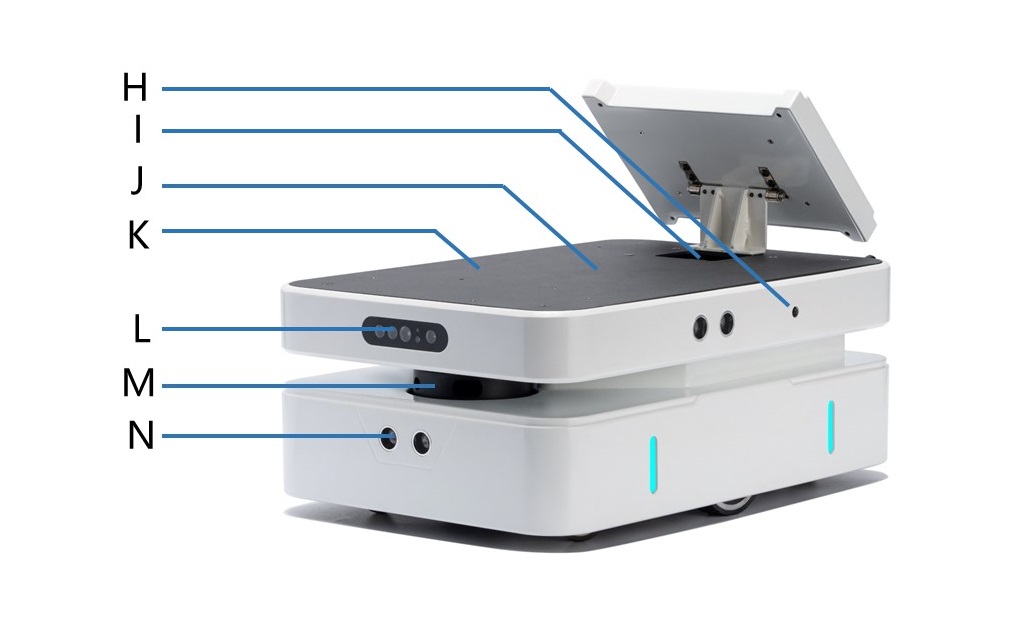
| H | Monocular Camera x 2 |
| I | Power Expansion Interface |
| J | 6-axis IMU |
| K | High-power speaker x 2 |
| L | RGBD Camera |
| M | Lidar |
| N | Ultrasonic x 3 |
3.2 Status Indication
Users can determine the status of the robot through the battery display, buzzer and lights installed on the Gemini.
| Status | Description |
|---|---|
| Current voltage | The current battery voltage can be read from the voltmeter on the rear electrical interface and with an accuracy of 0.1V |
| Low voltage alarm | When the battery voltage is lower than 10V, the robot will will give a harsh sound of "di-di-di" as warning. |
| Power on | When powered on, the buzzer will make a "di~" sound, and the power display module and the screen will light up |
3.3 Safety Information
3.3.1 Environment Considerations
- When using for the first time, please read this manual robotefully to understand the basic operation content and operation specifications.
- Use gemini always under -20℃~45℃ ambient temperature.
- If Gemini is not configured with separate custom IPprotection, its water and dust protection will be IP22 ONLY.
- Make sure the device has sufficient power.
- Make sure gemini does not have any obvious defects.
3.3.2 Inspection
- Please charge in time when the device is low battery alarm.
- When Gemini has a defect, please immediately stop using it to avoid secondary damage.
- When device has had a defect, please contact the relevant technical to deal with it, do not handle the defect by yourself.
3.3.3 Operation
- Ensure that the area around is relatively spacious.
- Control within sight distance.
- The maximum load of Gemini is 20 kg.
- When installing an external extension on Gemini, confirm the position of the center of mass of the extension and make sure it is at the center of rotation.
3.3.4 Charging
- Gemini products are equipped with a 5V/4A charger by default, which can meet the user's charging needs;
- We recommend that you turn the robot off before charging. And there is no indicator light provided on the site while charging. For specific indicator lights, please refer to the description on the charger.
- Please make sure the Gemini chassis is powered off when charging, and make sure the tail switch is turned off.
- When charging, make sure the ambient temperature is greater than 0°C;
- Insert the plug of the charger into the charging port at the rear of the robot;
- Connect the charger to power supply and turn on the switch in the charger. Then, the robot enters the charging state;
3.3.5 Maintenance
- According to the IP protection level of the device,please use Gemini in the environment with the protection level requires for the equipment.
- Do not push the robot directly after the vehicle is turned on, this behavior will damage the motor or wheel and other structures;
3.3.6 Preparation before use
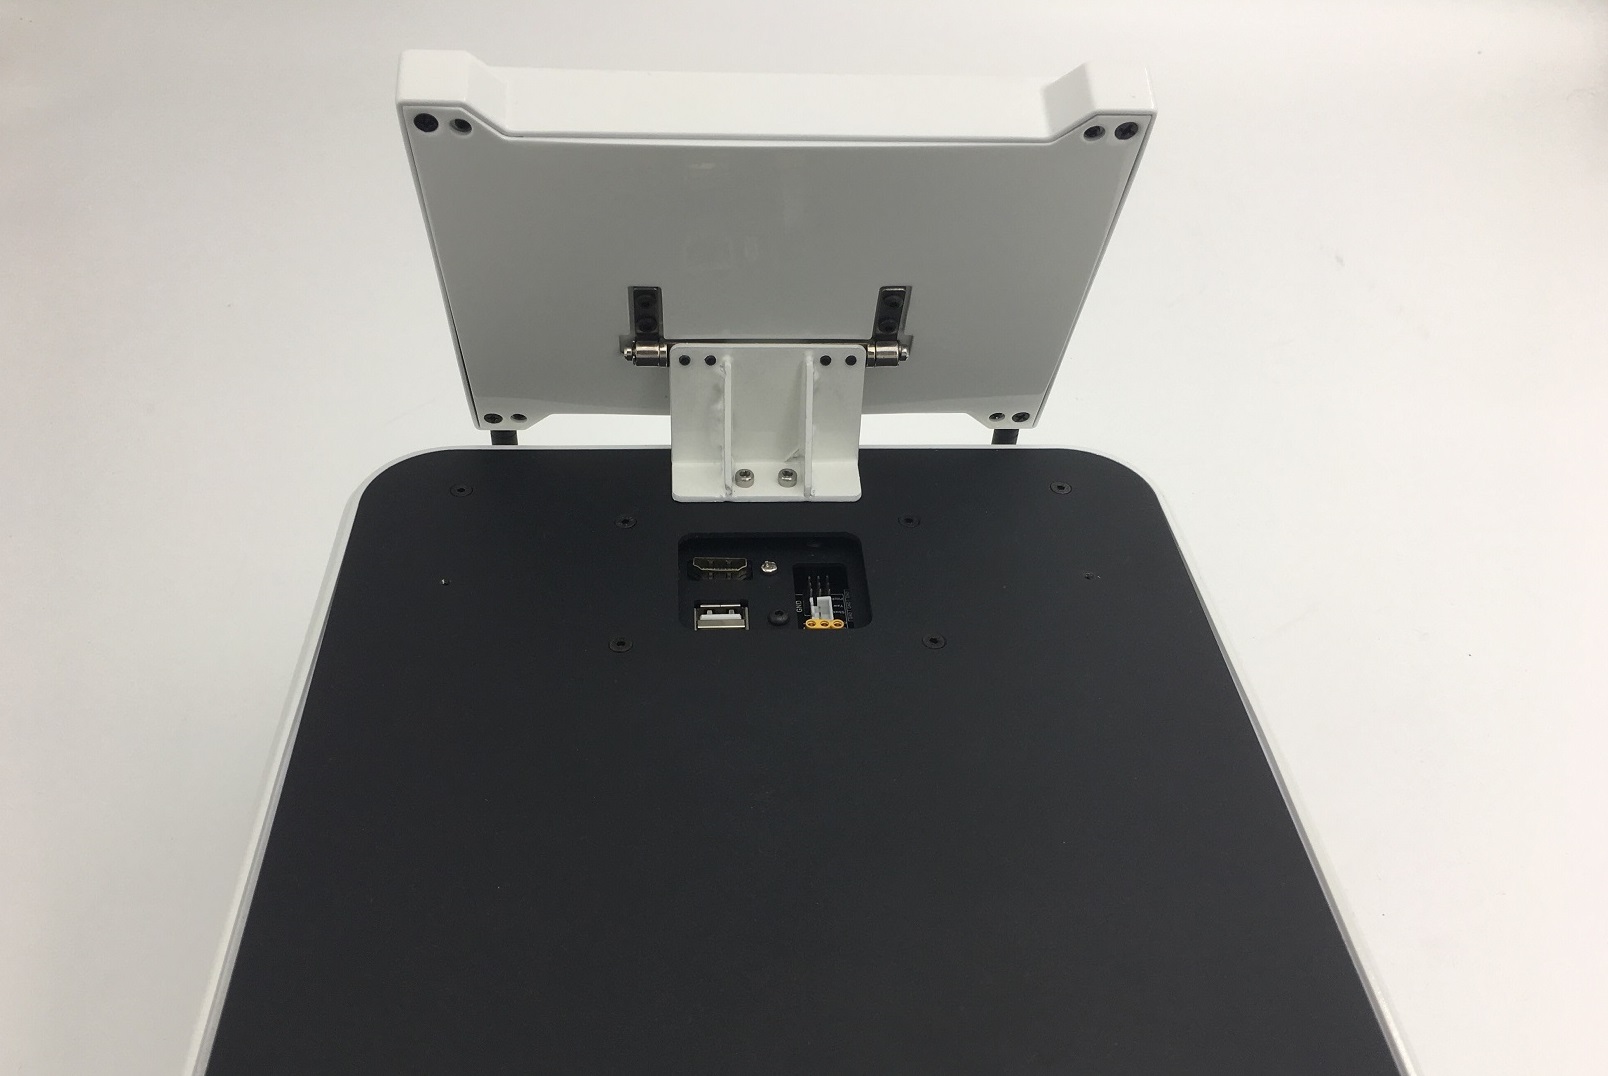
For safety during transportation, this product is shipped without a screen installed. After receiving the unmanned vehicle, users should refer to the following content to install the screen before using it. Gemini's accessories include screws and wrenches to install the screen
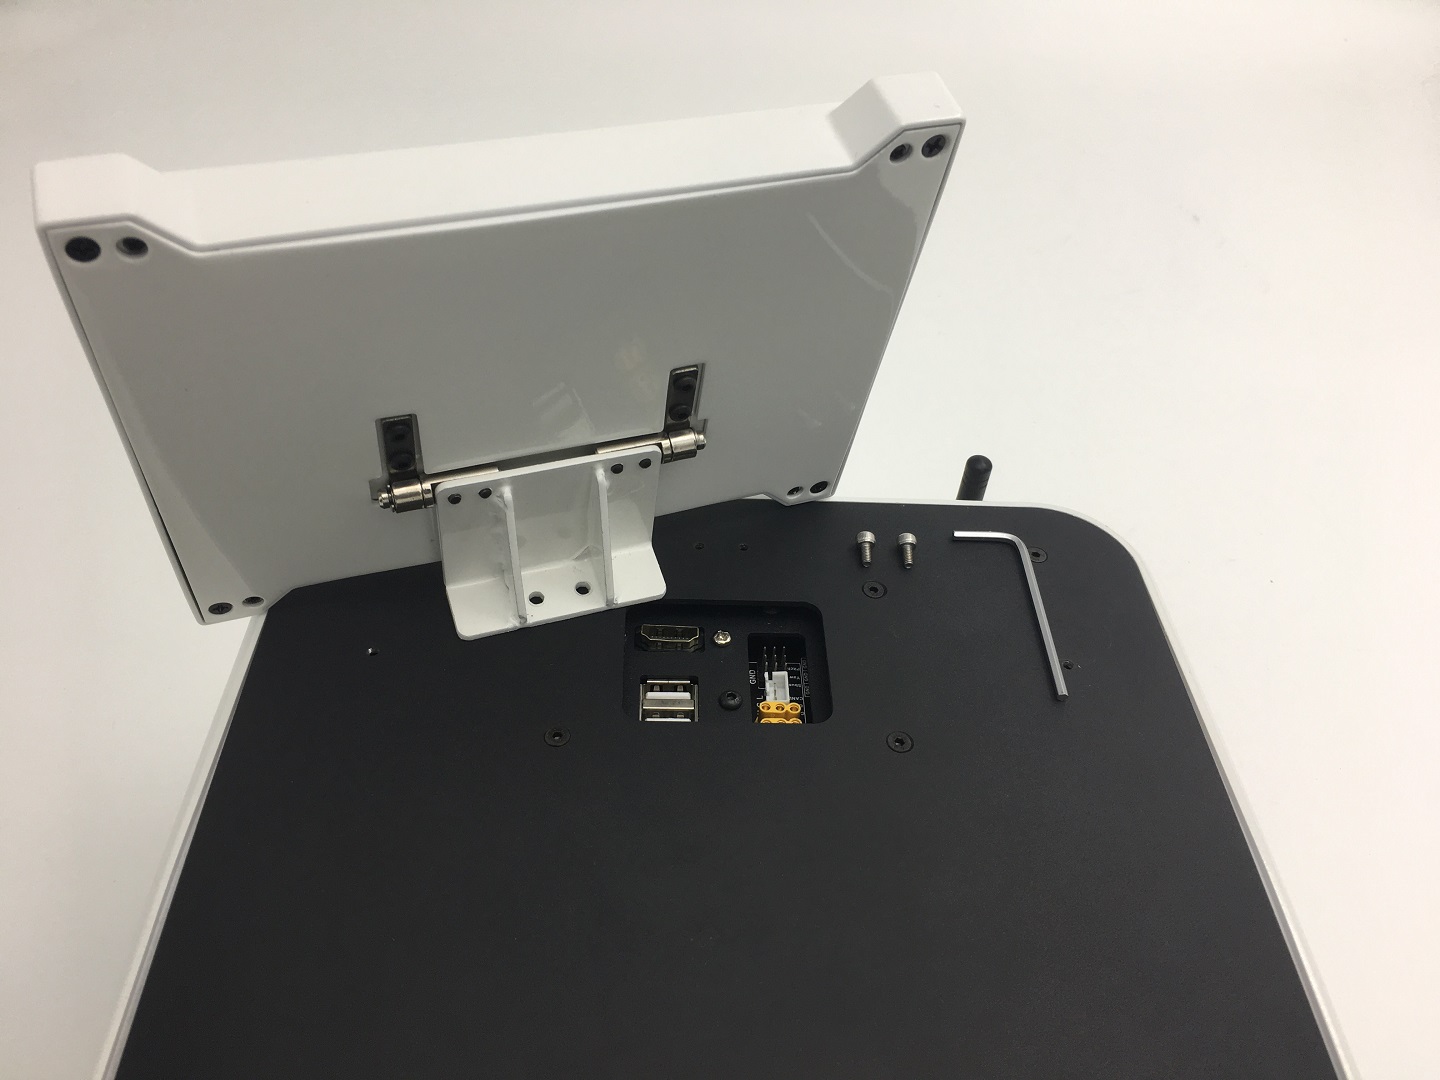
Users can choose the corresponding type of wrench to screw the screws into the holes of the installation screen, as shown in the figure below after the installation is completed.
After that, the user needs to connect the power supply cable and HDMI cable of the screen. The power supply cable and HDMI cable are as shown in the figure below.
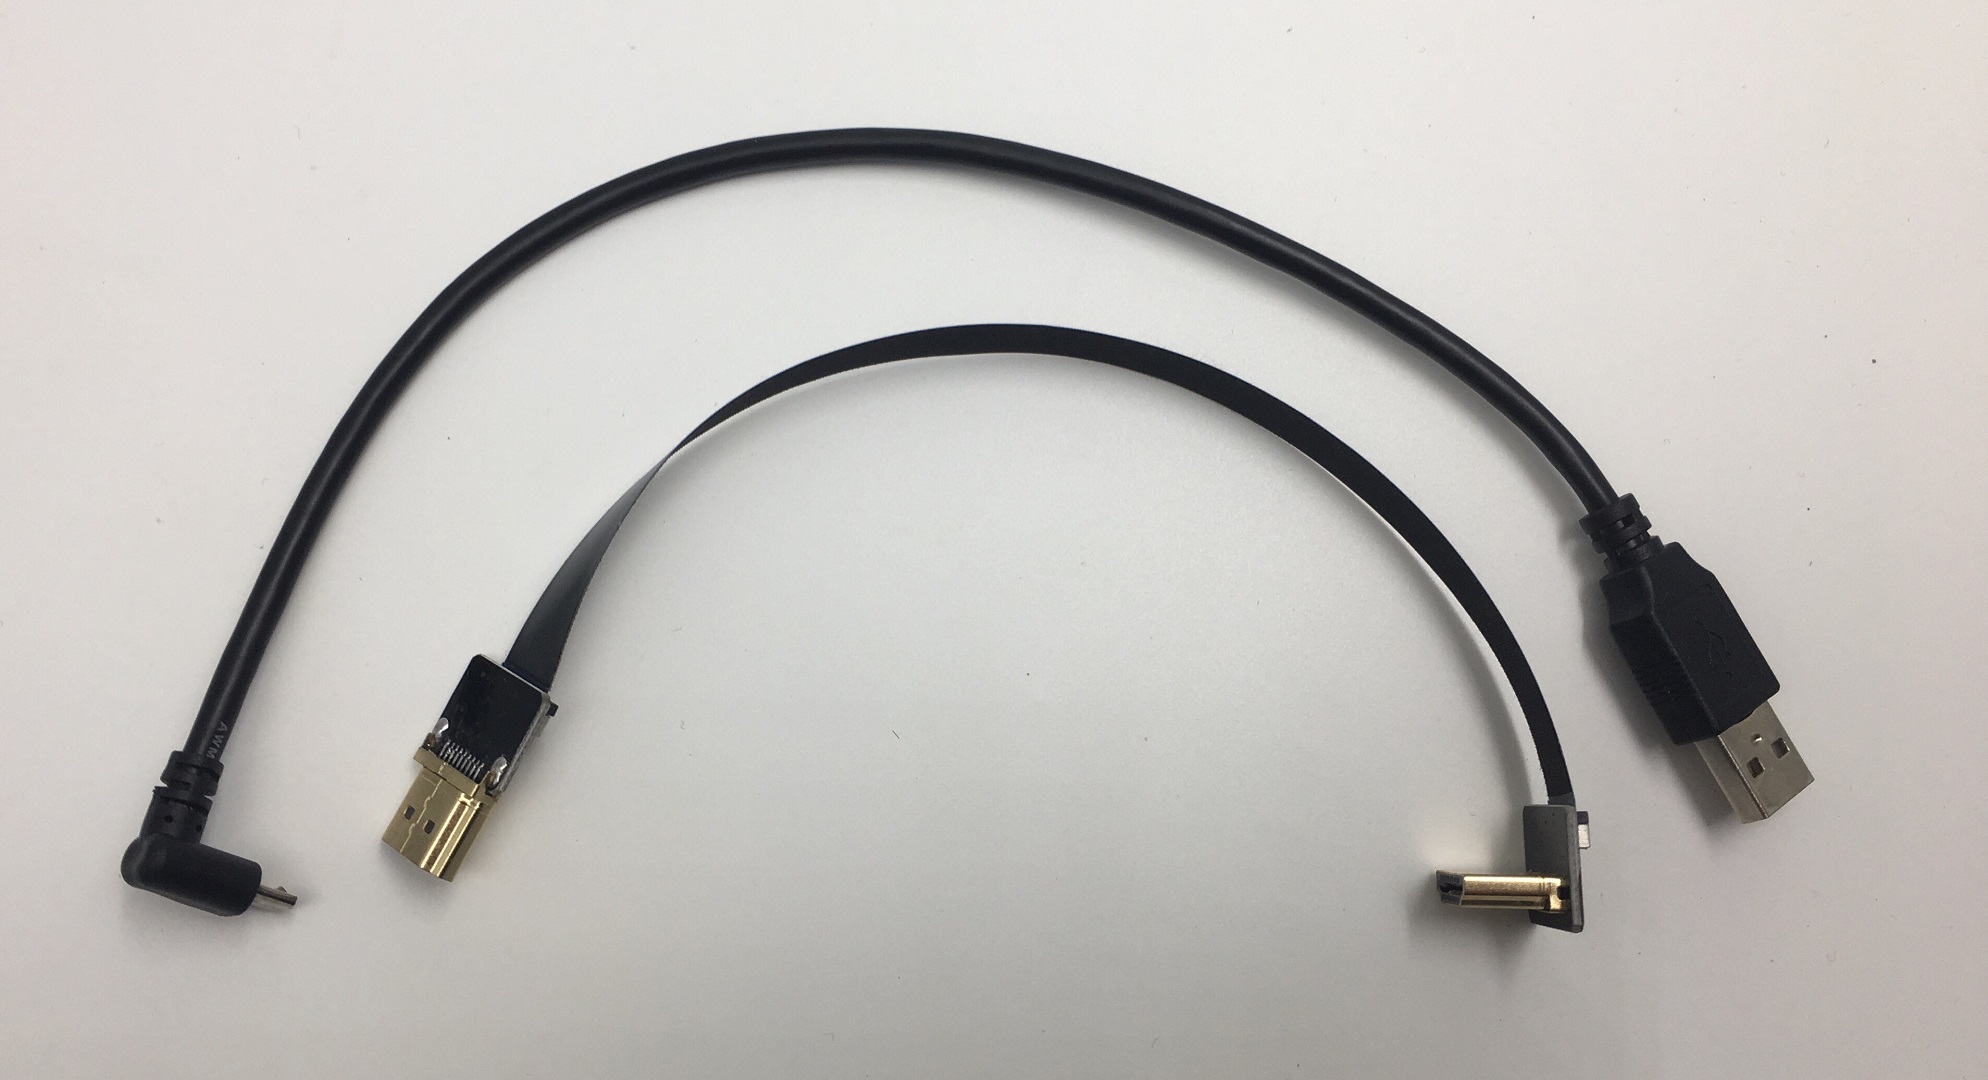
Users can refer to the following diagram to connect these two lines,There is one HDMI interface and two Micro b interfaces on the screen. If the upper interface is connected, the touch function of the screen can be enabled. Users can choose which interface to use according to their own needs.
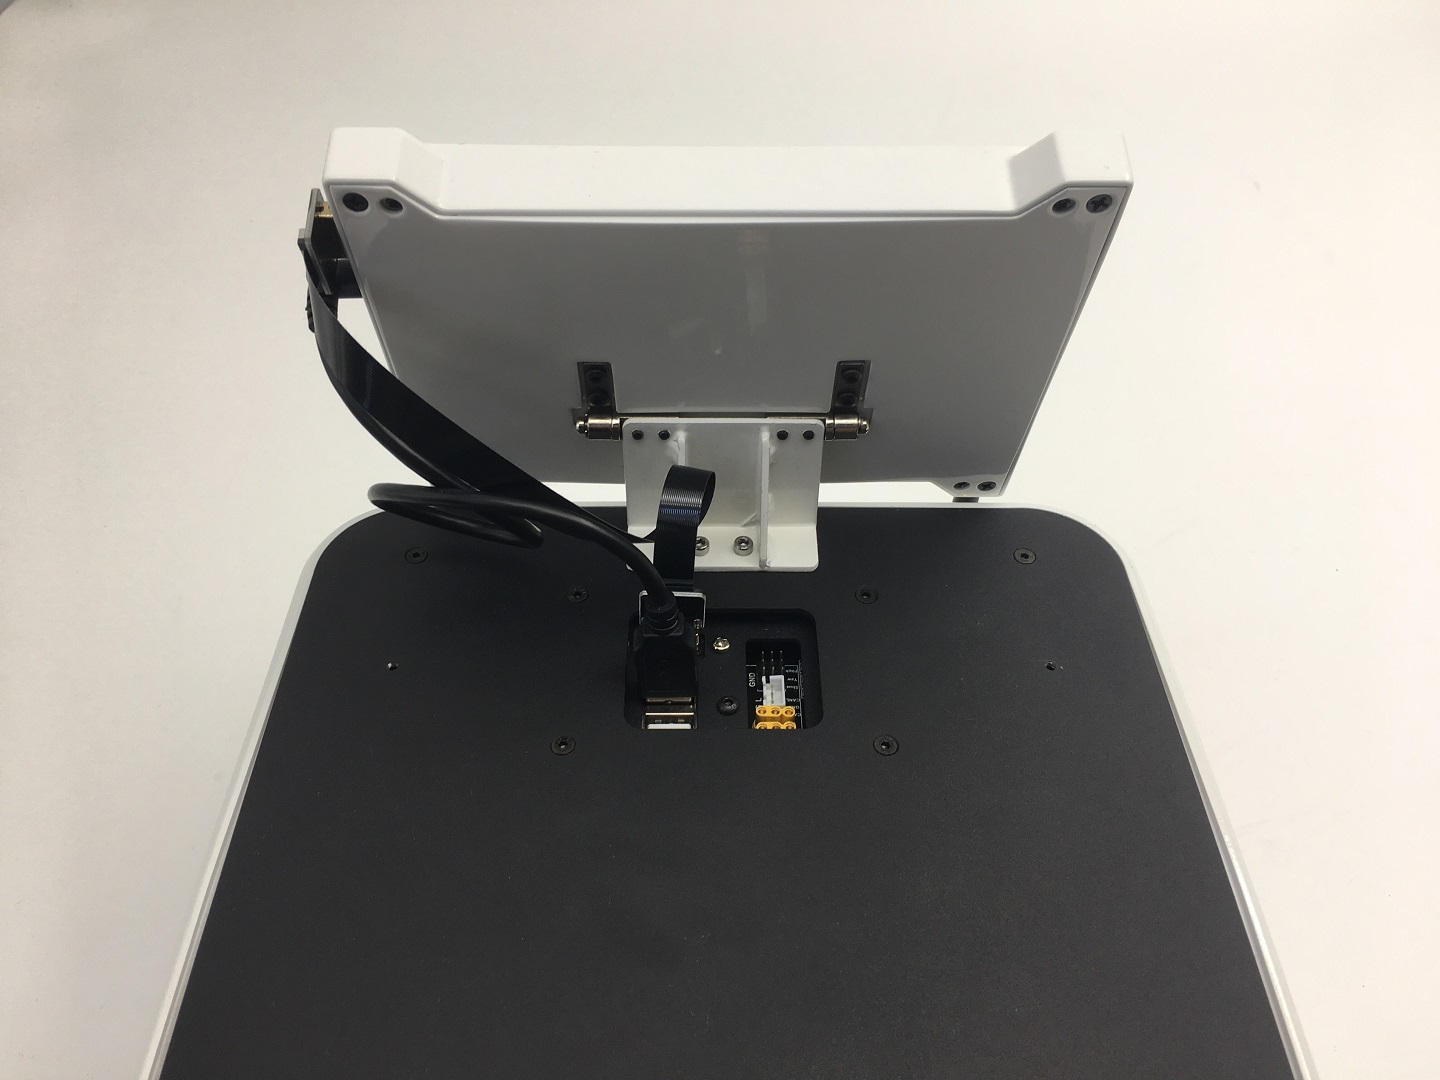
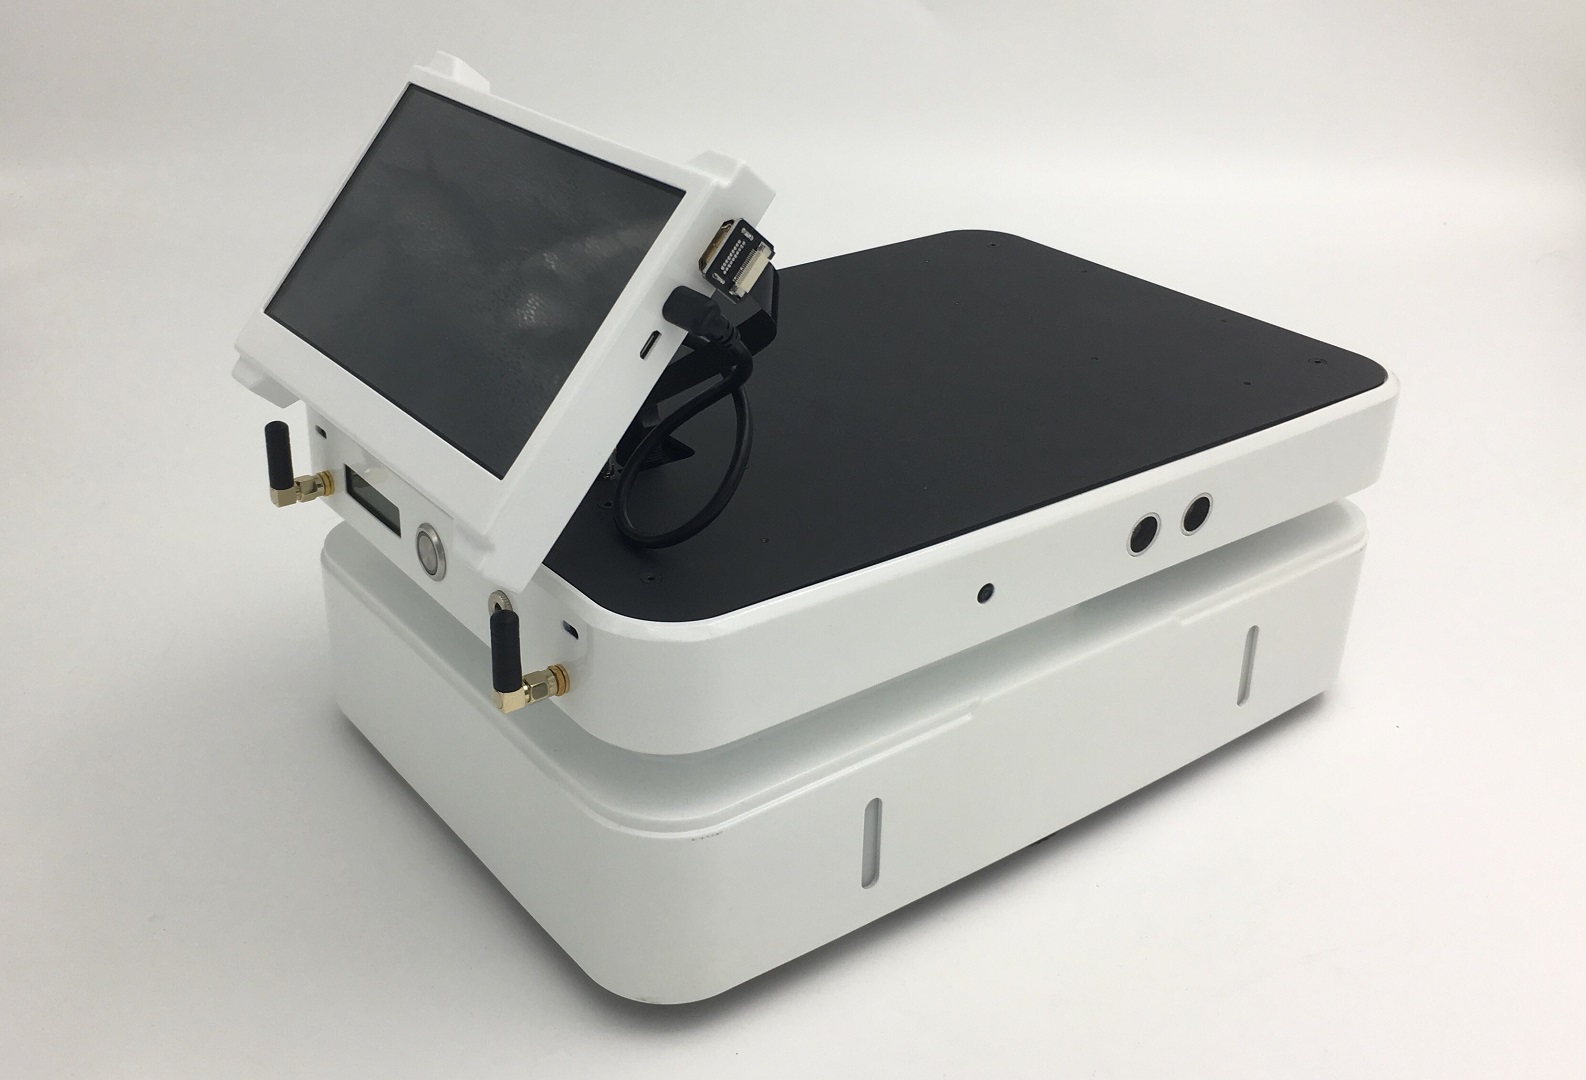
The connected robot is shown in the figure below
4 Performance parameters
| Parameter Type | Item | Indicator |
|---|---|---|
| Hardware Parameters | Dimensions (mm) | 350x235x140 |
| Chassis height (mm) | 12 | |
| Driven mode | 2-wheel differential, 2 driven wheels at the front and rear, front swing arm suspension | |
| Self-weight (kg) | 5kg | |
| Maximum load | 5kg | |
| Maximum speed | 0.65m/s | |
| Maximum climbing angle | 25° | |
| Battery | 15000mAh(15Ah) 12V | |
| Power connector | DC (5.5x2.5mm) | |
| Power extension | 12V 5Ax2, 5V 2A x2 | |
| Working hours | 4h | |
| Standby time | 8h | |
| Indicators | 2 RGB strips | |
| System Parameters | Industrial Computer | NVIDIA Jetson Nano(4G) |
| CPU | Quad-core ARM A57 @1.43GHz | |
| GPU | 128-core Maxwell | |
| System | Ubuntu 18.04LTS | |
| ROS version | ROS Melodic | |
| Communication interface | USB, WiFi, HDMI ,CAN ,Sbus | |
| Speaker | 2x3Watt High Power Speaker | |
| Display | 7 inch 1024x600 touch screen | |
| Sensors | 6-axis IMU | MPU6050 |
| Motor encoder | 3 | |
| Ultrasonic | 1 ultrasonic, detection distance 450mm | |
| HD camera | 2 camera, 120 degrees without distortion, 8 million pixels | |
| Lidar | Maximum detection distance 16m | |
| RGBD camera | 120 degrees without distortion, 8 million pixels | |
| Voice module | Two microphones, Snowboy Voice Assistant supported |
5 Main Components
5.1 Computer Parameters
| Projects | Metrics |
|---|---|
| CPU | Ouad-Core ARMCortex-A57 MPCore |
| Frequency | 64bitSoca1.43GHz |
| GPU | 128-core NVIDIAMaxwellTM GPU |
| AI Performance | 473 GFLOPS |
| Memory | 4GB 64-bit(LPDDR425.6GB/s) |
| WiFi | Self-provisioning required |
| Bluetooth | Self-configured |
| Network | Gigabit Ethernet (RJ45) |
| POE Powered | Yes |
| Rated Power | 5W-10W |
| Display | HDMI Display Port |
| Camera | CSI |
| IO | 40pin |
| USB | 4xUSB 3.0 |
5.2 RGBD camera parameters
| Item | Values |
|---|---|
| Baseline | 40mm |
| Depth Range | 0.3m—3m |
| Power Consumption | The average power consumption of the whole machine is less than 2W, the peak value of the laser is less than 5W (duration 3ms), and the standby power consumption is typically less than 0.7W |
| Depth Map Resolution | 640x400@30fps 320x200@30fps |
| Color image resolution | 1920x1080@30fps 1280x720@30fps 640x480@30fps |
| Accuracy | TBD |
| Depth FOV | H 67.9°, V 45.3° |
| RGB FOV | H 71°, V43.7° @1920x1080 |
| Delay | 30-45ms |
| Data transfer | USB2.0 or above |
| Supported Operating Systems | Android/Linux/Windows7/10 |
| Power Supply | USB |
| Working temperature | 10℃ ~ 40℃ |
| Application Scenarios | Indoor |
| Dustproof/Waterproof | Basic dustproof |
| Rating | Class1 Laser |
| Dimension(mm) | 59.6 x 17.4 x 11.1mm |
5.3 Lidar Parameters
| Item | Min | Typ | Max | Units | Remarks |
|---|---|---|---|---|---|
| Ranging frequency | / | 10000 | / | Hz | / |
| Scan Frequency | 5 | 7 | 12 | Hz | / |
| Ranging Range | 0.12 | / | 16 | m | 80% Reflectivity |
| Scan Angle | / | 0-360 | / | ° | / |
| Absolute Error | / | 2 | / | cm | Range≤1m |
| Relative Error | / | 2.0% | / | / | 1m<Range≤8m |
| Angular Resolution | 0.18@5Hz | 0.25@7Hz | 0.43@12Hz | ° | / |
5.4 Ultrasonic parameters
| Item | Parameter |
|---|---|
| Detection Distance | 2-450cm |
| Detection Accuracy | 1cm |
| Detection Frequency | 20Hz |
| communication interface | TTL serial port |
| Output method | USB output |
5.5 Wireless network robotd parameters
| Item | Parameter |
|---|---|
| NIC chip | Intel 8265AC |
| Wireless Band | 2.4GHz/5GHz |
| Wireless Rate | 300Mbps/867Mbps |
| WiFi Protocol | 802.11ac |
| Bluetooth Version | 4.2 |
6 Expansion Board
A power supply and signal expansion interface for secondary development are reserved above the Gemini. The details are as follows.
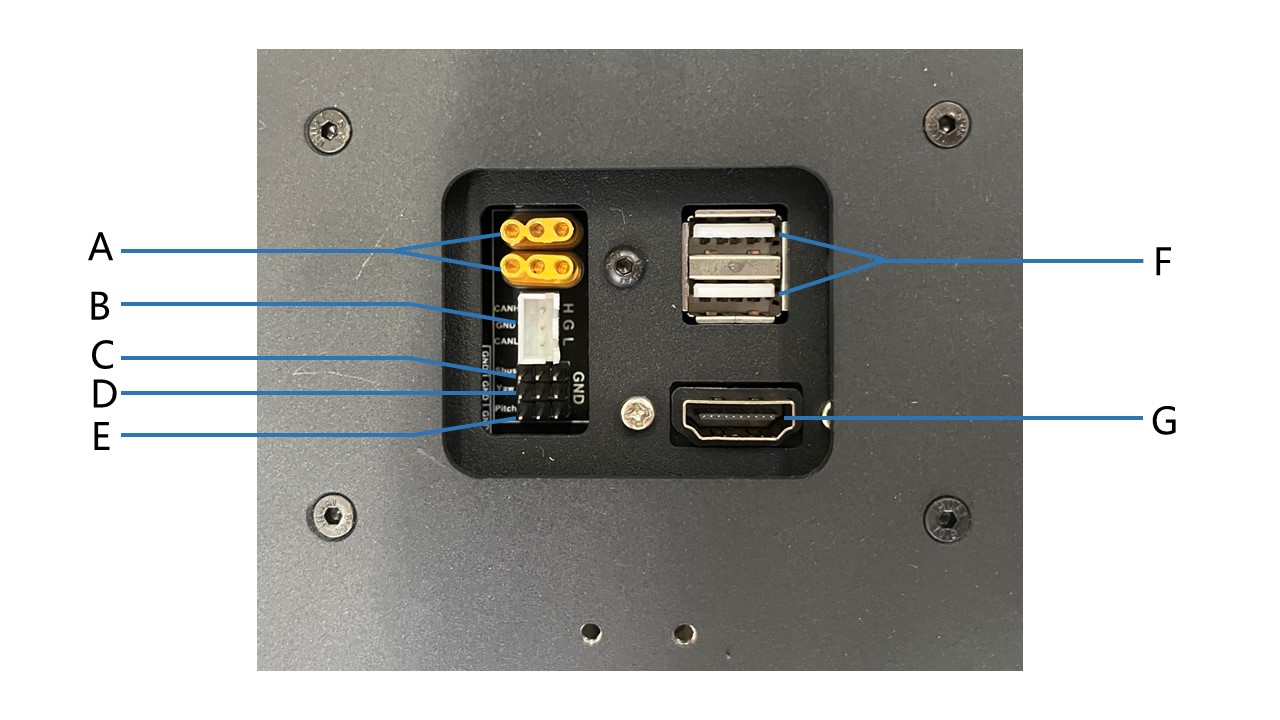
| No. | Name | Description |
|---|---|---|
| A | MR30 power expansion interface x 2 | The first hole on the left is GND, and a 12V current is formed between it and the second left hole, and a 5V current is formed between it and the third left hole |
| B | CAN bus expansion interface | CANH, GND and CANL from top to bottom |
| C | Sbus signal expansion interface | Sbus remote control signal expansion interface |
| D | 2 axis head signal extension | Yaw Signal Extension |
| E | 2 axis head signal extension | Pitch Signal Extension |
| F | USB expansion interface x 2 | USB 2.0 |
| G | HDMI signal expansion interface | HDMI signal interface |
7 Q&A
Q: After Gemini is powered on, the host is turned on and the screen does not light up
A:
Cause analysis: the power supply line or HDMI line of the screen is loose due to the long-term movement of the unmanned vehicle, which makes the screen unable to display content normally.
Solution: check whether the connection of these two wires is tight. If it is loose, reconnect it.
Q: Gemini's movement performance is abnormal, such as when using the keyboard remote control to walk in a straight line, the left or right deviation is serious, and everything displayed in the odometer is normal, or the navigation program cannot be executed normally
A:
Cause analysis: the wheels are loose due to the long-term movement of the unmanned vehicle
Solution: the user can check whether the fastening screws of the tire are loose. If they are loose, use tools to tighten the screws.