Turtle User Manual
1 Product Introduction
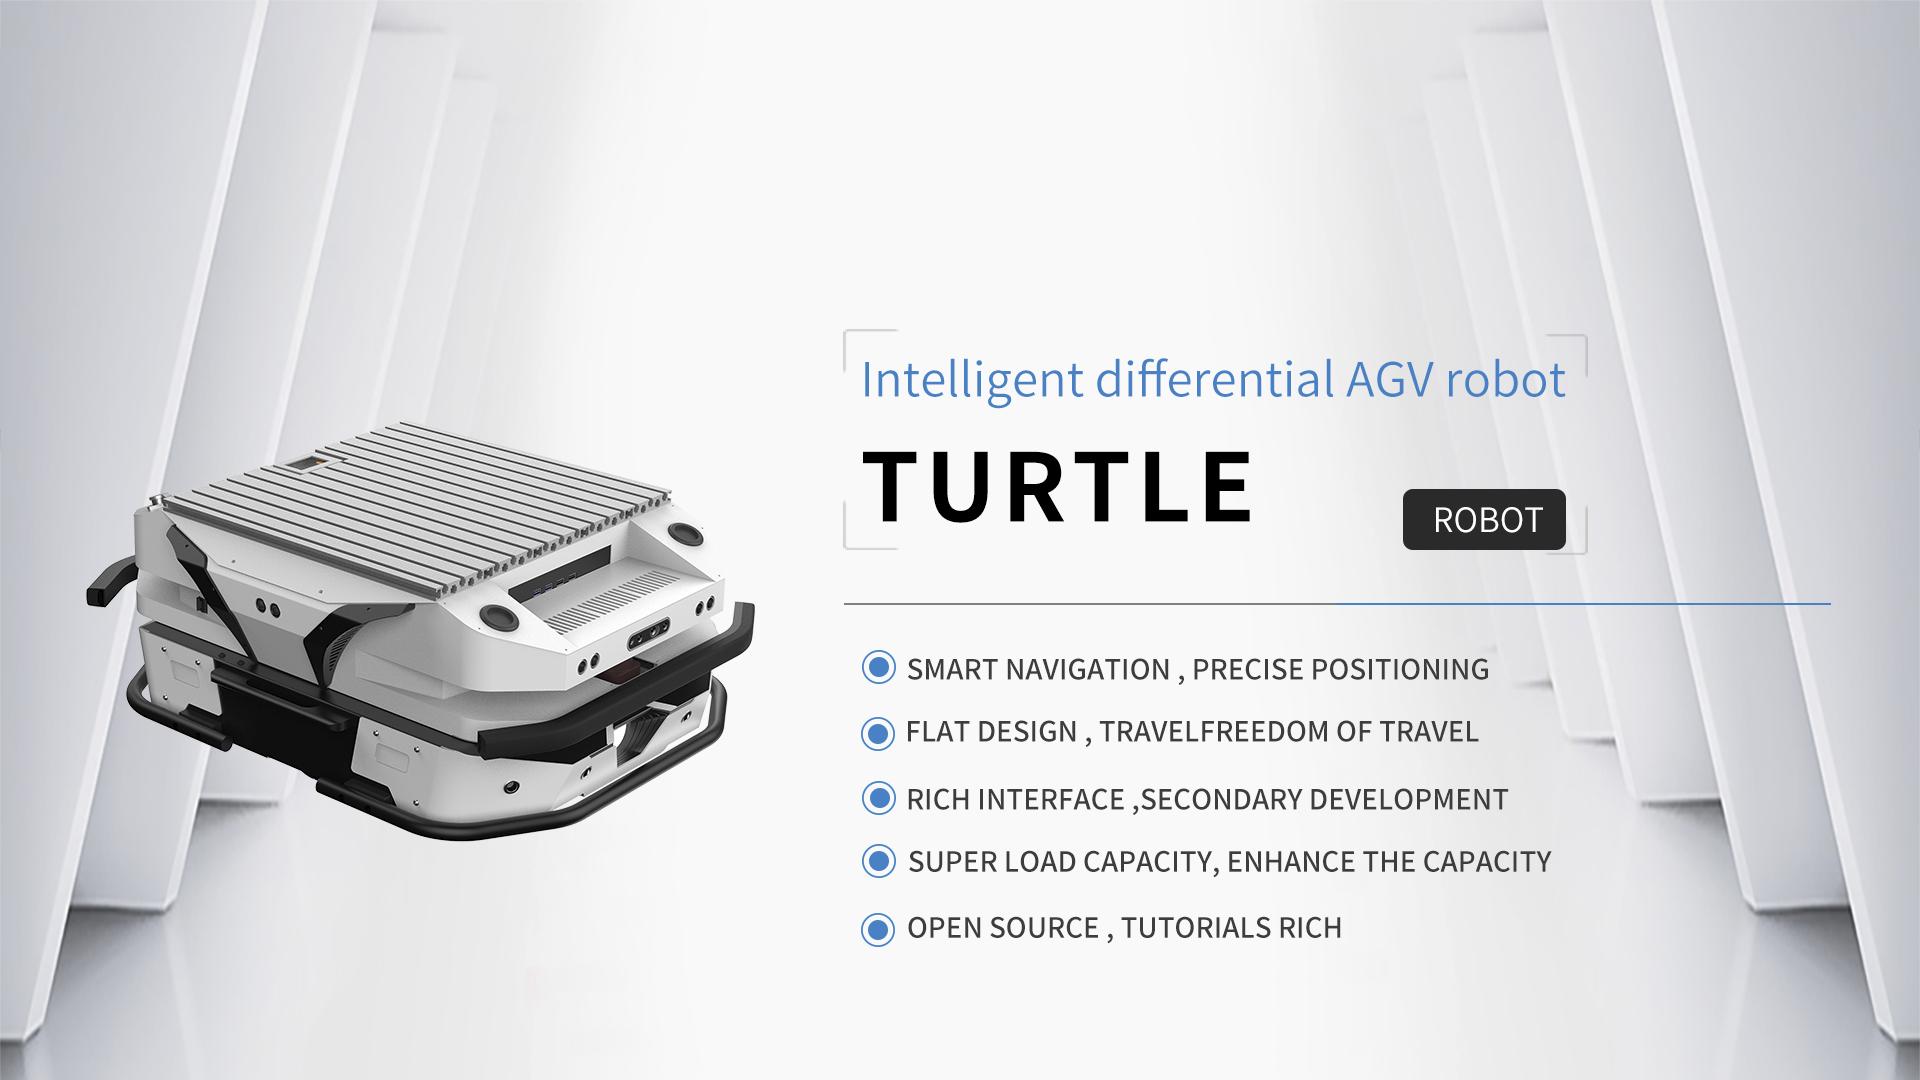
Turtle is a two-wheeled differential speed AGV with a flat design,which can drive itself indoors and outdoors through integrated navigation and obstacle avoidance software.
It integrates peripherals such as odometer, lidar, stereo camera, high-definition camera and voice input and output array, and includes functions like autonomous navigation, object recognition, human tracking, and speech recognition,etc.
In addition, Turtle has the advantages of low cost, high efficiency and fast deployment,which is cost-effective in indoor transportation scenarios.
With the secondary development interfaces and detailed teaching courses,Turtle is an ideal platform for user to to teach and learn,innovate and apply, research and compete in the field of intelligent robotics.
The Turtle robot can be installed with different kits to achieve diverse functions and applications. For example, after being equipped with a collaborative robotic arm, the robot can be used for object grasping, greenhouse picking, and research related to robotic arm motion planning. And if it is equipped with a patrol kit, it can be used for indoor security patrols such as warehouses and parks.
Turtle robot is suitable for internal logistics, greenhouse picking and other scenarios.And the electrical interfaces and communication interfaces are provided at the top of the robot to facilitate secondary development.With autonomous navigation, obstacle avoidance, and precise positioning functions,Turtle providing users with diversified application solutions.
2 Package Contents
The list of Turtle high-end shipments is as follows, the following list is for reference only
| No. | Name | Image | Quantity |
|---|---|---|---|
| 1 | Turtle Robot Body | 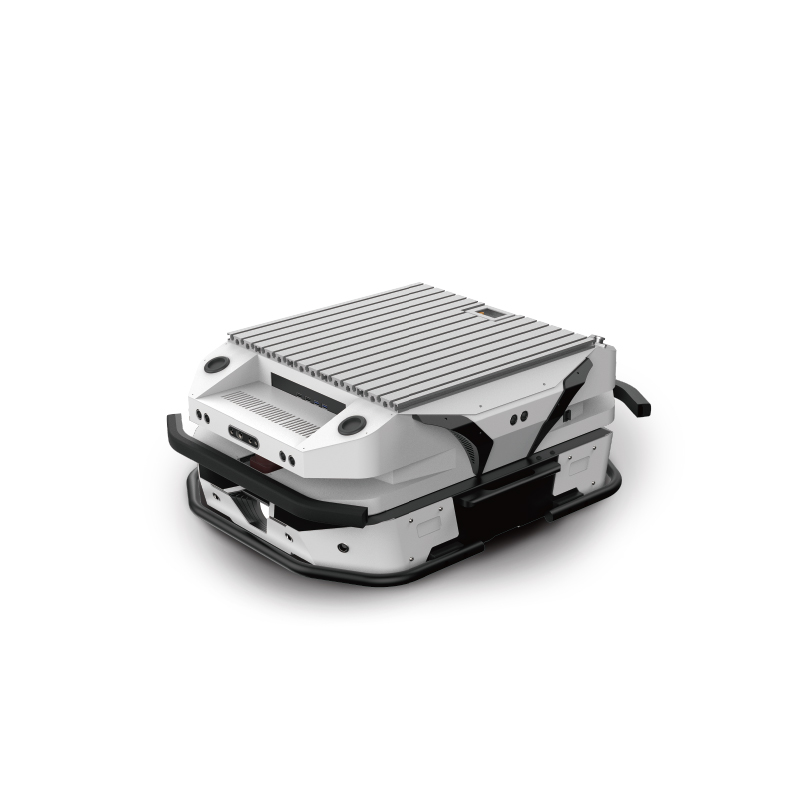 |
x1 |
| 2 | Battery Charger(AC 220V) |  |
x1 |
| 3 | FLYSKY FS-i6s Transmitter | 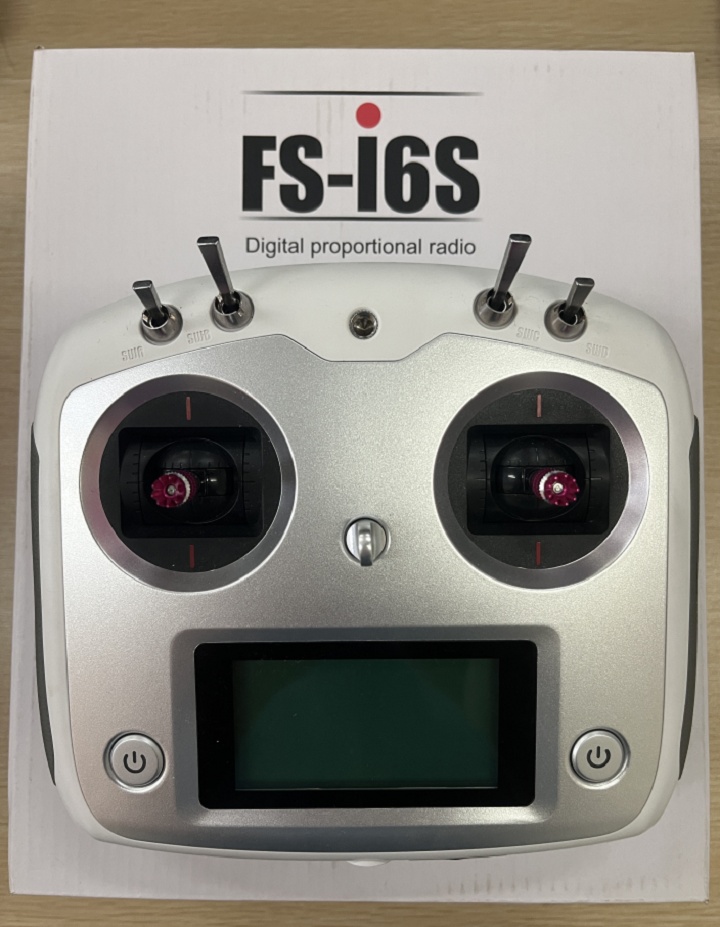 |
x1 |
| 4 | Wireless Keyboard and Mouse |  |
x1 |
| 5 | Tools kit |  |
x1 |
| 6 | User manual |  |
x1 |
| 7 | Product Warranty Certificate/After-Sale Service Manual |  |
x1 |
| 8 | Inspection Sheet |  |
x1 |
| 9 | Product certificate |  |
x1 |
3 Product Overview
3.1 The Basic
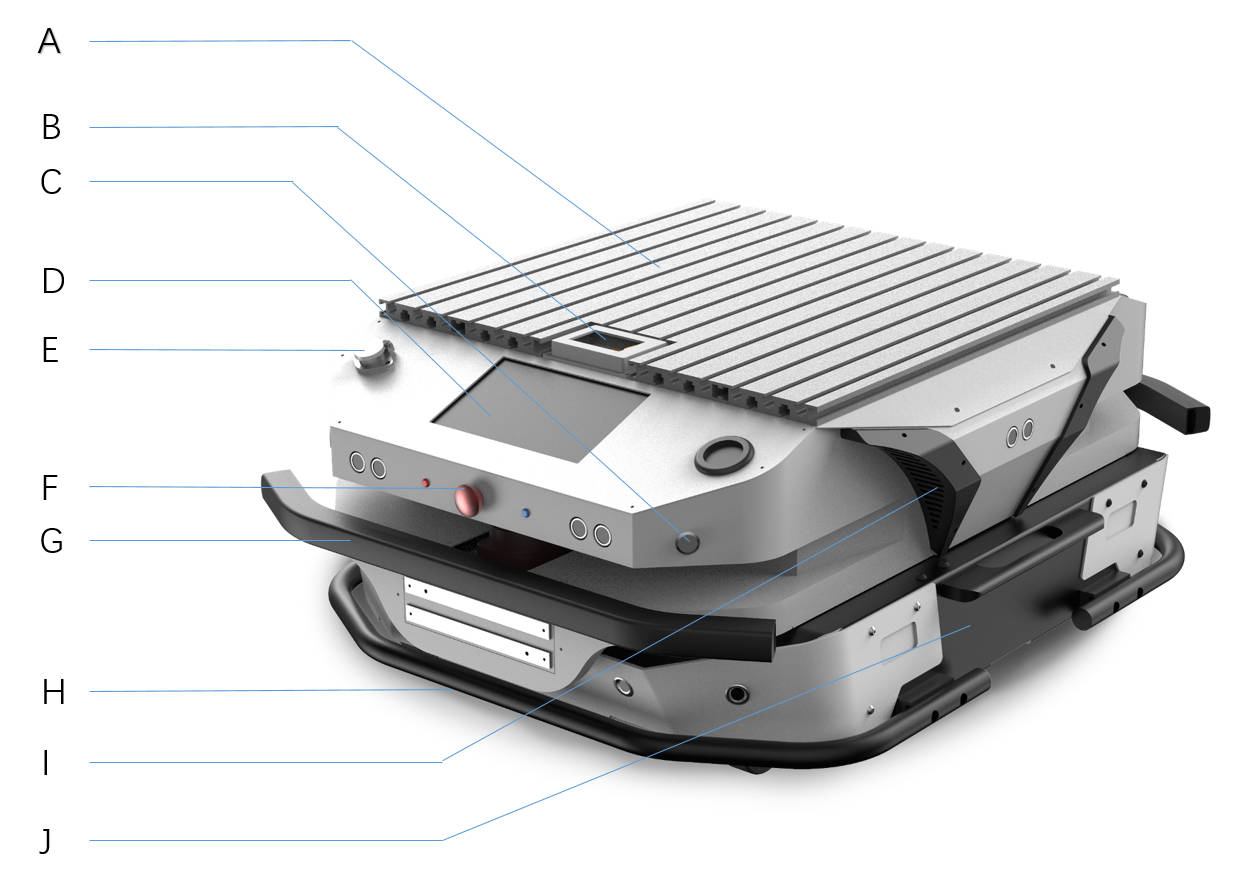
| No. | Description |
|---|---|
| A | Aluminum Expansion Board |
| B | Extended Interface |
| C | Reserved Function Button |
| D | 7-inch IPS display |
| E | Manual charging port |
| F | Emergency Stop Switch |
| G | Anti-collision sensor |
| H | Automatic charging port |
| I | Metal Bumper |
| J | Circulating cooling system |
| K | Swing arm independent suspension |
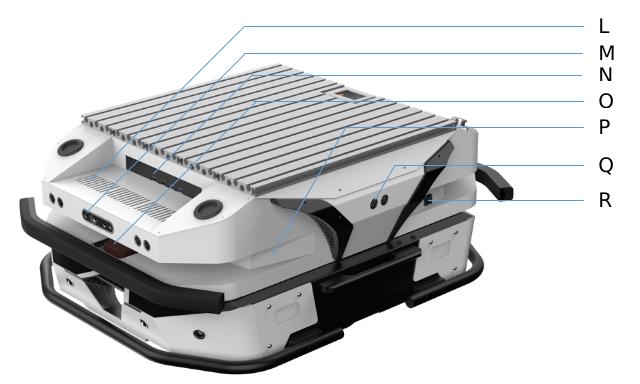
| No. | Description |
|---|---|
| L | Hi-Fi |
| M | RGBD Camera |
| N | IPC |
| O | Front and rear lidar |
| P | Built-in 4/5G networking module |
| Q | Multiple Ultrasounds |
| R | Main Power Switch |
3.2 Rear Electrical Interface

- Q1 is the DB9 serial port;
- Q2 is the emergency switch;
- Q3 is the charging interface;
- Q4 is the extension interface for CAN and 24V power supply;
- Q5 is the display of battery voltage;
- Q6 (Rotary Switch)is the key as the main electrical switch;
3.3 Status Indication
Users can identify the status of robot through the voltmeter, the buzzer and lights mounted on Turtle.
| Status | Description |
|---|---|
| Current Voltage | The current battery voltage can be read from the voltmeter on the rear electrical interface and with an accuracy of 1V |
| Low Voltage Alarm | When the battery voltage is lower than 24V or the battery power is lower than 15% , the robot will give a beep-beep-beep sound as warning. When the battery voltage is detected as lower than 22V, Turtle will actively cut off the power supply to external extensions and drive to prevent the battery from being damaged. In this case, the chassis will not enable movement control and accept external command control. |
| Robot powered on | Front and rear lights are switched on. |
3.4 Description of the Rear Electrical Interfaces
3.4.1 DB9 Serial Interface Description

| Pin No. | Pin Name |
|---|---|
| 2 | RS232-RX |
| 3 | RS232-TX |
| 5 | GND |
3.4.2 Rear Aviation Interface Description
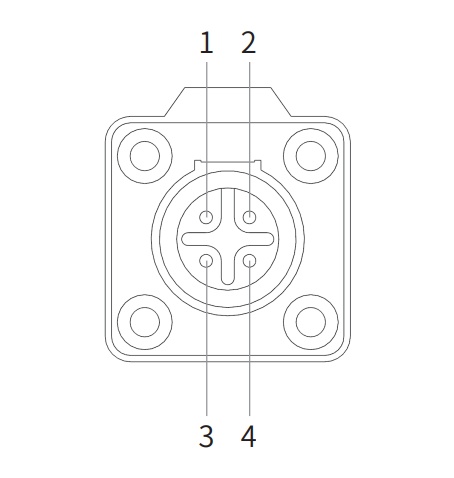
| Pin No. | Pin Type | Definition | Remarks |
|---|---|---|---|
| 1 | Power | VCC | Power Positive,Voltage range: 23-29.2V,Maximum current 5A |
| 2 | Power | GND | Power Negative |
| 3 | CAN | CAN_H | CAN Bus High |
| 4 | CAN | CAN_L | CAN Bus Low |
3.5 Instructions on Remote Control
FS RC transmitter is an optional accessory of Turtle for manually controlling the robot.With this transmitter, users can easily control Turtle universal robot chassis,The transmitter comes with a left-hand-throttle configuration. Its definitions and functions are shown in Figure below for reference.
The function of the button is defined as: SWA and SWD are temporarily disabled, and SWB is the control mode select button, dial to the top is command control mode, dial to the middle is remote control mode; SWC is light control button; S1 is throttle button, control Turtle forward and backward; S2 control is control the rotation, and POWER is the power button, press and hold at the same time to turn on
Note: The RC transmitter is preset the mapping of keys at factory. Do not arbitrarily change the keymapping, otherwise normal control will be unavailable.(We do not provide tutorials for changes)
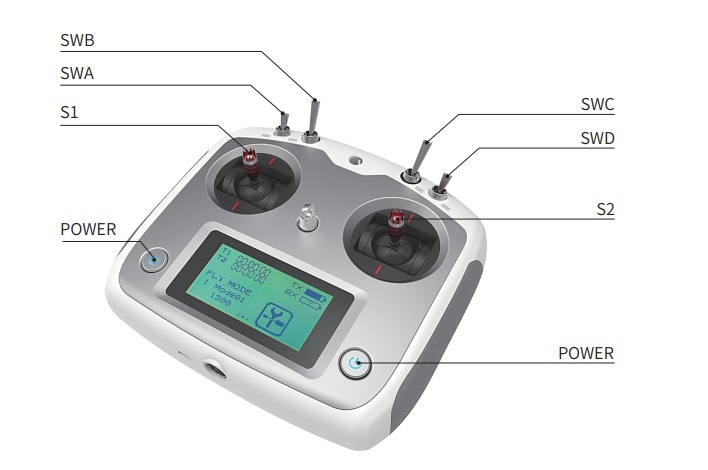
Getting Started:
- Move SWA,SWB,SWC and SWD to their high positions before transmitter power-up.
- Make sure the emergency stop switch has been released.When the emergency stop switch pops up, transmitter is in the controllable mode state. After pressing the E-switch,transmitter enters into the safe mode.
- POWER is the power button, press and hold both power buttons at the same time to turn on.
- Move SWB to the middle.
- The S1 controls forward and backward movement,the S2 controls the robot forleft rotation and right rotation.
3.6 Safety Information
3.6.1 Environmental Considerations
- For the first use,please read this manual carefully to understand the basic operating content and operating specification.
- Use Turtle always under -20℃~45℃ ambient temperature.
- If Turtle is not configured with separate custom IPprotection, its water and dust protection will be IP22 ONLY.
- Make sure each device has sufficient power.
- Make sure Turtle does not have any obvious defects.
- Check if the remote controller battery has sufficient power.
3.6.2 Check
- Please charge in time when the device is low battery alarm.
- When Turtle has a defect, please immediately stop using it to avoid secondary damage.
- When device has had a defect, please contact the relevant technical to deal with it, do not handle the defect by yourself.
3.6.3 Operation
- When using, make sure the emergency stop switch has been released.
- Ensure that the area around is relatively spacious.
- Carry out remote control within the range of visibility.
- The maximum load of Turtle is 80KG. When in use, ensure that the payload does not exceed 80KG.
- When installing an external extension on Turtle, confirm the position of the center of mass of the extension and make sure it is at the center of rotation.
3.6.4 Charging
- Turtle is equipped with a charger by default to meet customers' charging demand;
- We recommend that you turn the robot off before charging. And there is no indicator light provided on the site while charging. For specific indicator lights, please refer to the description on the charger.
- Make sure Turtle chassis is in power-off state;
- Make sure that Q6 (rotary switch) on the rear electrical panel is off before charging;
- When charging, make sure the ambient temperature is above 0℃;
- Insert the charger plug into the charging interface on the rear of the robot;
- Connect the charger to power supply and turn on the switch in the charger. Then, the robot enters the charging state;
- Note: The battery needs about 3 hours to be fully recharged from 22 V, and the voltage offully-recharged battery is about 29.2 V(The battery type here is ternary lithium battery, if the battery type is lithium iron phosphate, the maximum voltage will be 26.8V); the recharging duration is calculated as 30 AH ÷ 10A = 3h;
3.6.5 Maintenance
- According to the IP protection level of the device,please use Turtle in the environment with the protection level requires for the equipment.
- Do not push Turtle directly.
4 Performance parameters
| Parameter Types | Items | Values |
|---|---|---|
| Mechanical specifications | L × W × H | 685x570x155 |
| Wheelbase (mm) | 360 | |
| Weight of the robot(Kg) | 25~30Kg | |
| Battery type | Lithium battery 24V 15Ah | |
| Motor | DC brushless 2 X 150W | |
| Drive type | Independent (2-wheel) drive | |
| Suspension | Independent suspension with rocker arm | |
| Steering | (Two-wheel) differential steering | |
| Safety equipment | Servo brake/anti-collision tube | |
| Motion | No-load highest speed(m/s) | 2.3 |
| Minimum turning radius | Be able to turn on a pivot | |
| Maximum climbing capacity | 10° | |
| Minimum ground clearance(mm) | 30 | |
| Control parameter | Control mode | Remote control Control command mode |
| RC transmitter | 2.4G / Extreme distance 1Km | |
| Communication interface | CAN / RS232 |
5 The Main Components
5.1 Camera Specifications
| Items | Values |
|---|---|
| Baseline | 40mm |
| Operation Range | 0.3m—3m |
| Power Consumption | The average power consumption of the whole machine is <2W, the peak value of the laser turning on is <5W (duration 3ms), and the typical standby power consumption is <0.7W |
| Depth Map Resolution | 640x400@30FPS 320x200@30FPS |
| RGB Map Resolution | 1920x1080@30FPS 1280x720@30FPS 640x480@30FPS |
| Accuracy | TBD |
| Depth FOV | H 67.9° V 45.3° |
| RGB FOV | H 71° V43.7° @1920x1080 |
| Delay | 30-45ms |
| Data Transfer | USB 2.0 and above |
| Supported Operating System | Android / Linux / Windows7/10 |
| Power Supply | USB |
| Working Temperature 1 | 10℃ ~ 40℃ |
| Application Scenarios | Indoor |
| Dustproof/Waterproof | Basic Dust Protection |
| Rating | Class 1 Laser Product |
| Dimensions(mm) | 59.6x17.4x11.1mm |
5.2 Lidar
5.2.1 Performance parameters
| Item | Min | Typ | Max | Units | Remarks |
|---|---|---|---|---|---|
| Ranging frequency | / | 10000 | / | Hz | / |
| Scan Frequency | 5 | 7 | 12 | Hz | / |
| Ranging Range | 0.12 | / | 16 | m | 80% Reflectivity |
| Scan Angle | / | 0 - 360 | / | ° | / |
| Absolute Error | / | 2 | / | cm | Range≤1m |
| Relative Error | / | 2.0% | / | / | 1m<Range≤8m |
| Angular resolution | 0.18@5HZ | 0.25@7Hz | 0.43@12HZ | ° | / |
5.2.2 Definitions for Pins of Communication Interface

| Pin No. / Signal Name | Type | Description | Default | Range | Remarks/Comments |
|---|---|---|---|---|---|
| VCC | Power | Power supply for the positive voltage | 5V | 4.8V-5.2V | / |
| Tx | Output | Serial Port Output | / | / | Data stream:Lidar to Peripherals |
| Rx | Input | Serial Port Input | / | / | Data stream:Peripherals to Lidar |
| GND | Power | Power supply for the negative voltage | 0V | 0V | / |
| NC | Reserved | Reserved pins | / | / | / |
5.2.3 Optical Specification
| Item | Min | Typical | Max | Unit | Remarks/Comments |
|---|---|---|---|---|---|
| Laser wavelength | 775 | 792 | 800 | Nanometer(nm) | Infrared Light Band |
| Laser power | / | 3.5 | 6 | Milliwatt (mW) | Average optical output power |
| FDA | Class 1 |
5.2.4 Lens Maintenance
To ensure system ranging performance, please keep the laser and optical lens clean.
For dust on the lens surface,you can use a blower to blow off the dust on the lens or gently wipe it with lens cleaning paper. Never blow dust off lens surfaces with a strong breath.Your saliva or breath could increase condensation.
For the oil on the lens,you can use a lens cleaning fluid like alcohol and apply the fluid on to a cotton swab,then use the swab to clean the lens.
5.3 Ultrasonic Sensor
| Item | Parameter |
|---|---|
| Max Range | 8 meters for measuring the distance to the wall,2 meters for the human and about 4 meters for water/car |
| Beam angle | 5-10 degrees within 30cm, 60-70 degrees above 30cm |
| Communication Interface | TTL Serial |
| Output | USB |
5.4 Router
| Item | Parameter |
|---|---|
| Network support | 4G LTE |
| 4G LTE Speed | 150Mps |
| Number of LAN ports | 4x1000Base-T |
| Antenna connector | 2 x External antenna port |
| Maximum wireless transmission speed | 2.4G Mhz/5G Mhz |
| Dual-net dual-pass | Support (4G + broadband overlay internet) |
6 Expansion Board
On the robot, We also provide users with power extension interfaces for expanded pplications. The details are as follows:

| No. | Type | Voltage |
|---|---|---|
| A | MR30 | 5V / 12V |
| B | MR30 | 5V / 12V |
| C | XT30 | 5V |
| D | XT60 | 24V |
| E | MR30 | 5V / 12V |
| F | MR30 | 5V / 12V |
7 Q&A
Q:Turtle is started up correctly, but why cannot the RC transmitter control the robot body to move?
A:First, check whether the E-stop switches are released; then, check whether the controlmode selected with the top left mode selection switch on the RC transmitter is correct.
Q:Turtle gives "beep-beep-beep..." sound while running, how to deal with this problem?
A:If Turtle give this "beep-beep-beep" sound continuously, it means the battery is in the alarm voltage state. Please charge the battery in time.
Q:Why is the Turtle on but the screen remains black?
A: The shaking during transportation may cause the signal cable to become loose. We recommend that you try pluging the cable back in.