Thunder Mini User Manual
1 Product Introduction
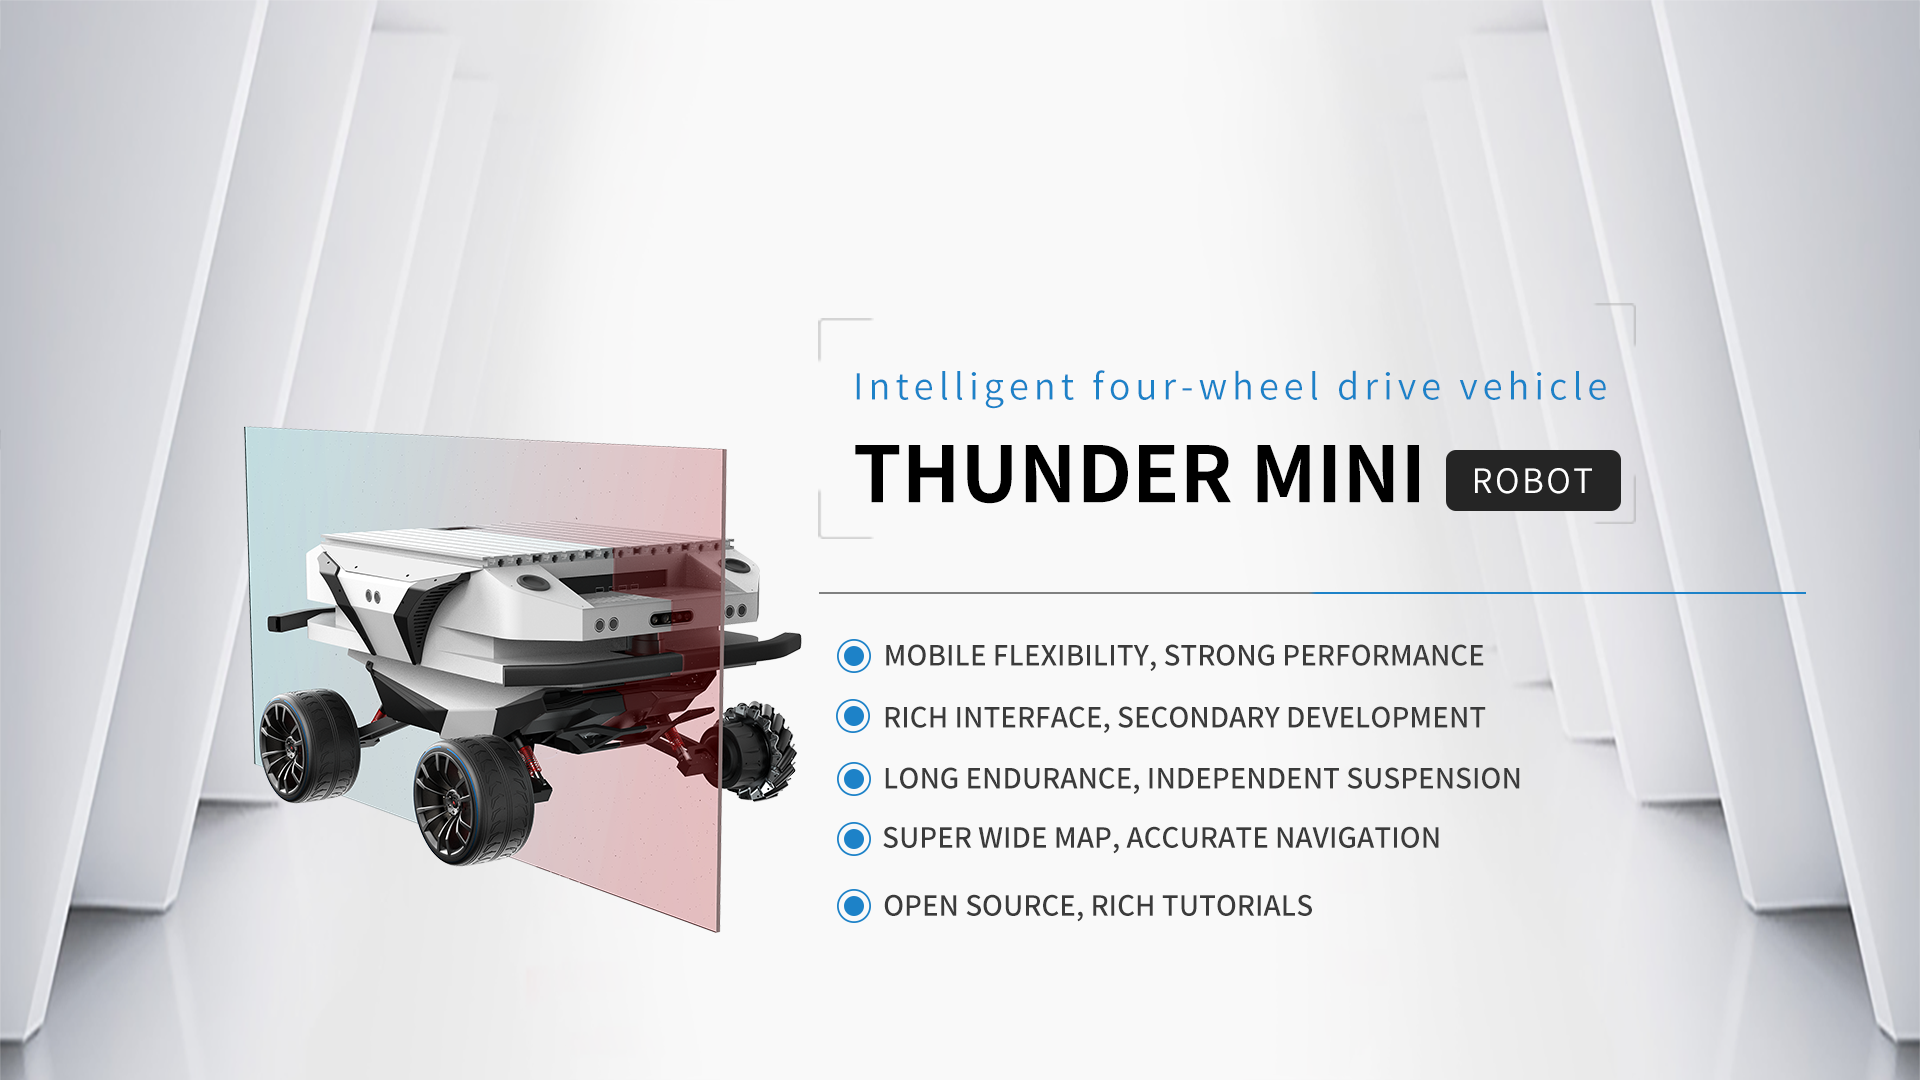
Thunder Mini is a four-wheel differential intelligent unmanned vehicle with a flat design that can drive independently indoors and outdoors. At the same time, it integrates peripherals such as odometer, laser radar, stereo camera, high-definition camera and voice input and output array, and has positioning and navigation. , object recognition, human body tracking, speech and semantic recognition and other functions, its low cost, high efficiency, fast deployment, is the king of cost performance in indoor transportation scenarios, at the same time has secondary development interface, rich curriculum system, is the teaching and learning in the field of intelligent robots , innovative applications, scientific research and an ideal platform for participating in competitive competitions.
The Thunder Mini robot can be matched with different kits to achieve diversified functions and applications. It is equipped with a collaborative mechanical kidney-used for object grasping, greenhouse picking, and research related to mechanical kidney motion planning. It is equipped with inspection kits-used in warehouses, parks and other indoor areas. Security patrol. Thunder Mini robot is suitable for indoor transportation logistics, greenhouse picking and other scenarios, supports rapid secondary development, has autonomous navigation, intelligent obstacle avoidance, precise positioning functions, and provides diversified application solutions.
2 Shipping List
The Thunder Mini high-end version shipping list is as follows, the following list is for reference only
| Number | Name | Picture | Quantity |
|---|---|---|---|
| 1 | Thunder Mini robot body | 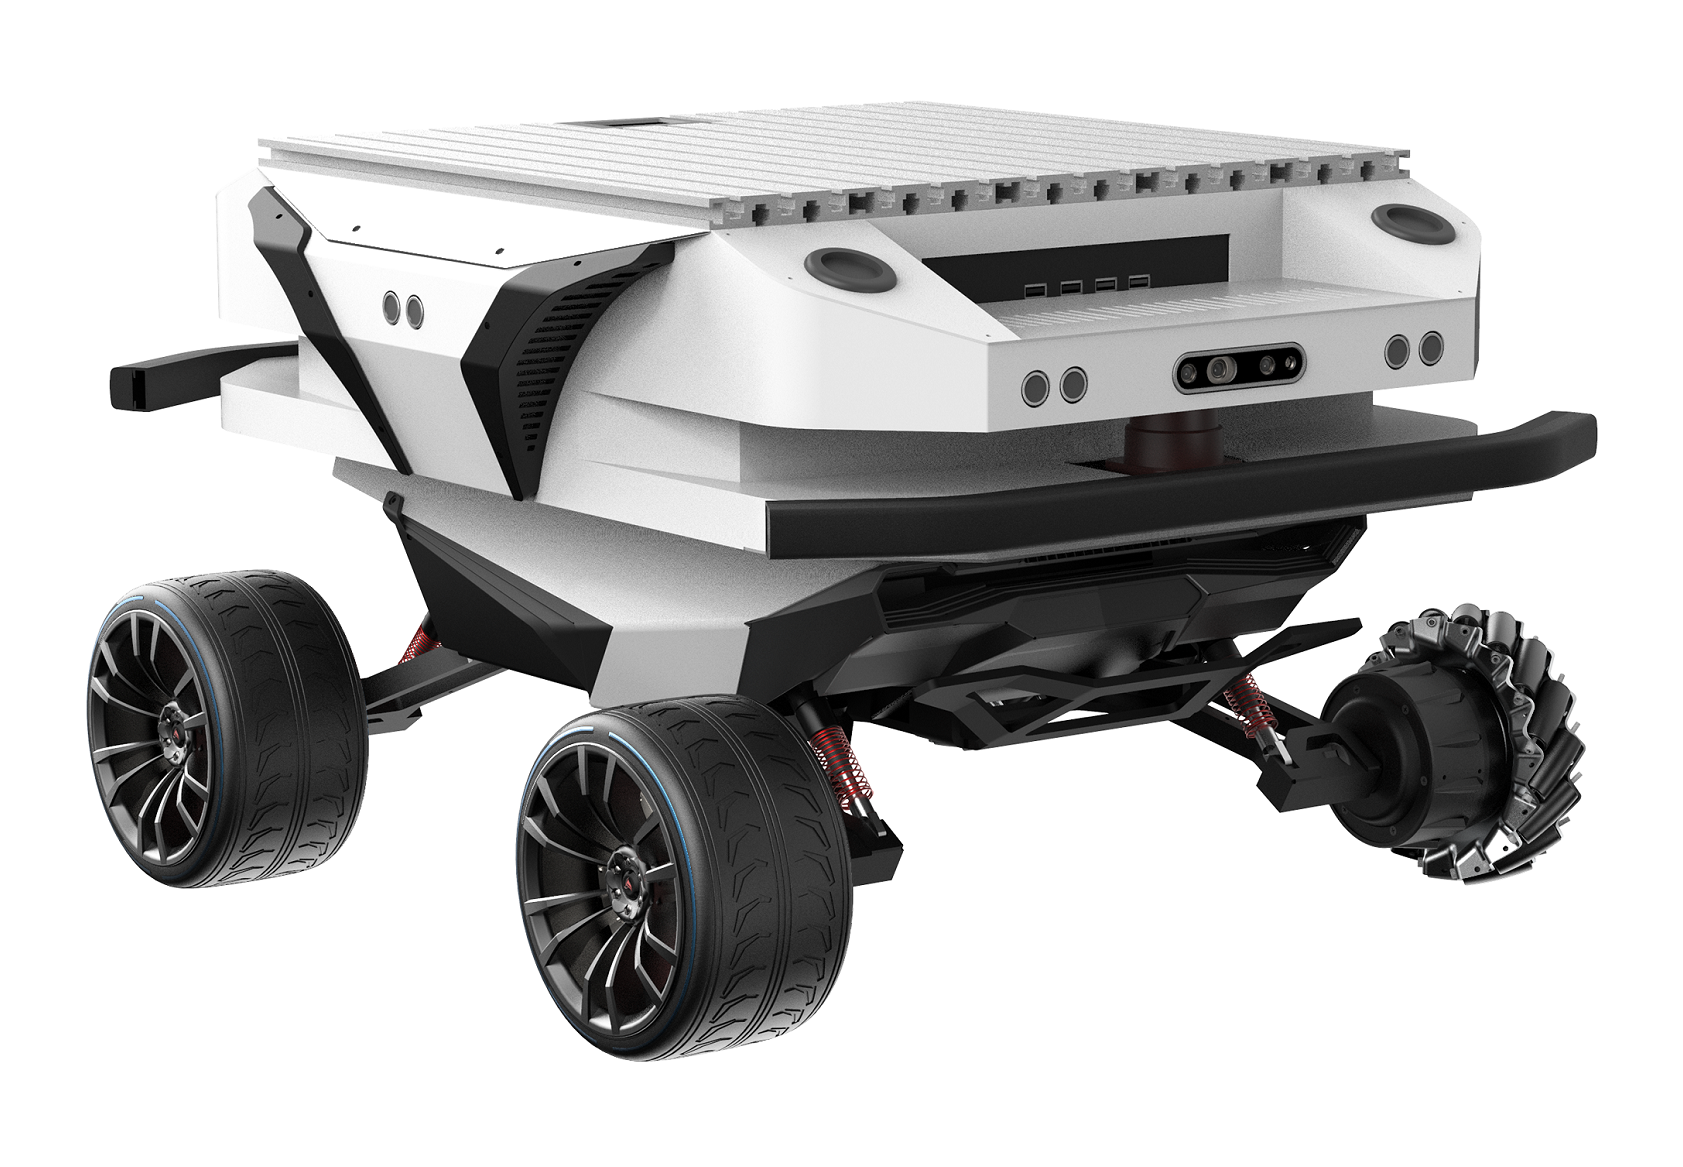 |
x1 |
| 2 | Battery charger (AC 220V) |  |
x1 |
| 3 | Fuss remote control | 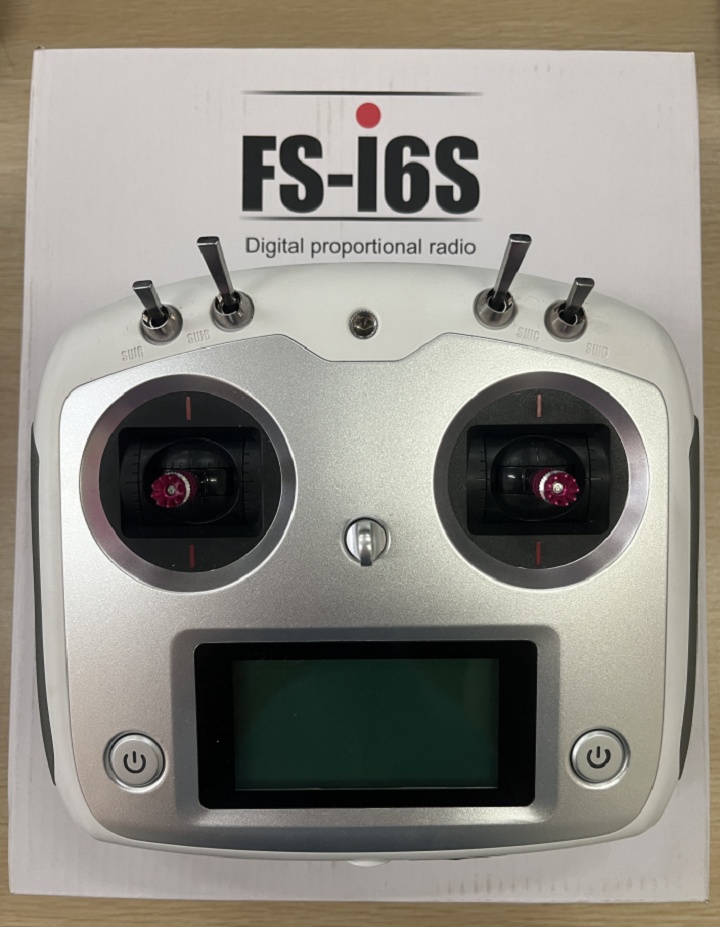 |
x1 |
| 4 | Mouse and keyboard |  |
x1 |
| 5 | Tool Set |  |
x1 |
| 6 | Experiment Manual |  |
x1 |
| 7 | Equipment Warranty Card / Service Manual |  |
x1 |
| 8 | Equipment factory test list |  |
x1 |
| 9 | Equipment Certificate |  |
x1 |
3 Product Introduction
3.1 Vehicle introduction
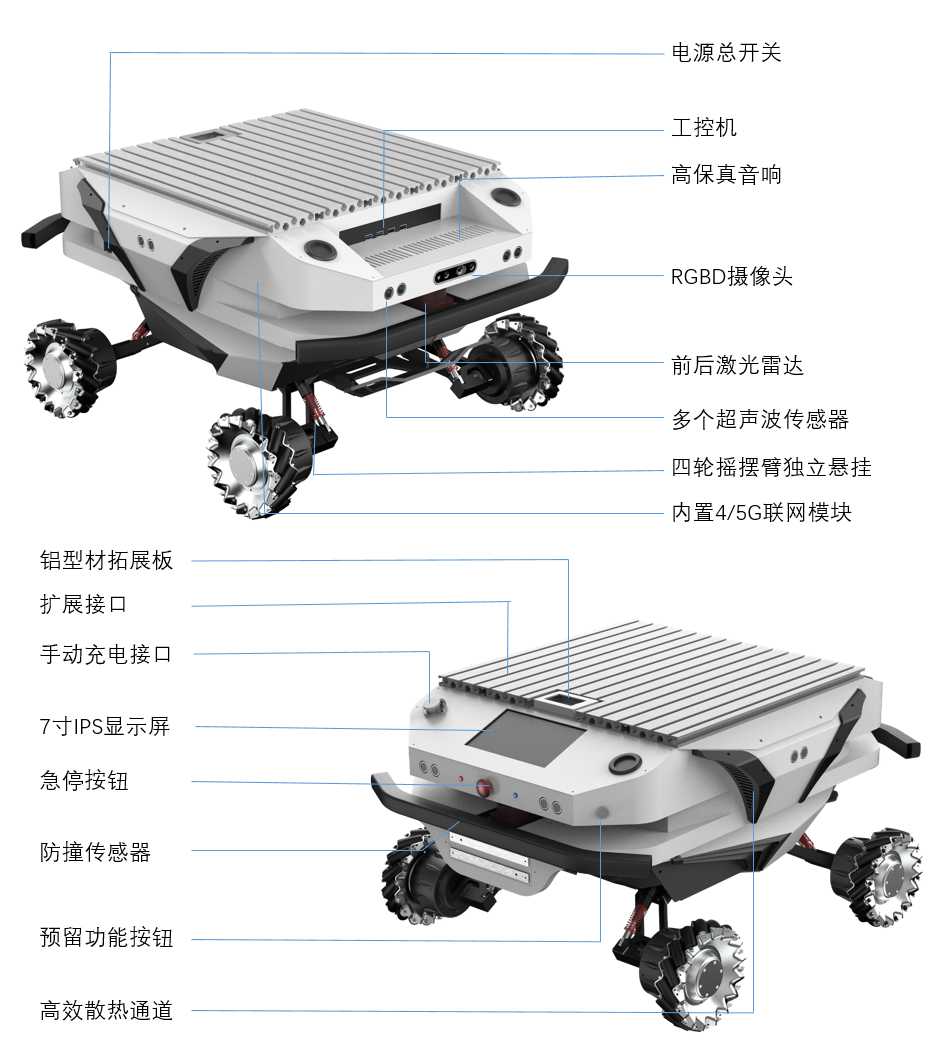
(The picture above is the introduction of Octopus Mini, the only difference between Thunder Mini and Thunder Mini is that Thunder Mini uses road wheels, and Octopus Mini uses Mecanum wheels)
3.2 Status indication
Users can determine the status of the car body through the voltmeter, buzzer and lights installed on the Thunder Mini.
| Status | Description |
|---|---|
| Current Voltage | The current battery voltage can be viewed through the voltmeter on the rear electrical panel, accurate to 1V |
| Low voltage alarm | When the battery power is lower than 15% or the voltage is lower than 24V, the car will emit a harsh sound of "di-di-di" to prompt. When it detects that the battery power is lower than 10% or the voltage is lower than 23V, in order to prevent battery damage, Thunder Mini will actively cut off the external expansion power supply and driver power supply. At this time, the chassis will not be able to perform motion control and accept external command control |
| Power-on display | Front and rear lights are on |
3.3 Remote Control Tutorial
The Fosse remote controller is an accessory of the Thunder Mini product. The Thunder Mini robot can be easily controlled by using the remote controller. In this product, we use the design of the left-hand accelerator. Its definition and function can refer to the figure below.
The functions of the buttons are defined as: SWA and SWD are temporarily not enabled, among which SWB is the control mode selection button, dialed to the top is the command control mode, dialed to the middle is the remote control mode; SWC is the light control button; S1 is the throttle button , to control the Thunder Mini to move forward and backward; S2 controls the rotation, and POWER is the power button, press and hold at the same time to turn on the machine
Note: The mapping of the remote control has been set before leaving the factory, please do not change it at will. (no change tutorial provided)

Tutorial:
- The four paddles of SWA, SWB, SWC, and SWD need to be turned to the front before the remote control is turned on
- Make sure that the emergency stop switch of the chassis is turned on, the emergency stop switch is in controllable mode when it pops up, press it to enter the safe mode
- Press and hold both POWER keys at the same time to power on
- Put the SWB paddle to the middle position
- S1 bit controls the forward and backward of the car, S2 controls the steering of the car
3.4 Precautions
3.4.1 Environment
- For the first use, please read this manual carefully to understand the basic operation content and operation specifications.
- Use in ambient temperature of -20℃~45℃.
- If the IP protection level of the vehicle is not individually customized, the vehicle's waterproof and dustproof capabilities are IP22.
- Make sure that the power of each device is sufficient.
- Make sure the vehicle has no obvious abnormalities.
- Check that the remote control has sufficient battery power.
3.4.2 Inspection
- Please charge in time when the device is low-battery alarm.
- When the equipment is abnormal, please stop using it immediately to avoid secondary injury.
- When the device has abnormality, please contact the relevant technical personnel, please do not handle it without authorization.
3.4.3 Operation
- Make sure the emergency stop switch has been released when using.
- Ensure that the surrounding area is relatively open when controlling.
- Remote control within sight distance.
- The maximum load of Thunder Mini is 80KG, when in use, ensure that the payload does not exceed 80KG.
- When installing external extensions on Thunder Mini, confirm the position of the center of mass of the extensions to ensure that they are at the center of rotation.
3.4.4 Charging
- Thunder Mini products are equipped with a charger by default, which can meet the charging needs of customers;
- The default is to turn off the power to charge. When charging normally, there is no indicator light on the chassis. Please refer to the instructions on the charger for specific indicator lights;
- Make sure the Thunder Mini chassis is powered off;
- Before charging, please confirm that Q6 (knob switch) in the rear electrical console is off;
- When charging, ensure that the ambient temperature is greater than 0°C;
- Insert the plug of the charger into the charging port at the rear of the car;
- Connect the charger to the power supply and turn on the charger switch to enter the charging state;
- Note: It takes about 3 hours for the current battery to be fully charged from 22V, and the fully charged voltage of the battery is about 29.2V (the battery voltage here is a ternary lithium battery type, if the battery type is lithium iron phosphate, the highest voltage is 26.8V); The charging time calculation is 30AH÷10A=3H.
3.4.5 Maintenance
- Please use it in an environment that meets the requirements of the protection level according to the IP protection level of the equipment;
- Do not push the cart directly;
4 function parameters
| parameter type | item | indicator |
|---|---|---|
| Mechanical Parameters | Length x Width x Height (mm) | 730 x 570 x 406 |
| Body Weight (Kg) | 55Kg | |
| Battery type | Lithium battery 24V 30Ah | |
| Drive form | Independent drive | |
| Suspension | Independent Suspension | |
| Steering | Differential Steering | |
| Safety Equipment | Servo Brake/Collision Tube | |
| Performance Parameters | No-load maximum speed (m/s) | 2.0 |
| Minimum turning radius | Can turn in place | |
| Maximum gradeability | >25.9° | |
| Minimum ground clearance (mm) | 70 | |
| Control parameters | Control mode | Remote control command mode |
| Remote control | 2.4G / limit distance 1Km | |
| Communication interface | USB |
5 Main components
5.1 Camera parameters
| item | parameter |
|---|---|
| Baseline | 40mm |
| Depth Range | 0.3m—3m |
| Power Consumption | The average power consumption of the whole machine is <2W, the peak value at the moment when the laser is turned on is <5W (3ms duration), and the typical value of standby power consumption is <0.7W |
| Depth Map Resolution | 640x400@30FPS 320x200@30FPS |
| Color image resolution | 1920x1080@30FPS 1280x720@30FPS 640x480@30FPS |
| Accuracy | TBD |
| Depth FOV | H 67.9° V 45.3° |
| Color FOV | H 71° V43.7° @1920x1080 |
| Delay | 30-45ms |
| Data transmission | USB2.0 or above |
| Support OS | Android / Linux / Windows7/10 |
| Power supply method | USB |
| Working Temperature | 10℃ ~ 40℃ |
| Applicable scene | Indoor |
| Dustproof and waterproof | Basic dustproof |
| Safety | Class1 Laser |
| Dimensions (mm) | 59.6x17.4x11.1mm |
5.2 Radar
5.2.1 Performance parameters
| Item | Minimum | Typical | Maximum | Unit | Remarks |
|---|---|---|---|---|---|
| Ranging frequency | / | 10000 | / | Hz | / |
| Scan Frequency | 5 | 7 | 12 | Hz | / |
| Ranging range | 0.12 | / | 16 | m | 80% reflectivity |
| Scan Angle | / | 0 - 360 | / | ° | / |
| Absolute Error | / | 2 | / | cm | Range≤1m |
| Relative error | / | 2.0% | / | / | 1m<ranging≤8m |
| Angle Resolution | 0.18@5HZ | 0.25@7Hz | 0.43@12HZ | ° | / |
5.2.2 Communication interface definition

| Pin | Type | Description | Default | Range | Remarks |
|---|---|---|---|---|---|
| VCC | Power supply | Power supply voltage positive | 5V | 4.8V-5.2V | / |
| Tx | Output | System serial port output | / | / | Data flow: radar flow to peripherals |
| Rx | Input | System serial port input | / | / | Data flow: Peripheral flow to radar |
| GND | Power supply | Negative pole of power supply voltage | 0V | 0V | / |
| NC | Reserved | Reserved pins | / | / | / |
5.2.3 Optical parameters
| Item | Minimum | Typical | Maximum | Unit | Remarks |
|---|---|---|---|---|---|
| Laser wavelength | 775 | 792 | 800 | nm | Infrared band |
| Laser power | / | 3.5 | 6 | mw | Average output power |
| FDA | Class 1 |
5.2.4 Lens maintenance
Cleaning and maintenance of the lens surface. For the dust on the lens surface, you can use a blower to blow off the floating dust on the lens or gently wipe it with lens paper. Be careful not to blow it directly with your mouth to prevent saliva particles from adhering to the lens surface; for lens surfaces with oil stains , wipe with a cotton swab dipped in alcohol.
5.3 Ultrasound
| item | parameter |
|---|---|
| Maximum range | Measuring wall 8 meters, measuring people 2 meters, measuring water surface/vehicle about 4 meters |
| Wave velocity angle | 5-10 degrees within 30cm, 60-70 degrees above 30cm |
| Communication interface | TTL serial port |
| Output method | USB output |
5.4 Router
| item | parameter |
|---|---|
| Support Network | 4G Full Netcom |
| 4G rate | 150Mps |
| Ethernet port | Four Gigabit Ethernet ports |
| Antenna interface | 2 external antenna holes |
| Wireless rate | 2.4G Mhz/5G Mhz |
| Dual network and dual communication | Support (4G+ broadband superimposed Internet access) |
6 Expansion Board
On the unmanned vehicle, we have left a power expansion port for the user's secondary development. The details are as follows:

| Serial No. | Model | Voltage |
|---|---|---|
| A | MR30 | 5V / 12V |
| B | MR30 | 5V / 12V |
| C | XT30 | 5V |
| D | XT60 | 24V |
| E | MR30 | 5V / 12V |
| F | MR30 | 5V / 12V |
Remark:
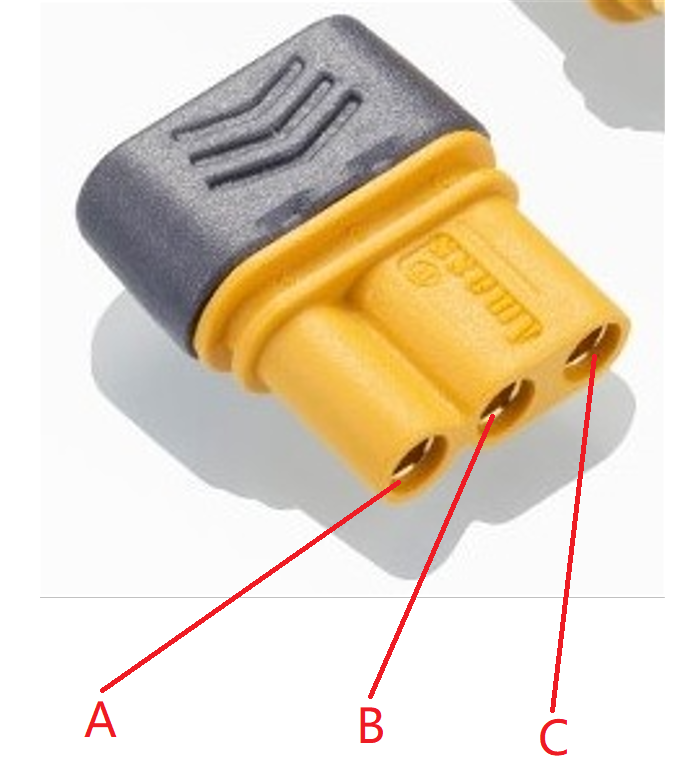
As shown in the figure, the MR30 interface has three ports Among them, A is GND, the output voltage between A and B is 12V, and the output voltage between A and C is 5V.
Thunder Mini用户手册

---…Q:Thunder Mini上电后主机开机了屏幕不亮?
A:在运输过程中的晃动可能会导致信号线松动,可以尝试把HDMI线重新插拔。
7 Common problems and solutions
Q: The Thunder Mini starts normally, and the car body does not move when using the remote control?
A: First confirm whether the emergency stop switch is released, and then confirm whether the control mode selected by the mode selection switch on the upper left side of the remote control is correct.
Q: The Thunder Mini makes a "beep-beep-beep..." sound during operation, how to deal with it?
A: If the Thunder Mini emits continuous "drip-dip-dip...", it indicates that the battery is already in an alarm voltage state, please charge it in time.
Q: After the Thunder Mini is powered on, the host computer turns on and the screen does not light up?
A: Shaking during transportation may cause the signal cable to become loose. You can try to re-plug the HDMI cable.